
DANGER ELECTRICAL SHOCK
Pinball machines have high voltages which can cause DANGER TO LIFE AND LIMB. TURN POWER OFF and UNPLUG PINBALL MACHINE prior to installation. Pinball machines are high voltage and can cause electrical shock.
SAFETY GLASSES are also recommended while working with or installing pinball parts.
Please follow these safety instructions as well as all installation instructions. Failure to follow these instructions may result in damage to the pinball machine, accessory or other parts. Please see our Disclaimer for associated risks and responsibilities (Section 13 in our Terms of Service) prior to installation.
Images included in these instructions are of an installed prototype and may vary from your product slightly.
If you have questions or concerns regarding the proper installation of this part, please contact us for assistance.
- Turn off power, remove back glass. Take note of the approximate location of the light saber artwork on the back glass (the LEDs will be installed directly behind this artwork.
- Attach LED channel to the narrow sides on the left and right inside the backbox (position according to the lightsaber artwork mentioned in step 1). The channel with the red dot should be attached on the left side, the one with the blue dot attached on the right side. The wire should be running down toward the pinball cabinet.
- Attach the two-way splitter to each end of the LED channels.
- Attach the LED controller to the splitter.
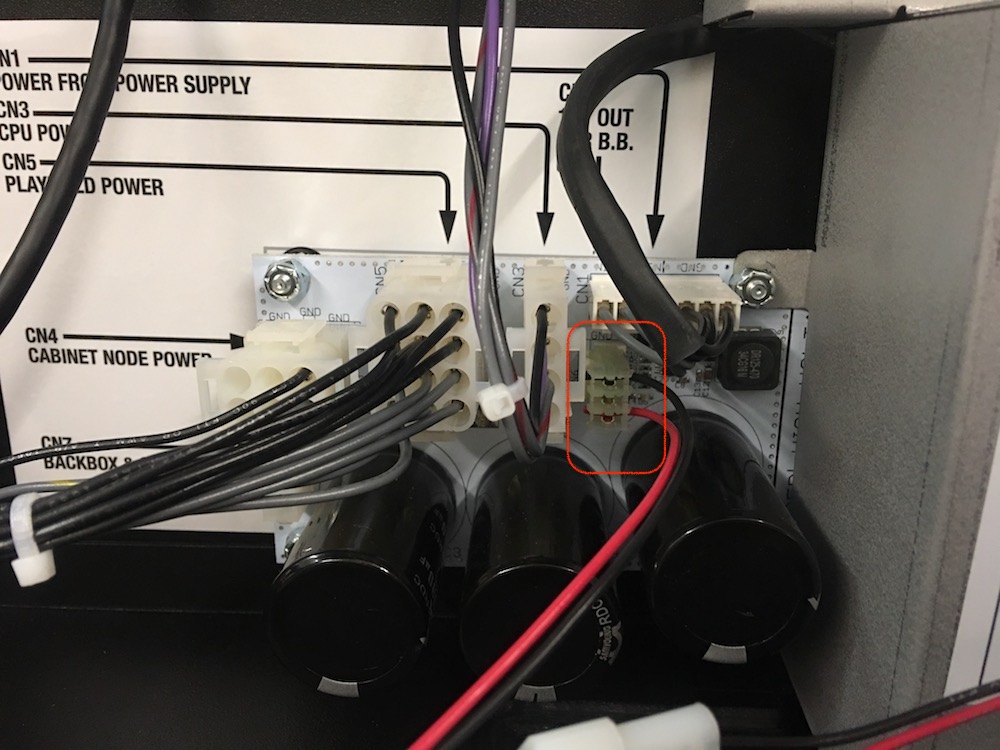
- Attach the power adapter to the end of the LED controller and attach the 3 pin connector to the node board in the bottom right corner of the backbox. It is labeled CN2.

- You can also install this product to other power adapters that have the three pin molex connector if your CN2 power is already in use. Please see our Spike 12v/5v Power adapter for an example of this option.
- Adjust the LED mode (flashing, fading, etc.) using the LED controller.
- Installation is complete!

Comments
0 comments
Please sign in to leave a comment.