


DANGER ELECTRICAL SHOCK
Pinball machines have high voltages which can cause DANGER TO LIFE AND LIMB. TURN POWER OFF and UNPLUG PINBALL MACHINE prior to installation. Pinball machines are high voltage and can cause electrical shock.
SAFETY GLASSES are also recommended while working with or installing pinball parts.
Please follow these safety instructions as well as all installation instructions. Failure to follow these instructions may result in damage to the pinball machine, accessory or other parts. Please see our Disclaimer for associated risks and responsibilities (Section 13 in our Terms of Service) prior to installation.
Images included in these instructions are of an installed prototype and may vary from your product slightly.
If you have questions or concerns regarding the proper installation of this part, please contact us for assistance.
When removing screws from the playfield, reinstall by first turning them counter-clockwise to match the original groove in order to respect the integrity of the playfield wood.
NOTE: This product requires the replacement of one of your stock 12v flasher bulbs with a 8SMD modified flasher bulb. This change is not visible above the playfield. If you prefer not to utilize the replacement bulb, a set of alligator clips can be utilized instead. Please note that alligator clips are not intended for permanent connections and can come loose potentially causing shorts.
Installation Steps:
- Turn off game, remove the glass.
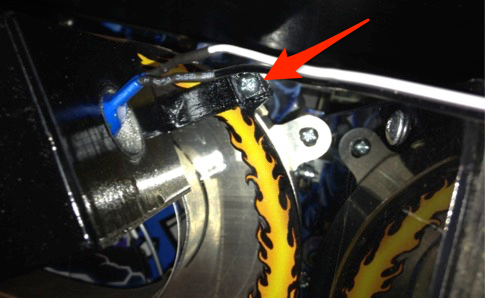
- Remove the screws and washers on the corner of the right and left ramps. Set the washers aside as they are not utilized for installation.
- Attach the speaker with the short bracket on the right ramp side using the existing screw.
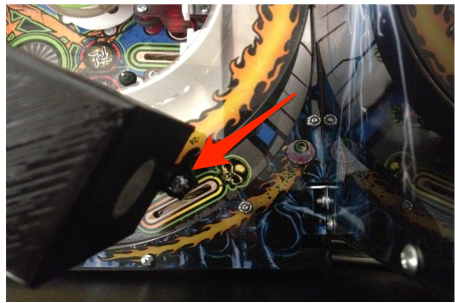
- Attach the speaker with the long bracket on the left ramp side using existing screw.
- Feed speaker wire over the top of the back panel. Conceal it by running it directly behind the speaker.
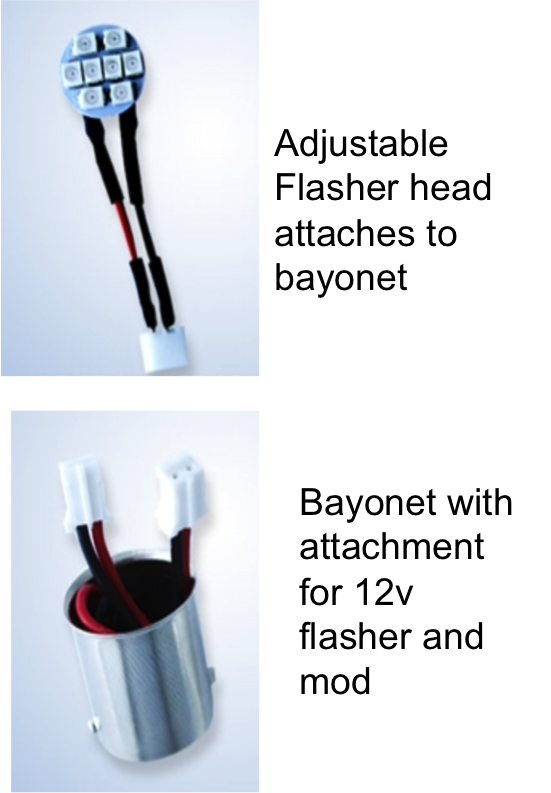
- Attach the flasher head to the bayonet provided with the mod. The flasher head will need to be adjusted to match the direction of the other flasher LEDs. Attach the splitter to the second connector on the bayonet. Attach the wiring from each of the speakers to the splitter connectors on the bayonet.
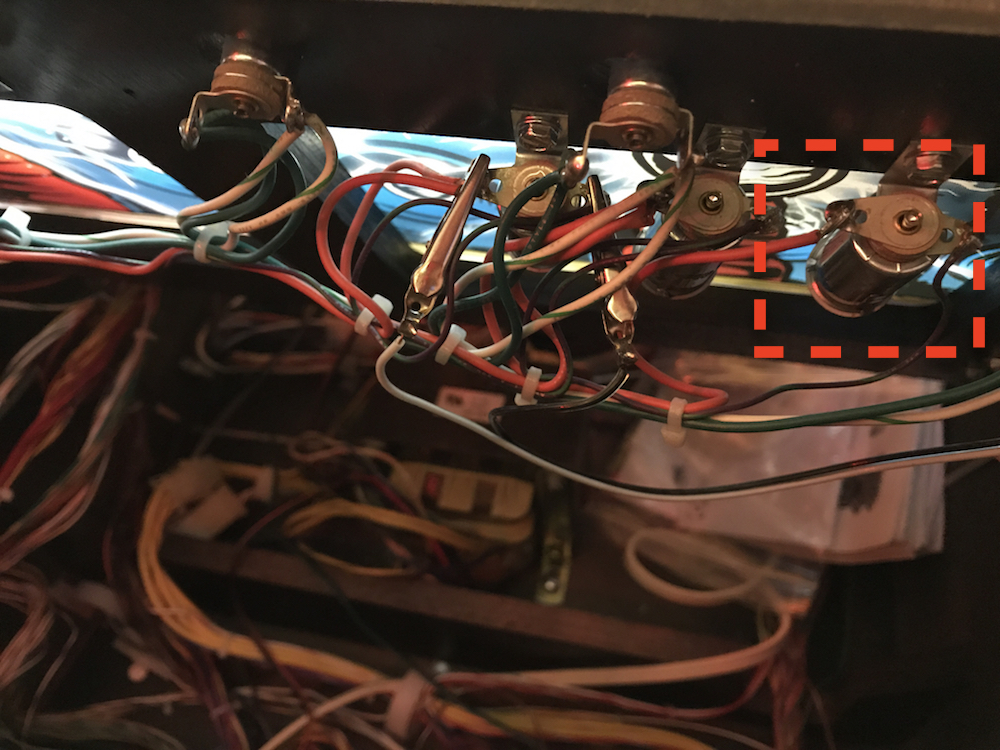
- Locate the two sets of three back panel flashers behind the backboard panel. Select one of the three flashers to replace. Remove the bayonet by pushing in and turning to release. Replace the bayonet with the one provided with the speakers (now attached to the speaker wiring). Note: this photo shows the far right flasher highlighted as one of the flashers that can be utilized.
- Test product functionality using your games Flasher Test from the Diagnostic Menu (consult your games manual for details on accessing the Diagnostics Menu). Cycle through the flashers until you find the appropriate flashers.
- Installation is now complete!
For alligator clip installation, substitute this step for steps 6-7.
Attach clips to the flashers shown below.
Locate the two sets of three back panel flashers behind the panel. Attach the alligator clips to the two outside flashers on each side, leaving one in the middle. This ensures alligator clips do not touch one another. 
Copyright Mezel Mods- 2016. All rights reserved. Because stealing is wrong and mean.
Comments
1 comment
Question on the Mystery hole and Snake mouth LEDs= do they work for the Pro?
The answer is yes/no. The Mystery hole does work on the Pro however the Snake mouth LED does not. One of our staff purchased a Pro version of the snake mouth from this Pinside user. http://pinside.com/pinball/forum/topic/fs-metallica-snake-scoop-led-mod
Please sign in to leave a comment.