

DANGER ELECTRICAL SHOCK
Pinball machines have high voltages which can cause DANGER TO LIFE AND LIMB. TURN POWER OFF and UNPLUG PINBALL MACHINE prior to installation. Pinball machines are high voltage and can cause electrical shock.
SAFETY GLASSES are also recommended while working with or installing pinball parts.
Please follow these safety instructions as well as all installation instructions. Failure to follow these instructions may result in damage to the pinball machine, accessory or other parts. Please see our Disclaimer for associated risks and responsibilities (Section 13 in our Terms of Service) prior to installation.
Images included in these instructions are of an installed prototype and may vary from your product slightly.
If you have questions or concerns regarding the proper installation of this part, please contact us for assistance.
When removing screws from the playfield, reinstall by first turning them counter-clockwise to match the original groove in order to respect the integrity of the playfield wood.
NOTE: This product requires the replacement of one of your stock 12v flasher bulbs with an 8SMD flasher alternative. This is not visible from above the playfield. If you prefer not to utilize the replacement bulb, a set of alligator clips can be utilized instead. Please note that alligator clips are not intended for permanent connections and can come loose potentially causing shorts.
Installation Steps:
- Turn off game, remove glass and pinballs.
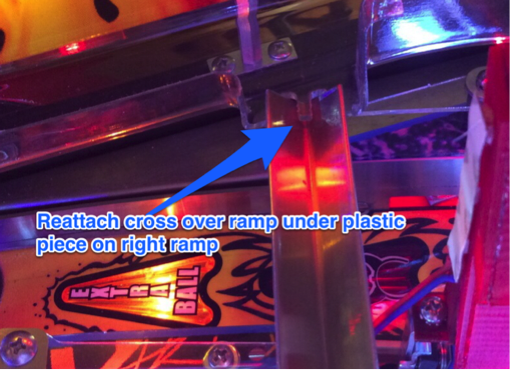
- Pull left ramp away from cross over ramp allowing you to lift cross over ramp above holder piece.

- Remove wires from outside of detonator box. These will not be used in final installation.
- Unscrew detonator box (2 screws on front). Detonator box comes apart like a puzzle. Front piece and right side for one piece, the back and left a second piece.
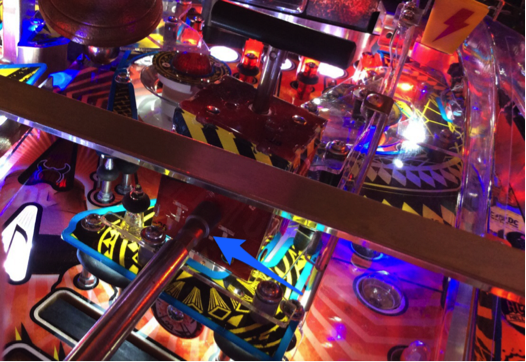
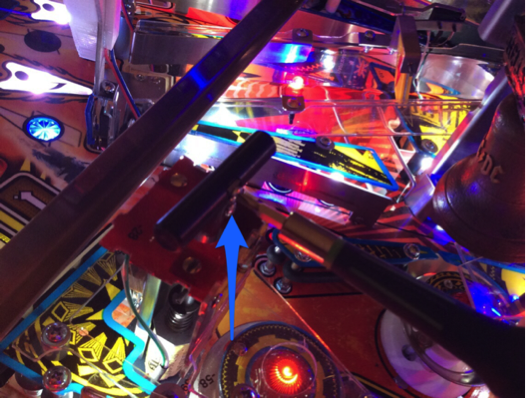
- Take top screw off detonator handle then lift second part of box.
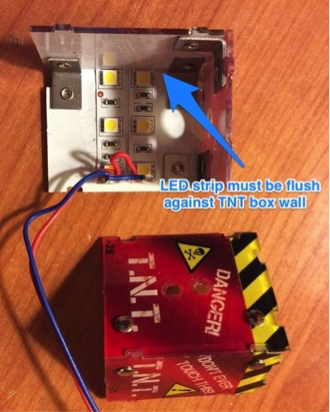
- Stick led strips on back piece of detonator box as shown in photo below.
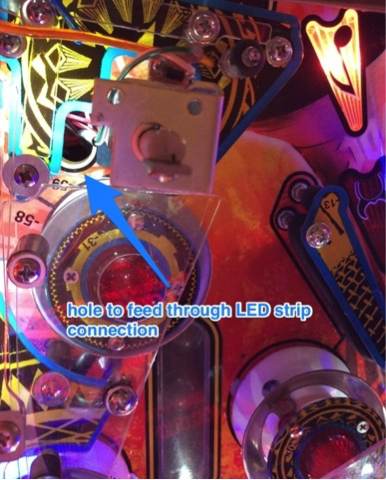
- Feed wires through hole in the playfield under the detonator box.
- Reinstall back of detonator box. Replace detonator handle and reattach second part of box. When replacing front box screws be sure to realign the switch to the holes in the TNT box.
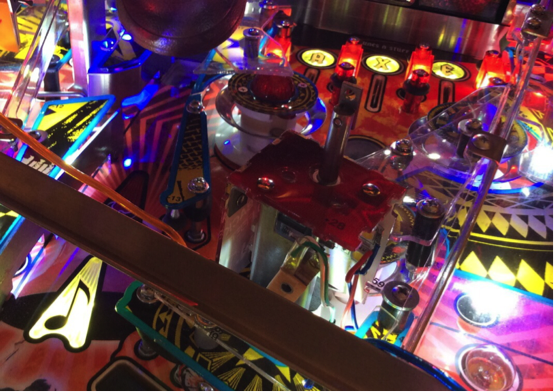
- Lift the playfield to begin EL Wire installation. Straighten the two EL wires, making them as straight as possible. This will enable you to more easily feed the wire through the small holes in the detonator.
-
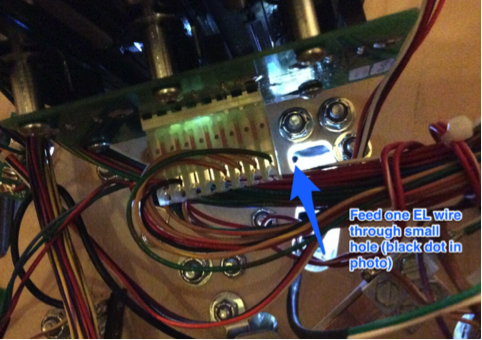
Lift playfield and find the area under detonator box. Feed one EL wire through the small hole shown in the photo below.
-
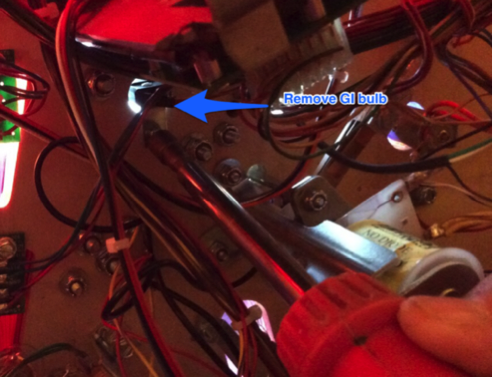
In order to install second EL wire, you must remove the GI light shown in the photo below. This will give you access to the second hole into the detonator box.
-
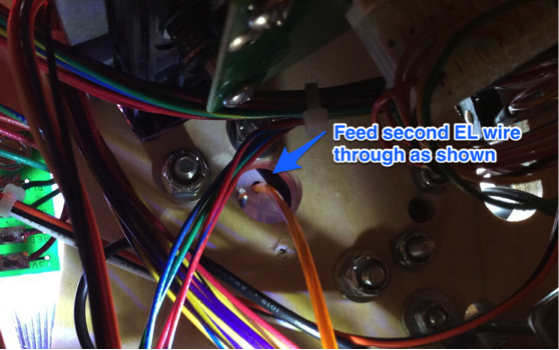
Find second small hole into detonator box inside GI hole. Slide second wire through the hole. Reattach GI light.
-
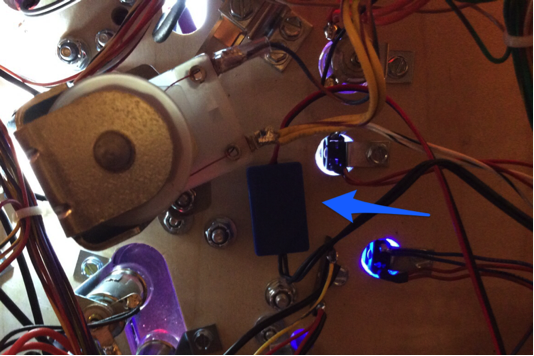
Attach inverter to the underside of playfield using double-sided tape (comes attached to the inverter).
-
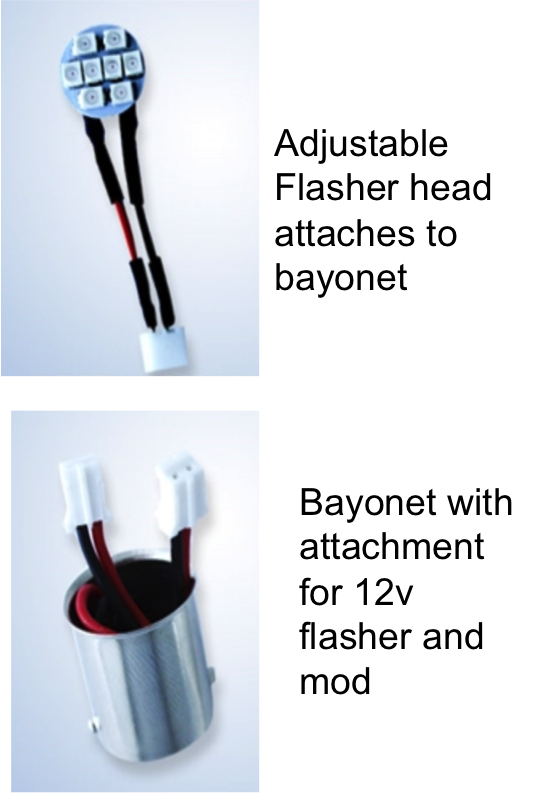
Attach the flasher head to the bayonet provided with the mod. The flasher head will need to be adjusted to fit under the playfield insert. Attach the splitter to the second connector on the bayonet. Attach the wiring from the EL Wire and the Detonator Box to the splitter connectors on the bayonet.
-
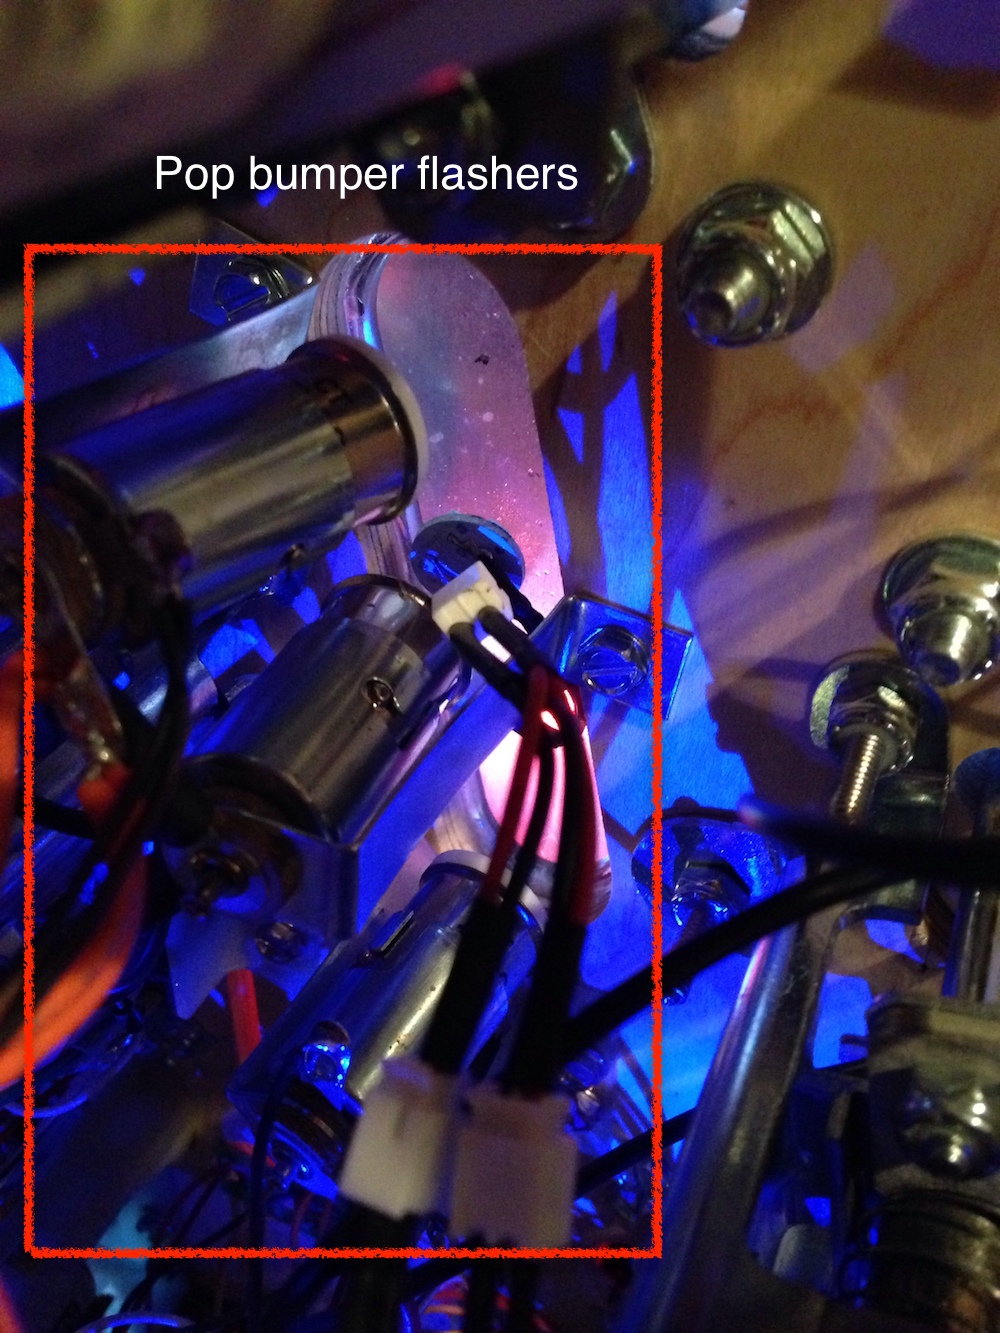
Locate the flasher insert near the pop bumpers. Utilize a hex driver to remove one of the three flasher bayonets. Attach the replacement flasher and adjust the head so that it is close to the top of the bayonet.
-
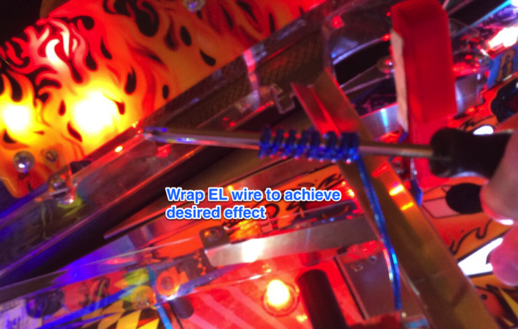
Return to the top of the playfield. Use a pencil, pen or screwdriver to shape EL wire as shown. Use approximately 6" of EL wire. Stretch to the desired look and feed 1/2" into the top of the detonator. Note EL wire can be shaped and reshaped until the desired look is achieved. If the wire does not hold its shape, we recommend using a heat gun or hair dryer to warm the wire while on shaping device. Let cool before removing.
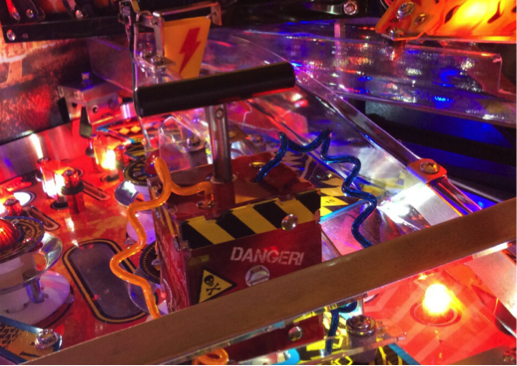
-
Reattach crossover ramp to right ramp. Installation is complete!
- Test product functionality using your games Flasher Test from the Diagnostic Menu (consult your games manual for details on accessing the Diagnostics Menu). Cycle through the flashers until you find the pop bumper flashers.
- Installation is complete!
Copyright Mezel Mods- 2016. All rights reserved. Because stealing is wrong and mean.

Comments
0 comments
Please sign in to leave a comment.