
These instructions are applicable to the following products:
WHATS IN THE BOX
|


DANGER ELECTRICAL SHOCK
Pinball machines have high voltages which can cause DANGER TO LIFE AND LIMB. TURN POWER OFF and UNPLUG PINBALL MACHINE prior to installation. Pinball machines are high voltage and can cause electrical shock.
SAFETY GLASSES are also recommended while working with or installing pinball parts.
Please follow these safety instructions as well as all installation instructions. Failure to follow these instructions may result in damage to the pinball machine, accessory or other parts. Please see our Disclaimer for associated risks and responsibilities (Section 13 in our Terms of Service) prior to installation.
Images included in these instructions are of an installed prototype and may vary from your product slightly.
If you have questions or concerns regarding the proper installation of this part, please contact us for assistance.
For the original version of Metallica, please use the instructions down below.
For Metallica Remastered, instructions can be found below the original instructions for how to install the gel set.
-
Turn off game, remove glass and secure balls.
- Lift playfield and locate board below the fuel target bank. Carefully slide large gel under edge of board ensuring the four F-U-E-L inserts are fully covered. For versions of the game without the LED board, loosen the screw on each lamp socket slightly to allow the gels to slide under the edge of the plastic socket.
- Locate the fuel gauge inserts and slide the small gels carefully under reach LED board being sure to cover the insert. You may need to loosen the LED board slightly to slide the gel under the boards.
For versions of the game without the LED board, loosen the screw on each lamp socket slightly to allow the gels to slide under the edge of the plastic socket. Utilize a small piece of tape on the Full and Empty insert to secure gel in place. - Lower the playfield and replace balls. Installation is complete.
For Metallica Remastered, please use the following set of instructions.
- Turn off game. Remove glass from game and set in a safe and secure location.
- If you have gameblades/ art blades, Place the Pinball Cabinet Assembly Protectors on each side of the machine. Next remove the pinballs from the trough. Then lift the playfield into the upright position.
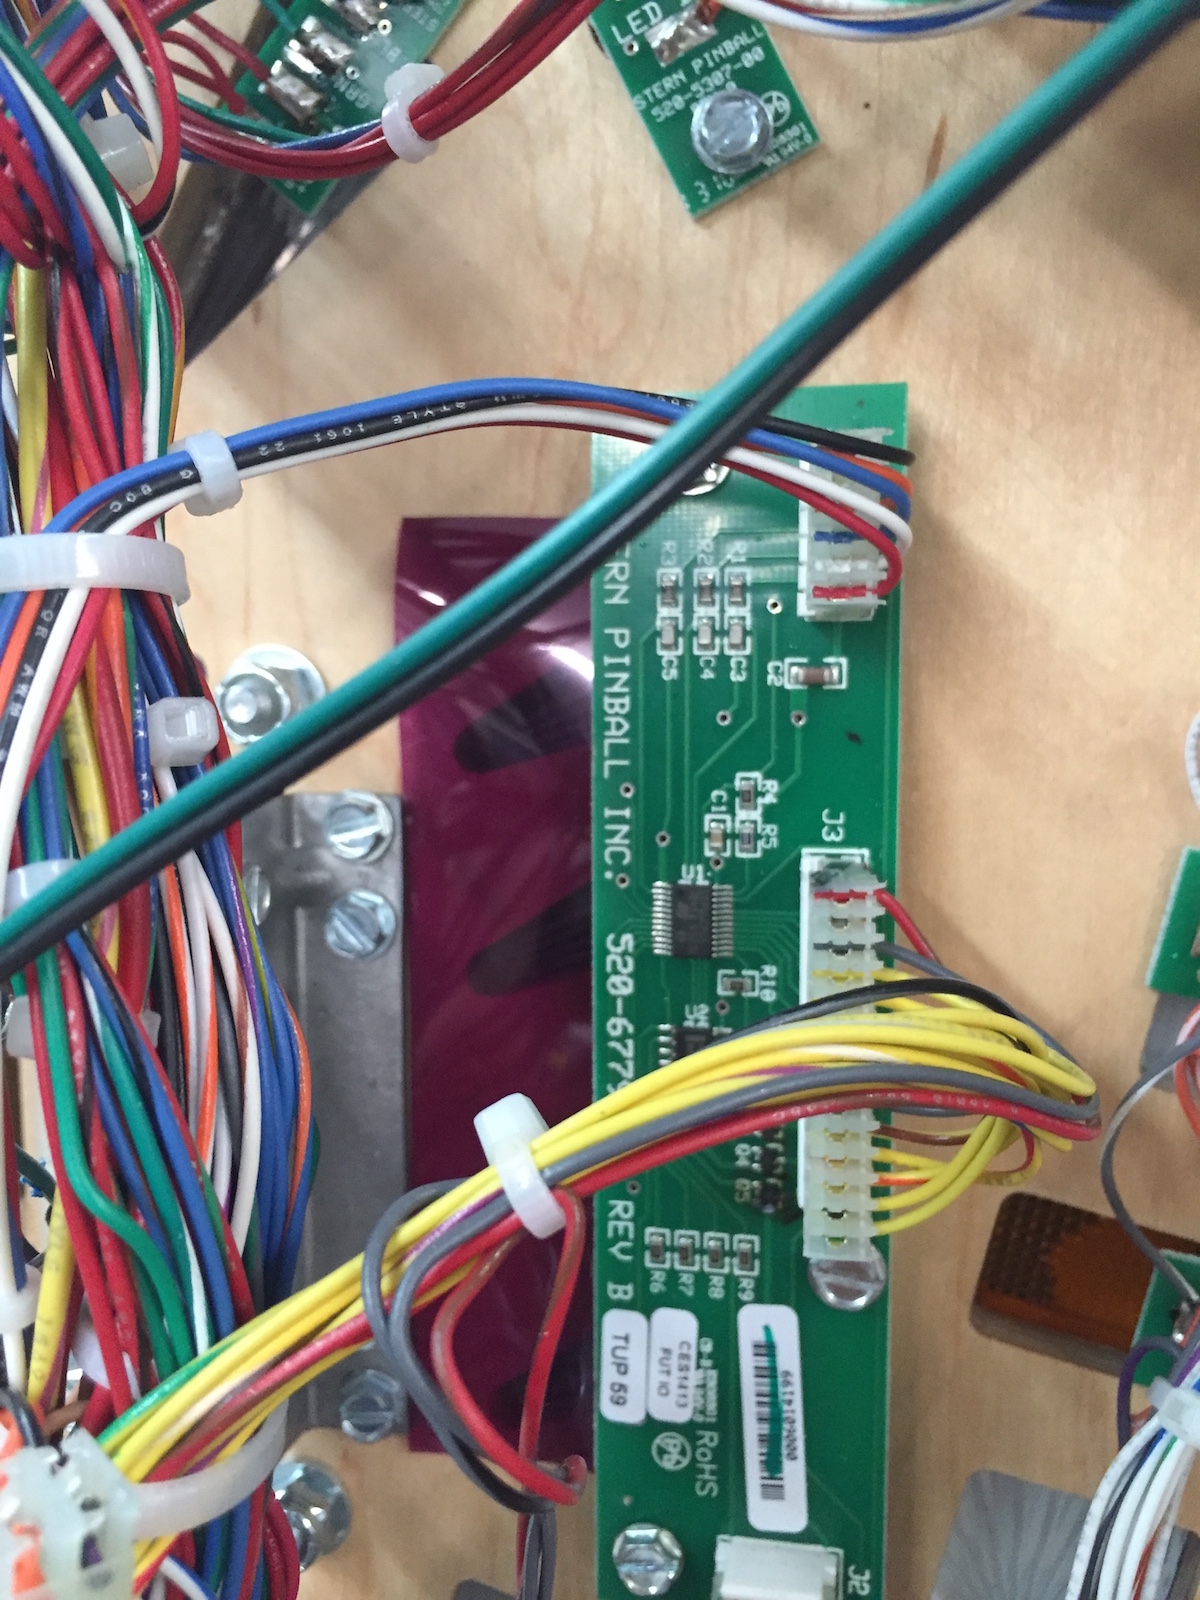
- Locate the Fuel inserts and remove the light board that controls the lights. Place the screws in a secure location and remove the connector from the board. Then set the board in a secure location.
- Place the gel in the game. If you would prefer the gel to be smaller, then you can trim it down during this step. Also remove the brass screw that secures the bracket that hold one of the node boards.
- Tape the gel down with the provided tape.
- Screw the brass screw back into place first. Then screw the light board back into place.
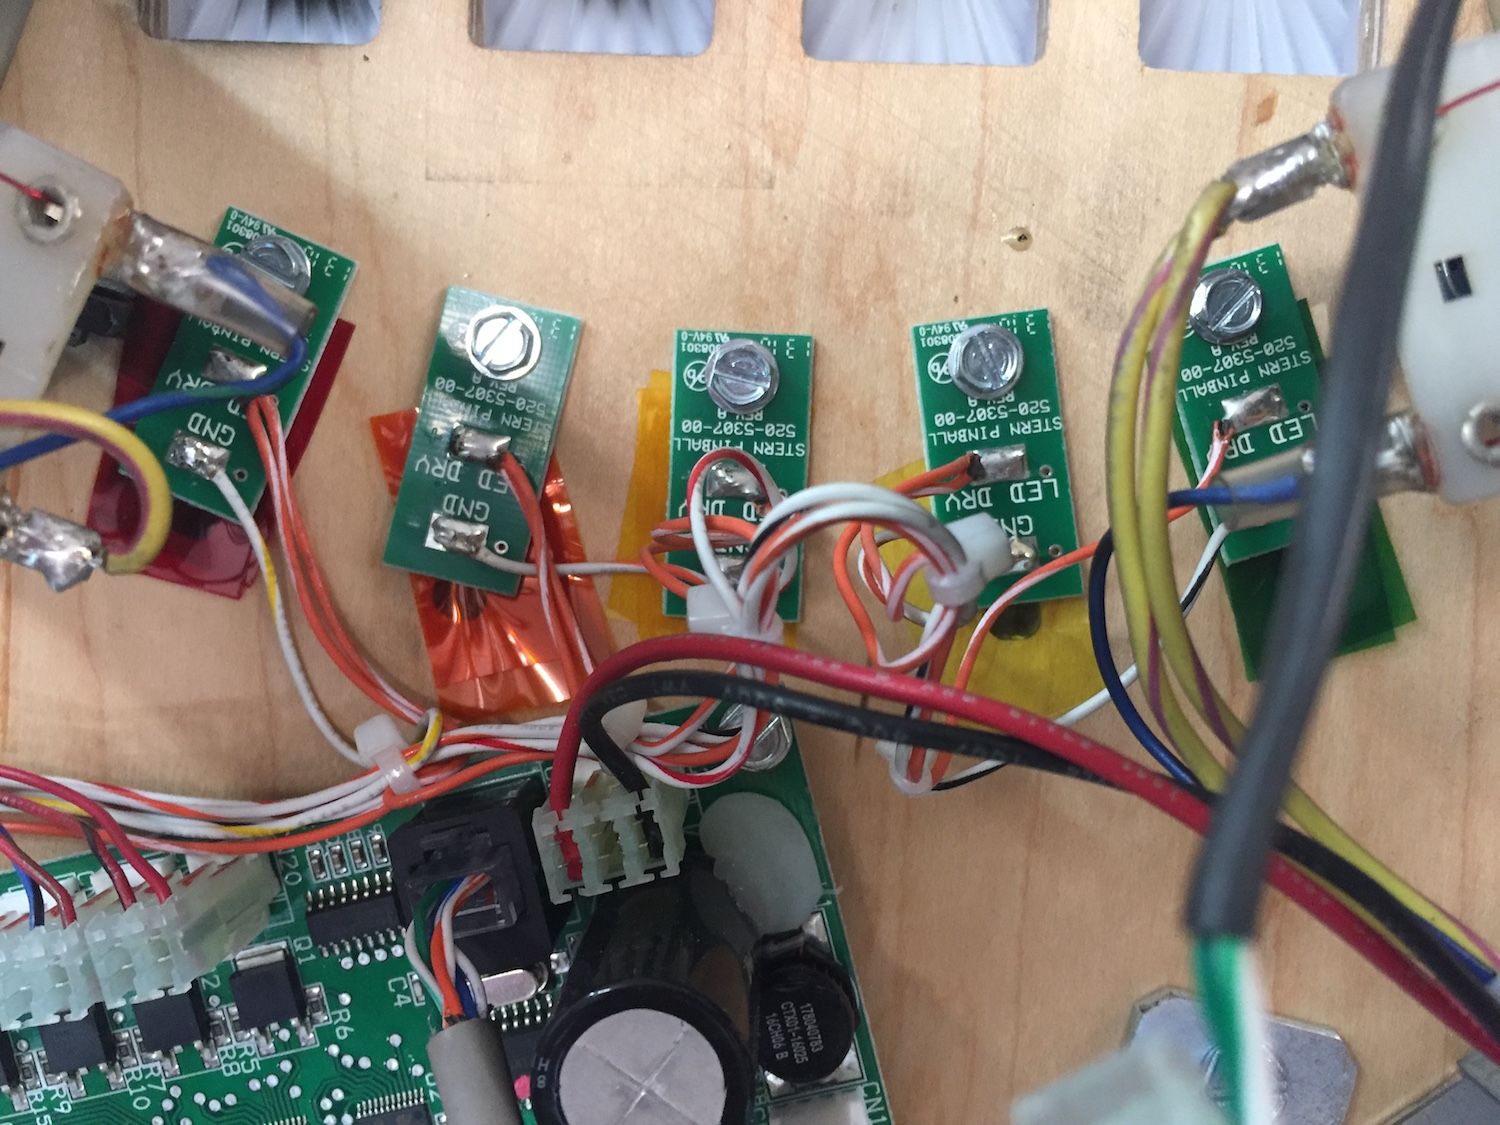
- Next, locate the center light board for the Fuel inserts. The board has been circled in the image below.
- Remove the four screws that hold the board in place and set them in a secure location, then unplug the connector from the board and set the board in a secure location. Next, cut the Yellow and Orange gels in half. You can also do this for the Green and Red gels, however, it isn't required. Then secure the gels using the provided tape in the following order: Red, Orange, Yellow, Yellow and Green.
- Resecure the board into place and reconnect it. Use the image in part 7 as a reference. Now, put the playfield back into place and return the balls to the trough. If you are using the Pinball Cabinet Assembly Protectors, you can now remove them. Finally, put the glass back onto the game.
- You are now done with the Fuel gel installation. But what about the extra gels? You are free to use them in whatever manner you want, but listed below are a few options that we like. (coming soon!)
Copyright Mezel Mods- 2016/2025. All rights reserved. Because stealing is wrong and mean.
Comments
0 comments
Please sign in to leave a comment.