


DANGER ELECTRICAL SHOCK
Pinball machines have high voltages which can cause DANGER TO LIFE AND LIMB. TURN POWER OFF and UNPLUG PINBALL MACHINE prior to installation. Pinball machines are high voltage and can cause electrical shock.
SAFETY GLASSES are also recommended while working with or installing pinball parts.
Please follow these safety instructions as well as all installation instructions. Failure to follow these instructions may result in damage to the pinball machine, accessory or other parts. Please see our Disclaimer for associated risks and responsibilities (Section 13 in our Terms of Service) prior to installation.
Images included in these instructions are of an installed prototype and may vary from your product slightly.
If you have questions or concerns regarding the proper installation of this part, please contact us for assistance.
When removing screws from the playfield, reinstall by first turning them counter-clockwise to match the original groove in order to respect the integrity of the playfield wood.
Note: This product uses alligator clips which are not intended for permanent connections and can come loose potentially causing shorts. We recommend soldering these connections in place for a more permanent connection.
- Disconnect the Sparky wire from the inverter (or quick connect for the Sparky 2-wire product). Ensure you see how the two connect and reconnect for Step 3 in this process. Failure to properly reconnect may cause inverter and EL wire to be damaged.
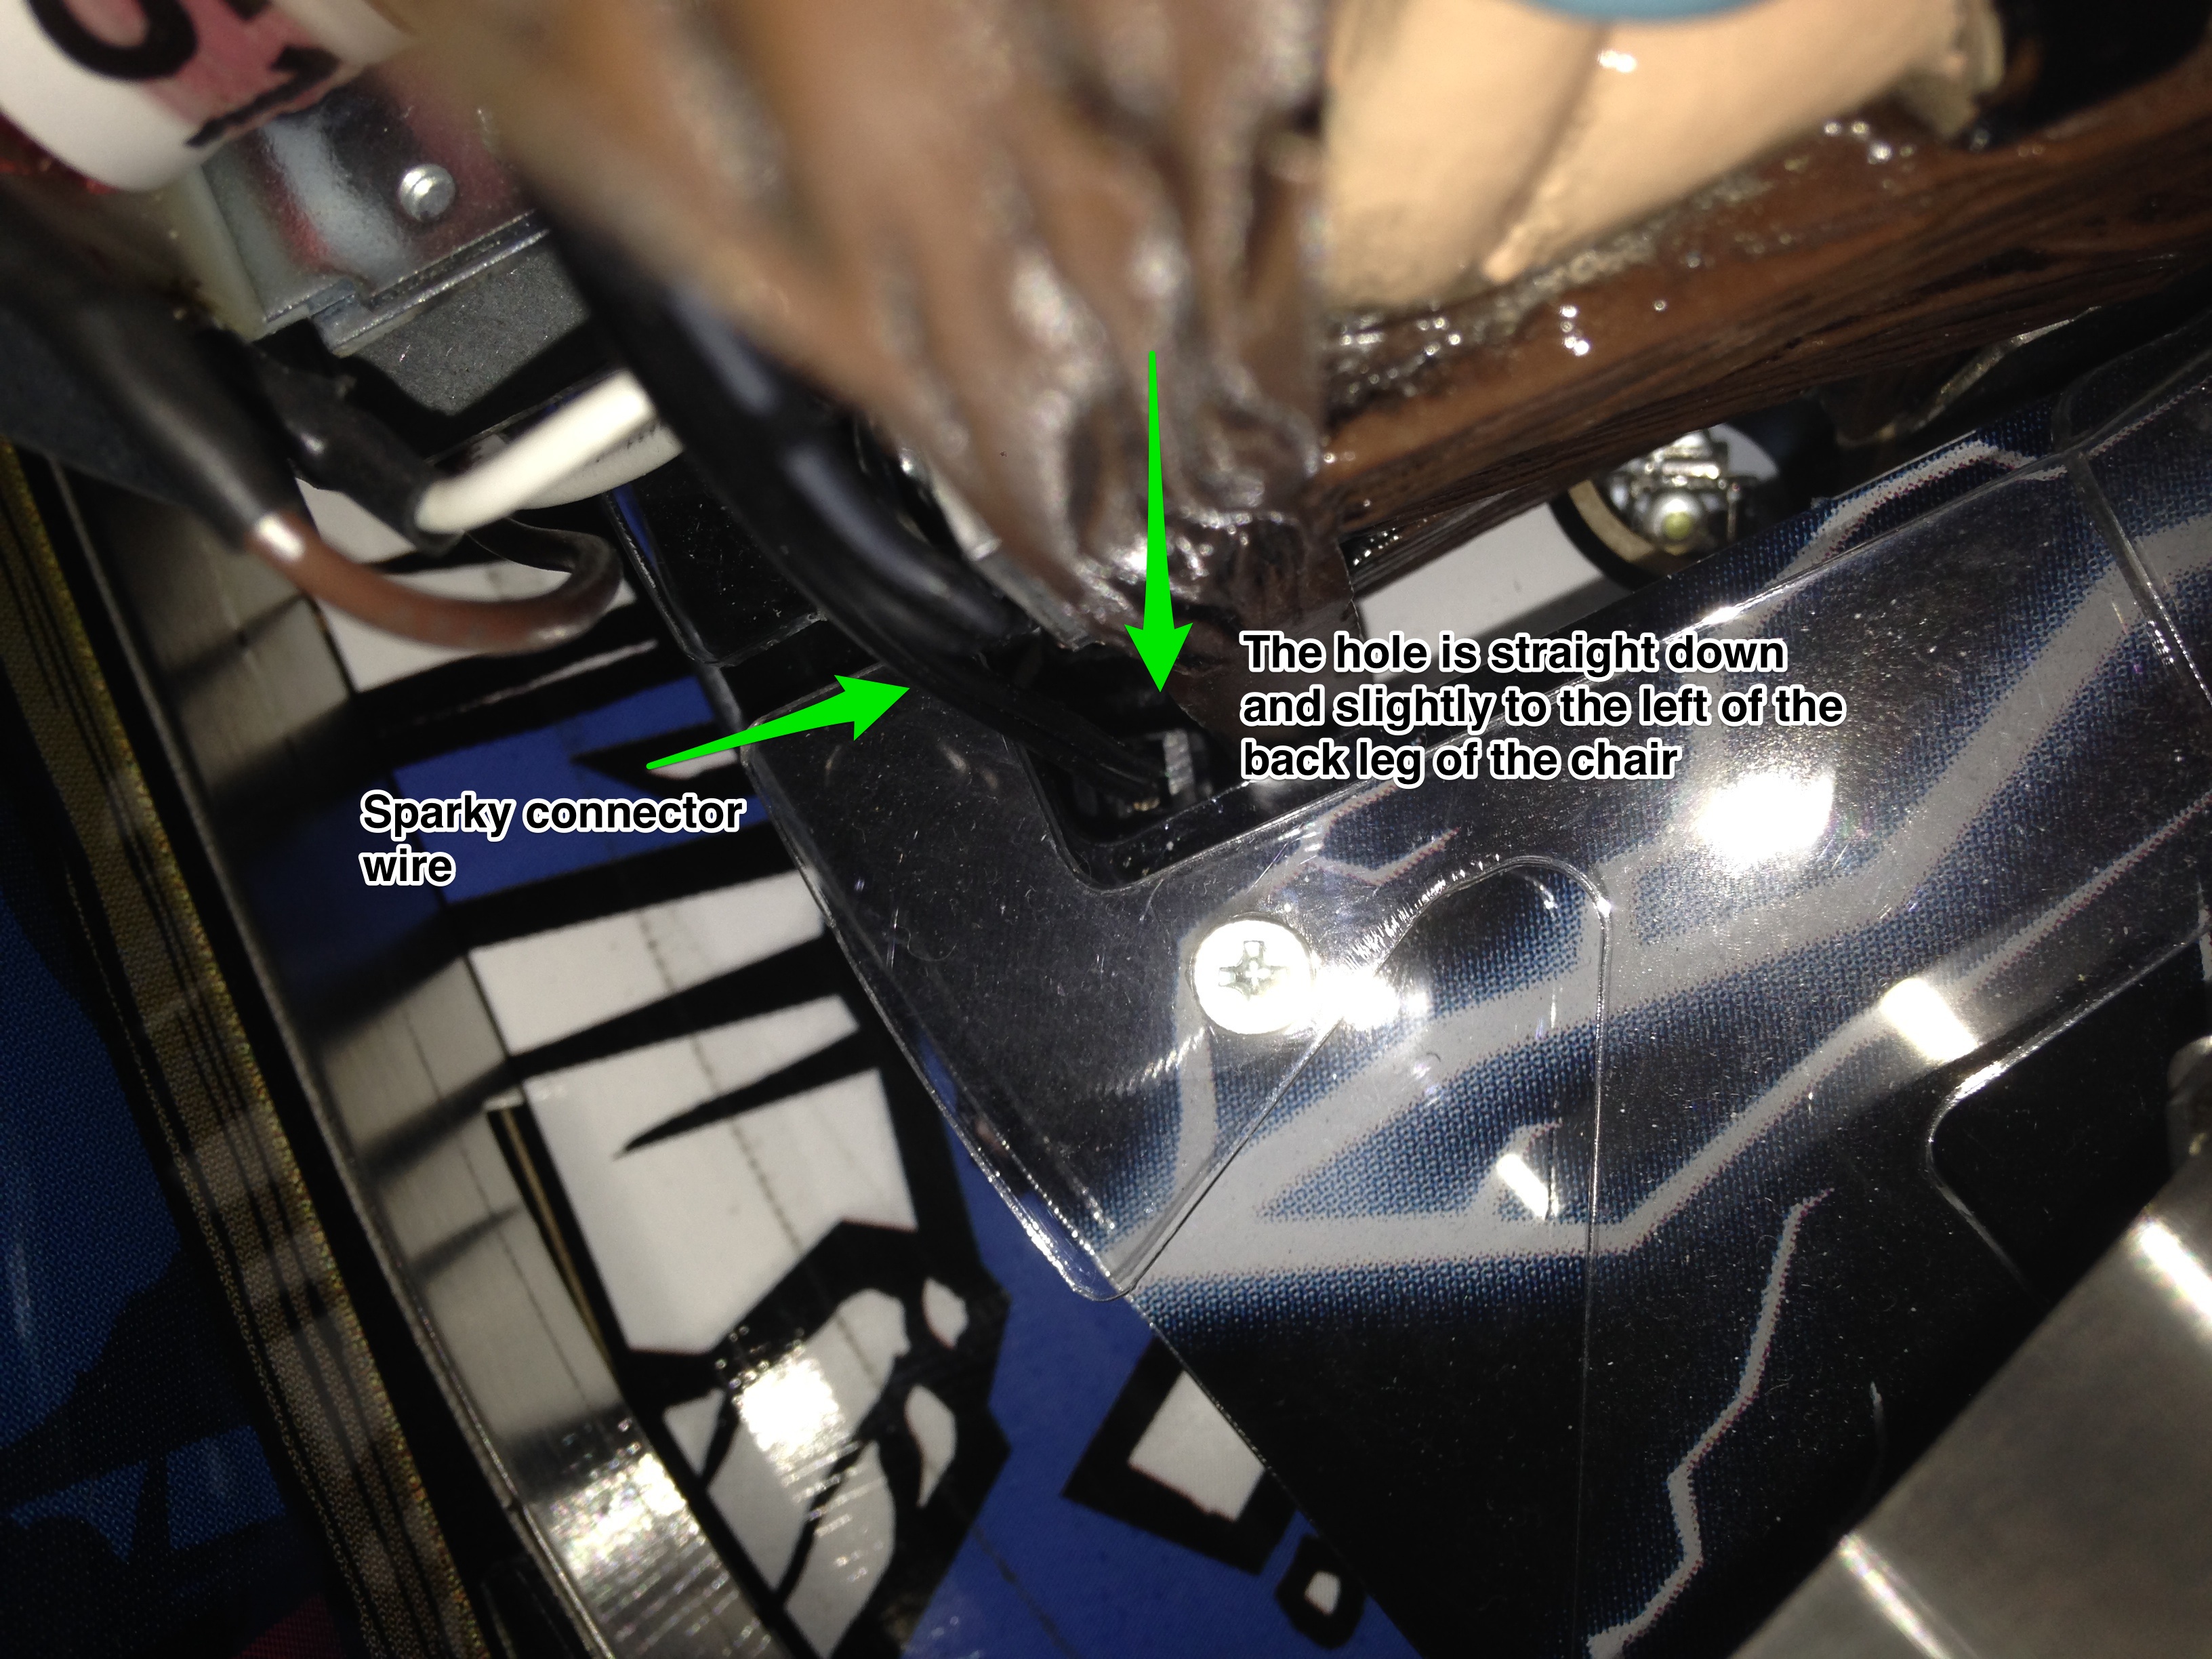
- Thread the connector down through the top of the playfield from the hole on the left of Sparky by the back of his chair. The hole is just to the left of the back leg of Sparky's chair. It takes patience but it can be done. There is an opening between the chair leg and the plastics around Sparky that can be used.
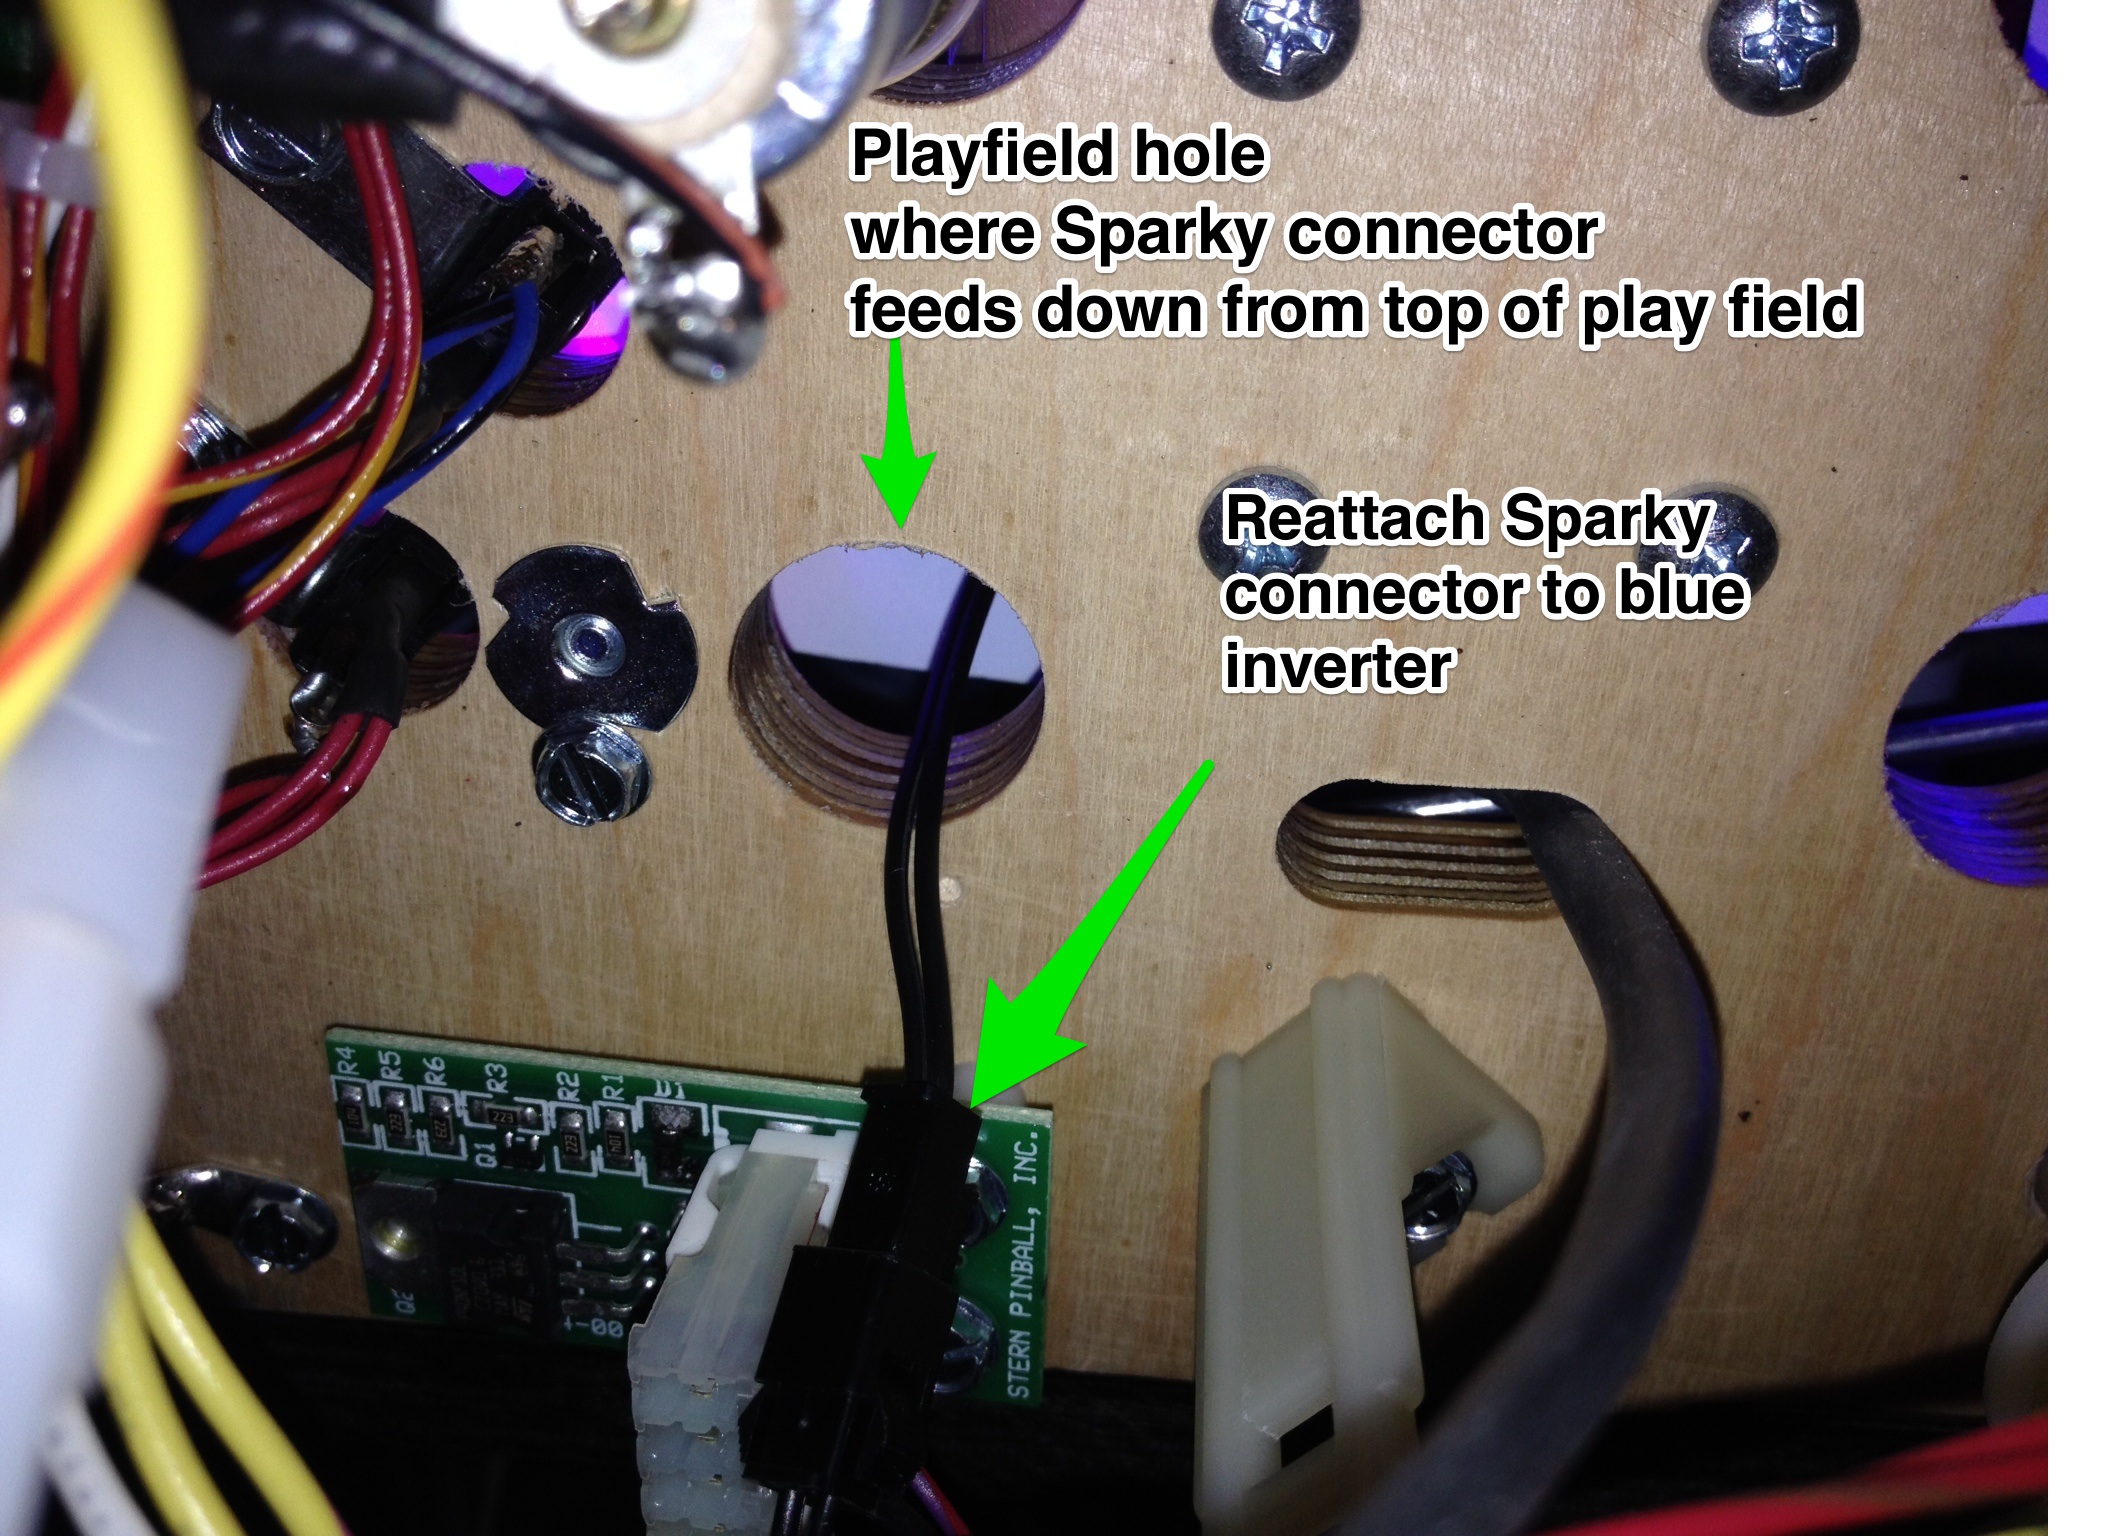
- When it is though the hole reconnect the connector wire to the blue inverter. NOTE: Please take care to ensure you reconnect correctly to avoid damage to inverter and EL wire. Attach the inverter to the bottom of the playfield using the double sided tape provided.
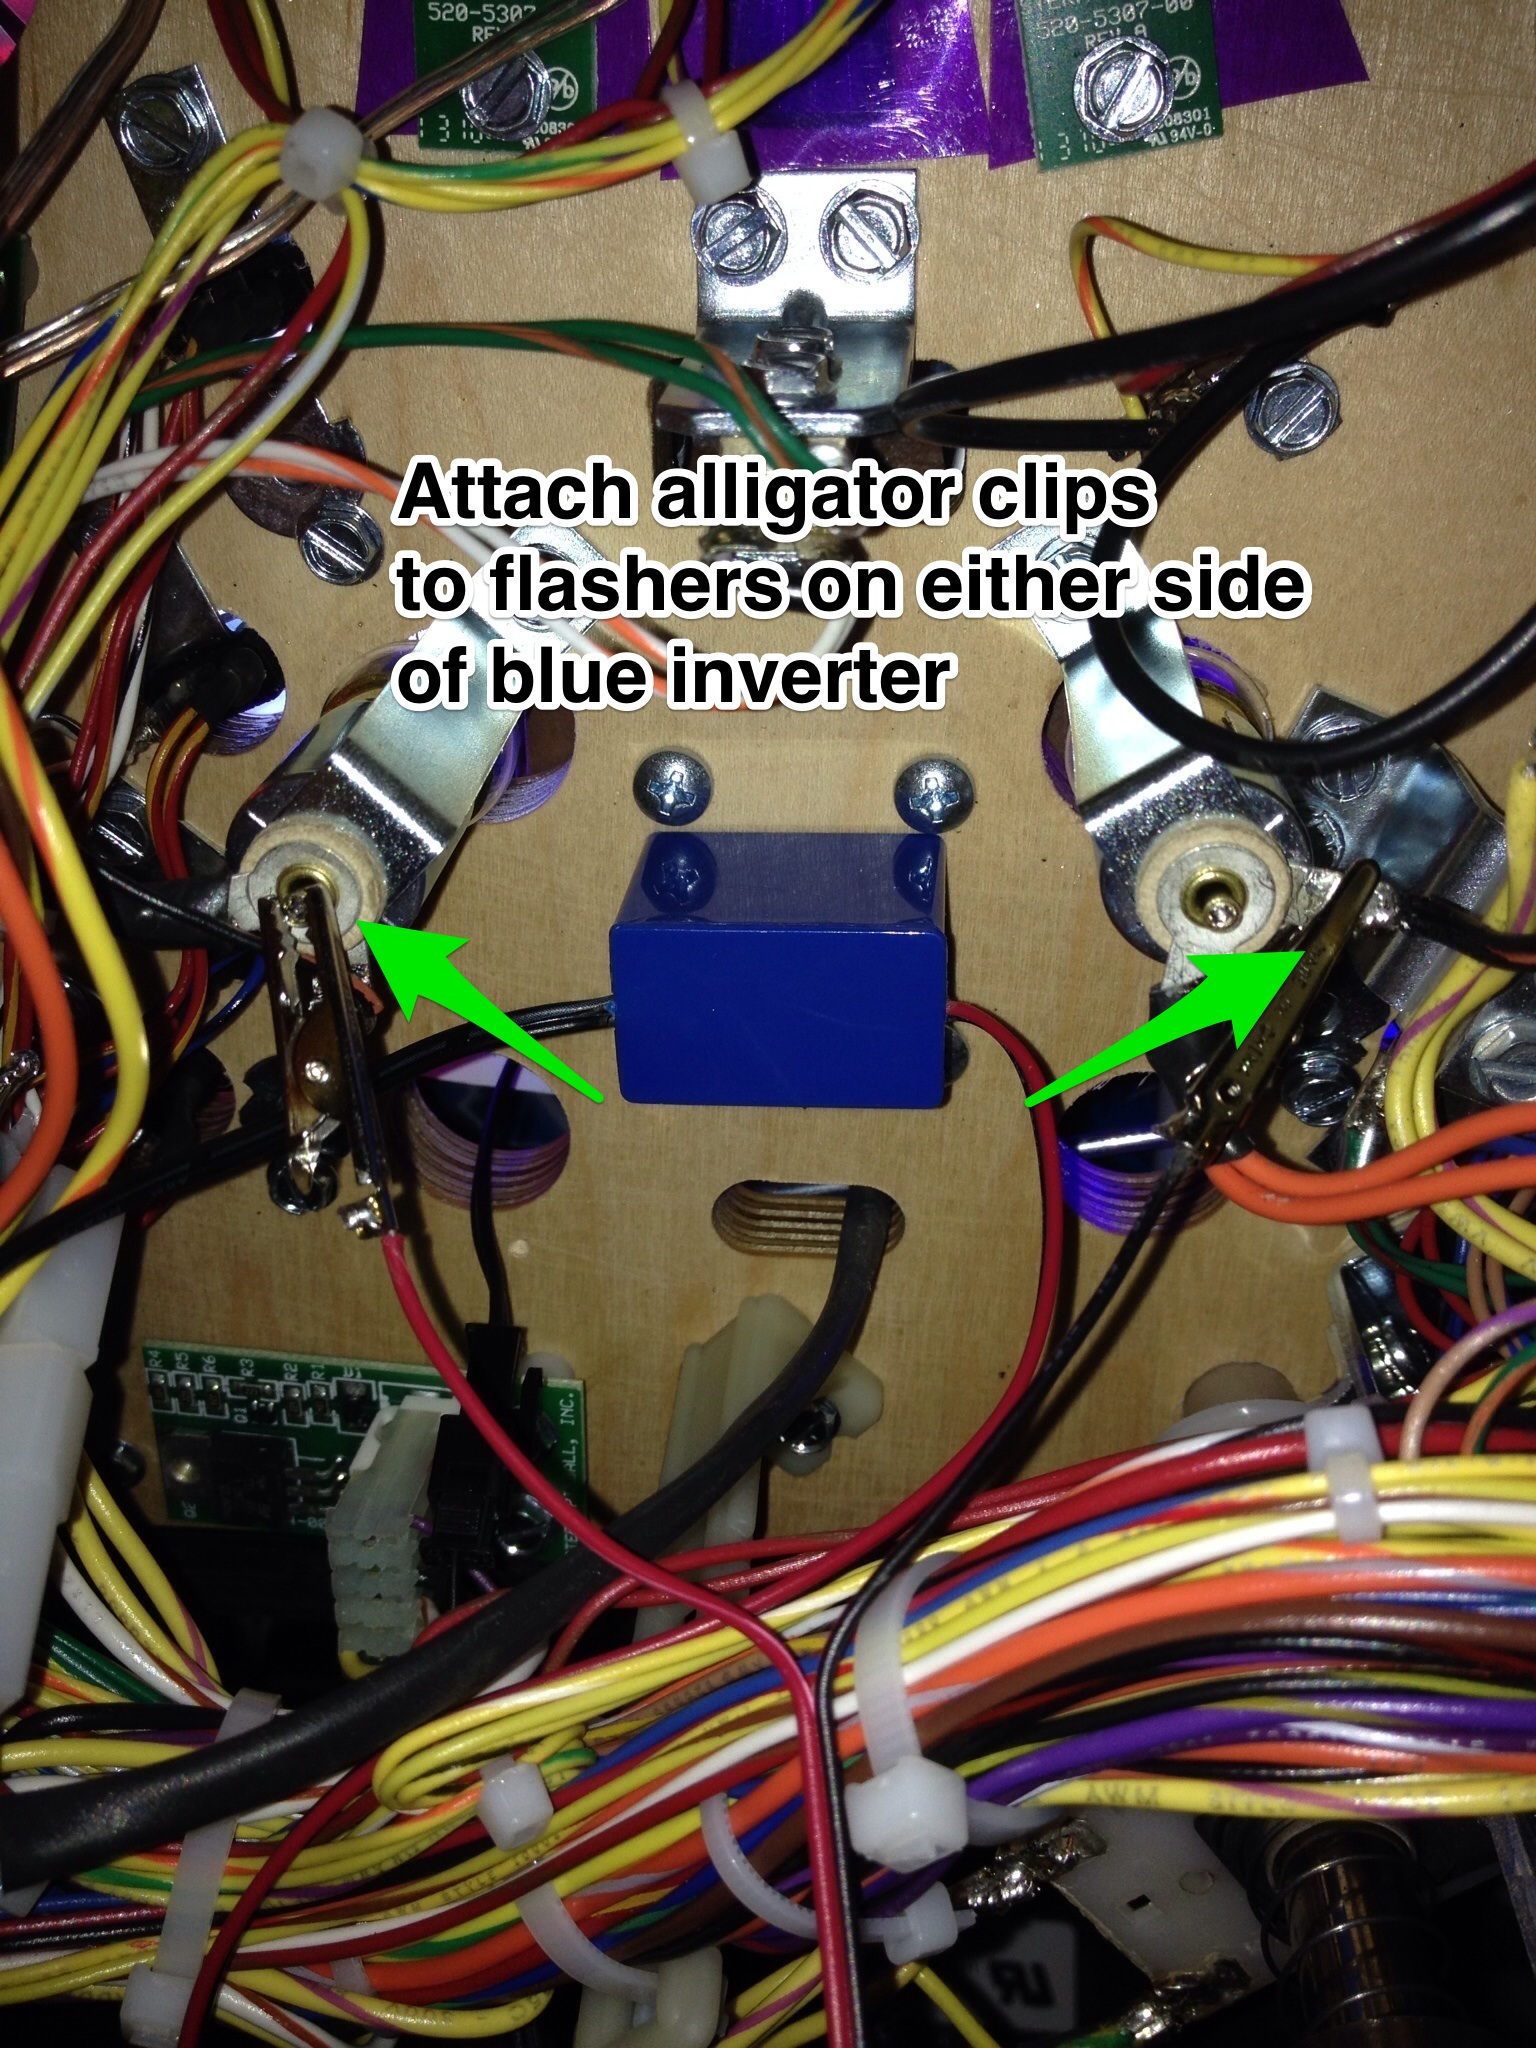
- Attach wires to the flashers on either side of the Sparky as shown.
- Attach the helmet to the top of Sparky using hot glue. Once the glue has set you can stretch the EL wire to your liking. It can be easily reshaped if necessary by wrapping the wire around the shaft of a thick screw driver.
Comments
0 comments
Please sign in to leave a comment.