
DANGER ELECTRICAL SHOCK
Pinball machines have high voltages which can cause DANGER TO LIFE AND LIMB. TURN POWER OFF and UNPLUG PINBALL MACHINE prior to installation. Pinball machines are high voltage and can cause electrical shock.
SAFETY GLASSES are also recommended while working with or installing pinball parts.
Please follow these safety instructions as well as all installation instructions. Failure to follow these instructions may result in damage to the pinball machine, accessory or other parts. Please see our Disclaimer for associated risks and responsibilities (Section 13 in our Terms of Service) prior to installation.
Images included in these instructions are of an installed prototype and may vary from your product slightly.
If you have questions or concerns regarding the proper installation of this part, please contact us for assistance.
- Turn off game and remove glass.
- Lift playfield on to service rails to aid in installation.
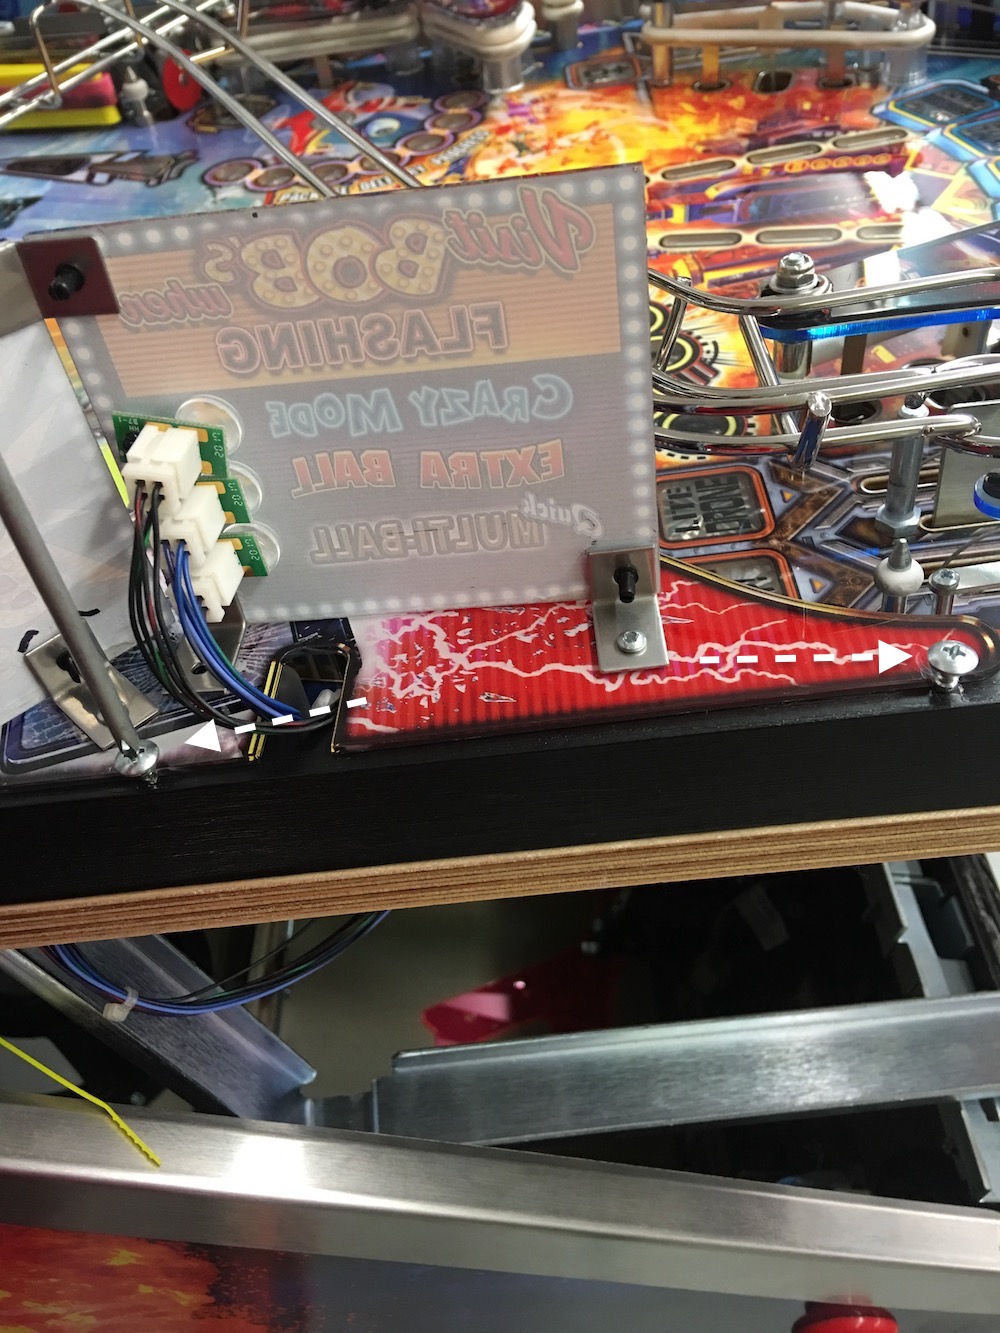
- Utilize a screw driver to loosen hardware holding plastic under Crazy Bob's signs in place. Slide plastic free from rail hardware.

- Lift plastic enough to remove hardware holding Bob brackets to the playfield plastic. Once hardware is removed and signs are free of plastic, carefully unplug Bob's LED lighting from back of sign.

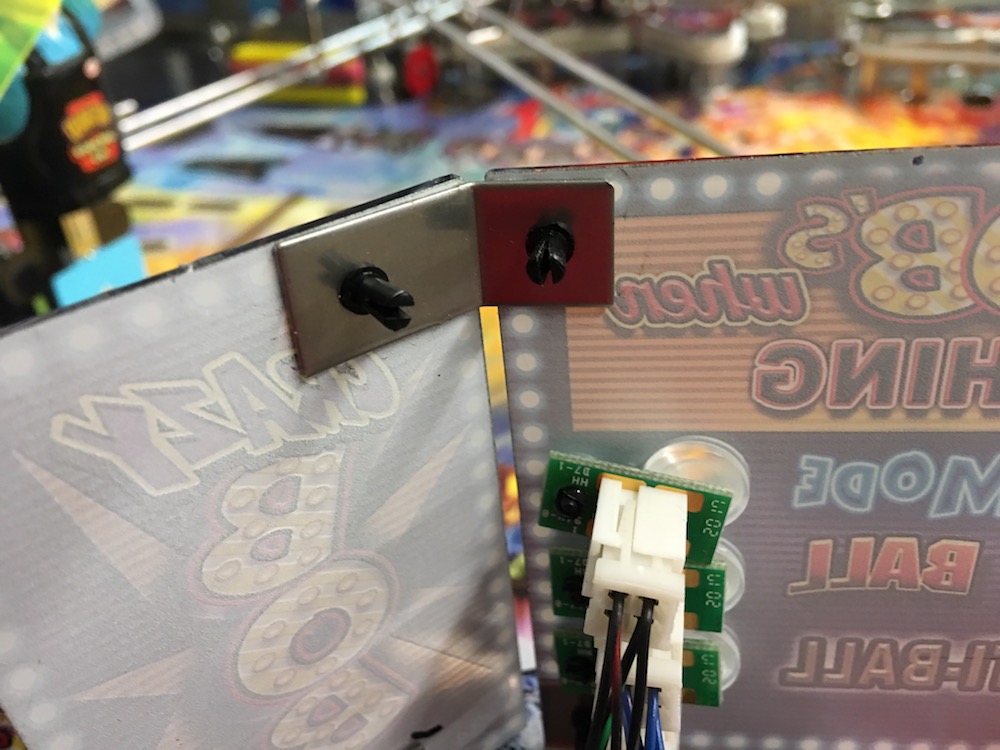
- Remove the sign brackets by gripping the rivets from the front while squeezing rear piece from behind. Pull front of rivet away from back. Repeat until brackets and signs are free of one another. If desired, replace rivets in top corners of signs (without bracket); otherwise, set aside rivets and brackets for storage with game parts as they are not required for use in final installation.

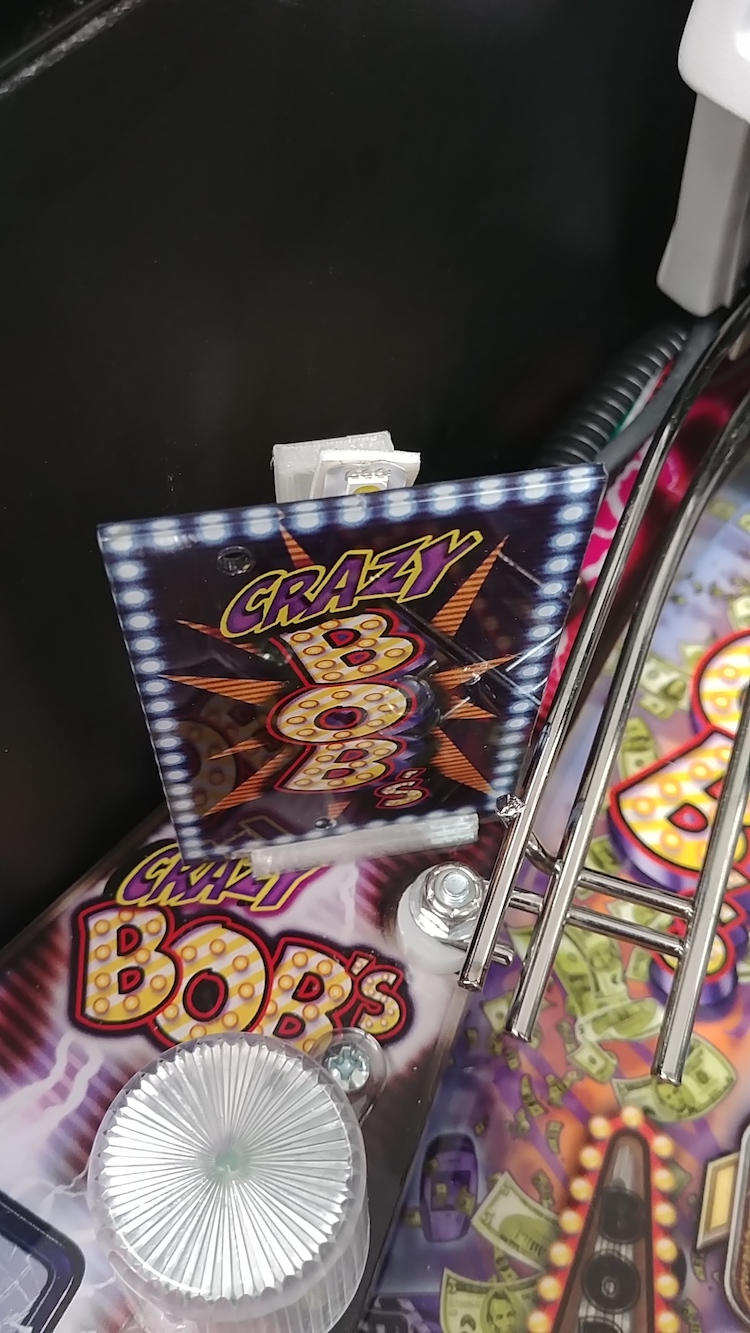
- Trim and attach pieces of the thin double sided tape to the bottom of each acrylic sign. Slide each sign into the replacement brackets.
- Attach the remaining tape to the bottom of the smaller Bob sign and attach to the playfield plastic, positioning as desired. Tuck the wiring for the smaller Bob sign through the hole in the plastic directly behind the sign.

- Lift plastic that holds Bob signs again in order to feed wiring from mod through hole in the playfield. The wiring for the second Bob's sign should be run under the plastic at this position. Reach below playfield and pull slack through until wire is taught but will allow for installation of the second Bob sign.

- Replace playfield plastic. Completely remove the screw holding the plastic to the playfield railing which is directly behind the broken cell phone graphic. At this point you can attach any remaining tape to the front corner, opposite the screw attachment, to aid in securing the sign. Utilize this screw to attach the bracket.
- Lift playfield and attach to power using our JJP Fused Power Tap or other similar power splitter.

Comments
0 comments
Please sign in to leave a comment.