

DANGER ELECTRICAL SHOCK
Pinball machines have high voltages which can cause DANGER TO LIFE AND LIMB. TURN POWER OFF and UNPLUG PINBALL MACHINE prior to installation. Pinball machines are high voltage and can cause electrical shock.
SAFETY GLASSES are also recommended while working with or installing pinball parts.
Please follow these safety instructions as well as all installation instructions. Failure to follow these instructions may result in damage to the pinball machine, accessory or other parts. Please see our Disclaimer for associated risks and responsibilities (Section 13 in our Terms of Service) prior to installation.
Images included in these instructions are of an installed prototype and may vary from your product slightly.
If you have questions or concerns regarding the proper installation of this part, please contact us for assistance.
When removing screws from the playfield, reinstall by first turning them counter-clockwise to match the original groove in order to respect the integrity of the playfield wood.
Stock Flasher Removal
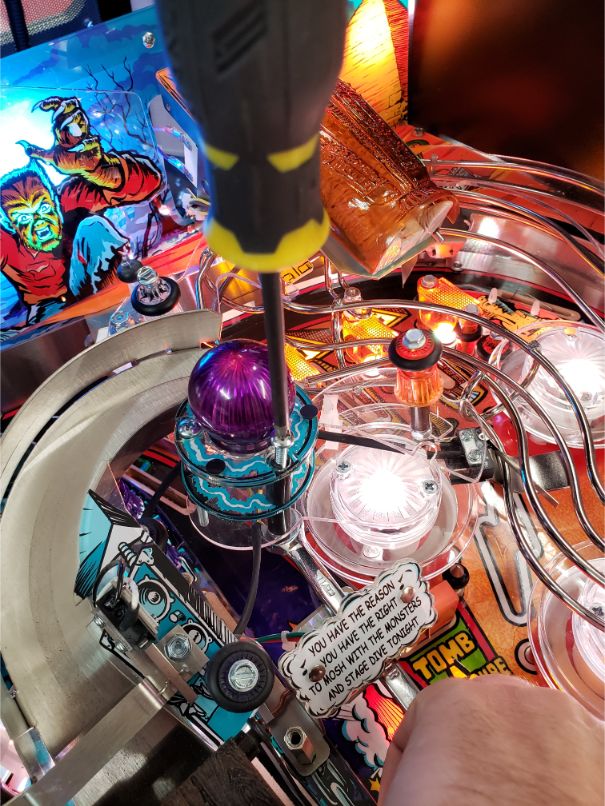
- Begin by removing the hardware that keeps the stock flashers in place. There are three bolts each with a nut at the bottom. You will need a screw driver and a wrench to hold the nut in place while you unscrew each bolt.
- Flip up the playfield and prepare to unplug and remove the stock cabling that powers the stock flasher.
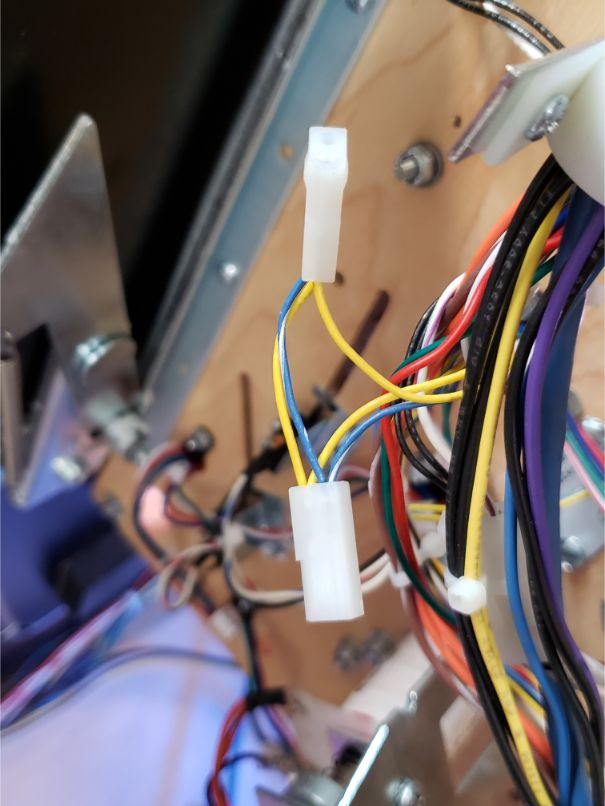
- Locate the two molex plugs with yellow and light blue wires. These plugs will be located underneath the stock flashers and are in the rear left of the underside of the playfield.
- Unplug the molex plug that leads to the flasher you are replacing. If replacing both flashers, unplug both.
- Remove the stock flasher from the top of the playfield by pulling the wiring through the hole in the playfield.
Replacement Installation
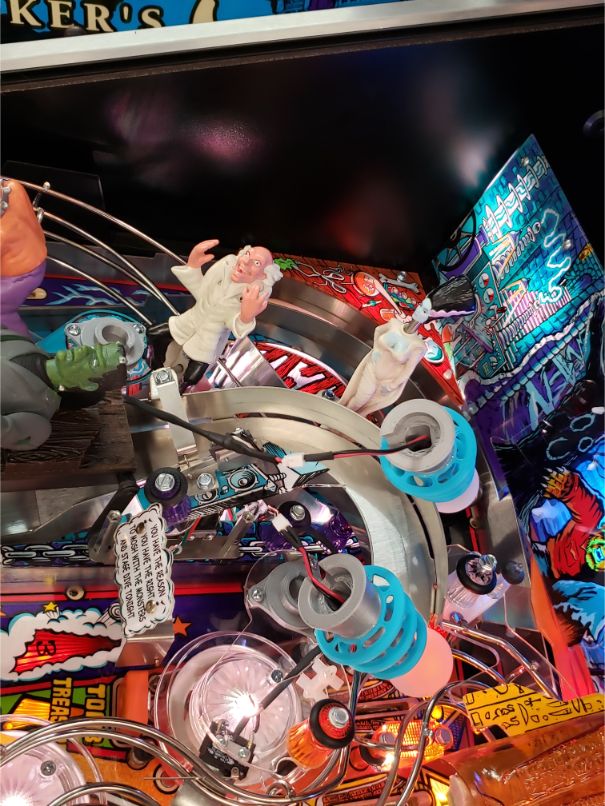
- Take the silver replacement base of the Tesla Coil and install it with the included hardware onto the location where the old flasher was. Be sure to install it in the correct orientation - as shown here - so that the wire powering the light will be properly concealed.
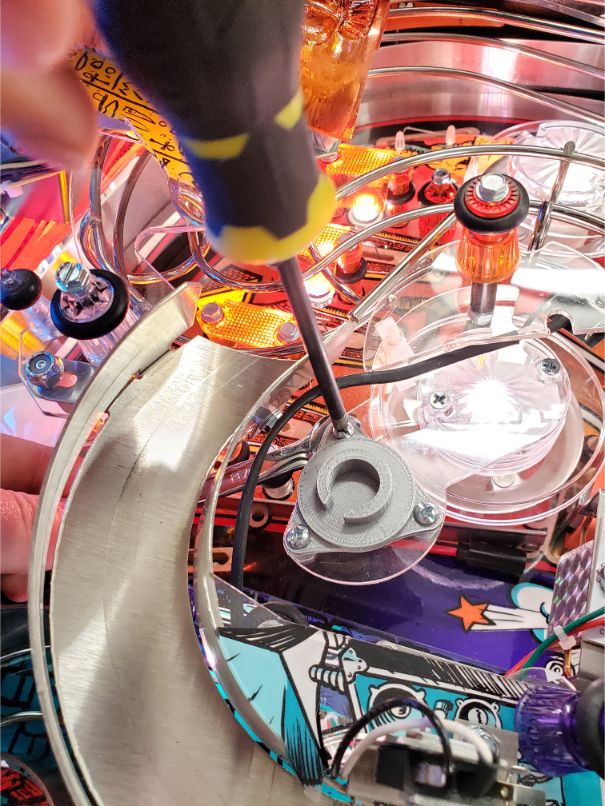
- Take the Tesla coil main body and feed the molex plug through the same hole in the playfield corresponding with the one that you removed.
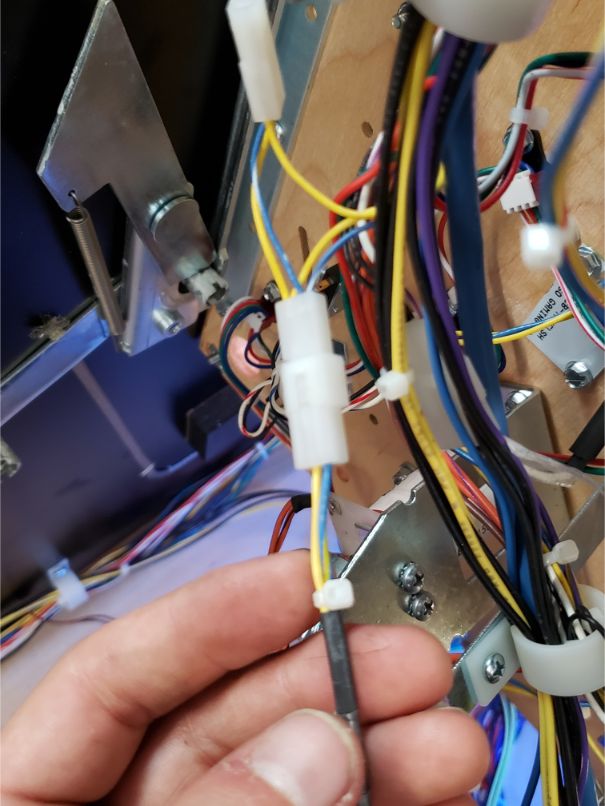
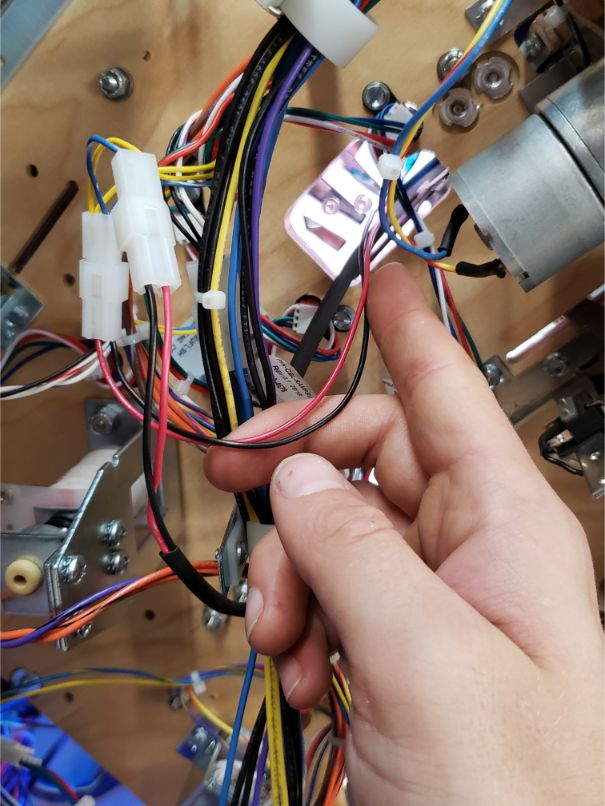
- Flip up the playfield again and plug in the replacement plug where you removed the old one. If you are replacing both flashers, your configuration will look like this:
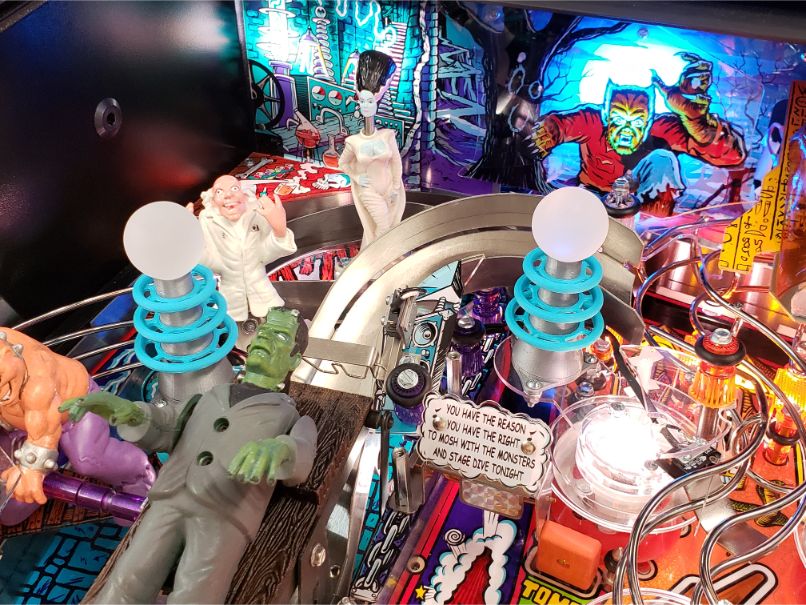
- Return the playfield to normal and remove the top side of the double sided tape included with the base of the tesla coil that is installed already. Then arrange the wire coming from the tesla coil main body such that it comes through the cut-out near its bottom. The cut-out on the bottom aligns with the cut out in the base. Slide the body onto the base so that the two cut-outs are aligned and the wire is nicely concealed. The double sided tape should hold your new tesla coil in place.

Installation Complete! Enjoy your new Coils!

Comments
0 comments
Please sign in to leave a comment.