
DANGER ELECTRICAL SHOCK
Pinball machines have high voltages which can cause DANGER TO LIFE AND LIMB. TURN POWER OFF and UNPLUG PINBALL MACHINE prior to installation. Pinball machines are high voltage and can cause electrical shock.
SAFETY GLASSES are also recommended while working with or installing pinball parts.
Please follow these safety instructions as well as all installation instructions. Failure to follow these instructions may result in damage to the pinball machine, accessory or other parts. Please see our Disclaimer for associated risks and responsibilities (Section 13 in our Terms of Service) prior to installation.
Images included in these instructions are of an installed prototype and may vary from your product slightly.
If you have questions or concerns regarding the proper installation of this part, please contact us for assistance.
When removing screws from the playfield, reinstall by first turning them counter-clockwise to match the original groove in order to respect the integrity of the playfield wood.
NOTE: For this installation you will need a pair of wire cutters. Because of slight game differences, the length of wire needed may vary - so we included a healthy amount of wire so that you can adjust it as necessary.
Photos found in this support article vary from the final version of the Mezel Mods Raptor pen. All versions have the back-most uprights bent to accommodate games with the Raptor toy model. The furthest back right curved upright has an area that appears to be 'damaged'- this is part of the design. It allows for the Raptor toy arms to freely move up and down.
NOTE: INSTALL PHOTOS VARY FROM FINAL VERSION WHICH HAS THE TWO BACK POSTS BENT TO MAKE ROOM FOR THE RAPTOR FOUND IN THE PREM/LE VERSIONS OF THE GAME.
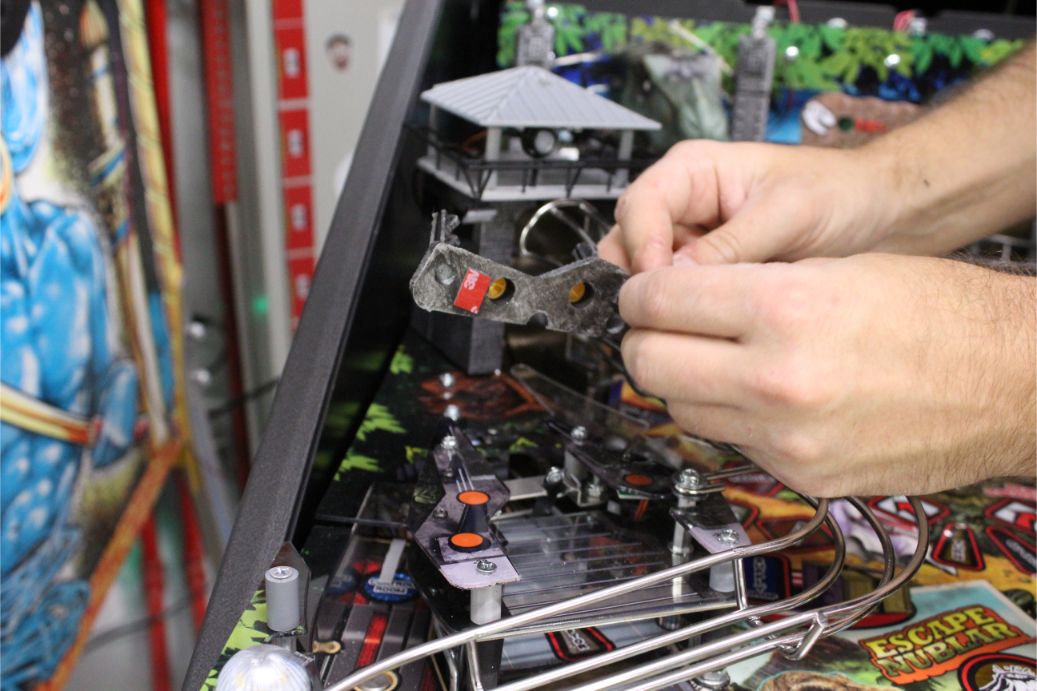
1. Start by removing the double-sided tape backing on either one of the raptor pen sides and installing it on the corresponding acrylic.
Use the screw head cutouts on the underside of the 3D print to align the piece properly.

2. Repeat for the other side.

3. Starting with the top rung, feed wire through each side of the raptor pen.
Be sure to leave excess wire at the end of the pen (do not cut it yet) so that while you are shaping/bending the wire around the front corners the wire does not come free.

4. Bend the Wire at the front of the pen corners so that it looks as such:

5. Repeat this process for the bottom rung. Note: the back-most upright on the right side does not have a wire rung. The area you see there is by design and made to accommodate the arms of the raptor toy found in the Prem/LE versions of the game.


6. Adjust/straighten and bend the wire where needed so that you achieved the desired look. Then trim the excess wire from the back of the pen. Utilize the 3M adhesive included to attach the 10K volts sign as desired.


Comments
0 comments
Please sign in to leave a comment.