


DANGER ELECTRICAL SHOCK
Pinball machines have high voltages which can cause DANGER TO LIFE AND LIMB. TURN POWER OFF and UNPLUG PINBALL MACHINE prior to installation. Pinball machines are high voltage and can cause electrical shock.
SAFETY GLASSES are also recommended while working with or installing pinball parts.
Please follow these safety instructions as well as all installation instructions. Failure to follow these instructions may result in damage to the pinball machine, accessory or other parts. Please see our Disclaimer for associated risks and responsibilities (Section 13 in our Terms of Service) prior to installation.
Images included in these instructions are of an installed prototype and may vary from your product slightly.
If you have questions or concerns regarding the proper installation of this part, please contact us for assistance.
When removing screws from the playfield, reinstall by first turning them counter-clockwise to match the original groove in order to respect the integrity of the playfield wood.
GI Bulb Replacement Installation
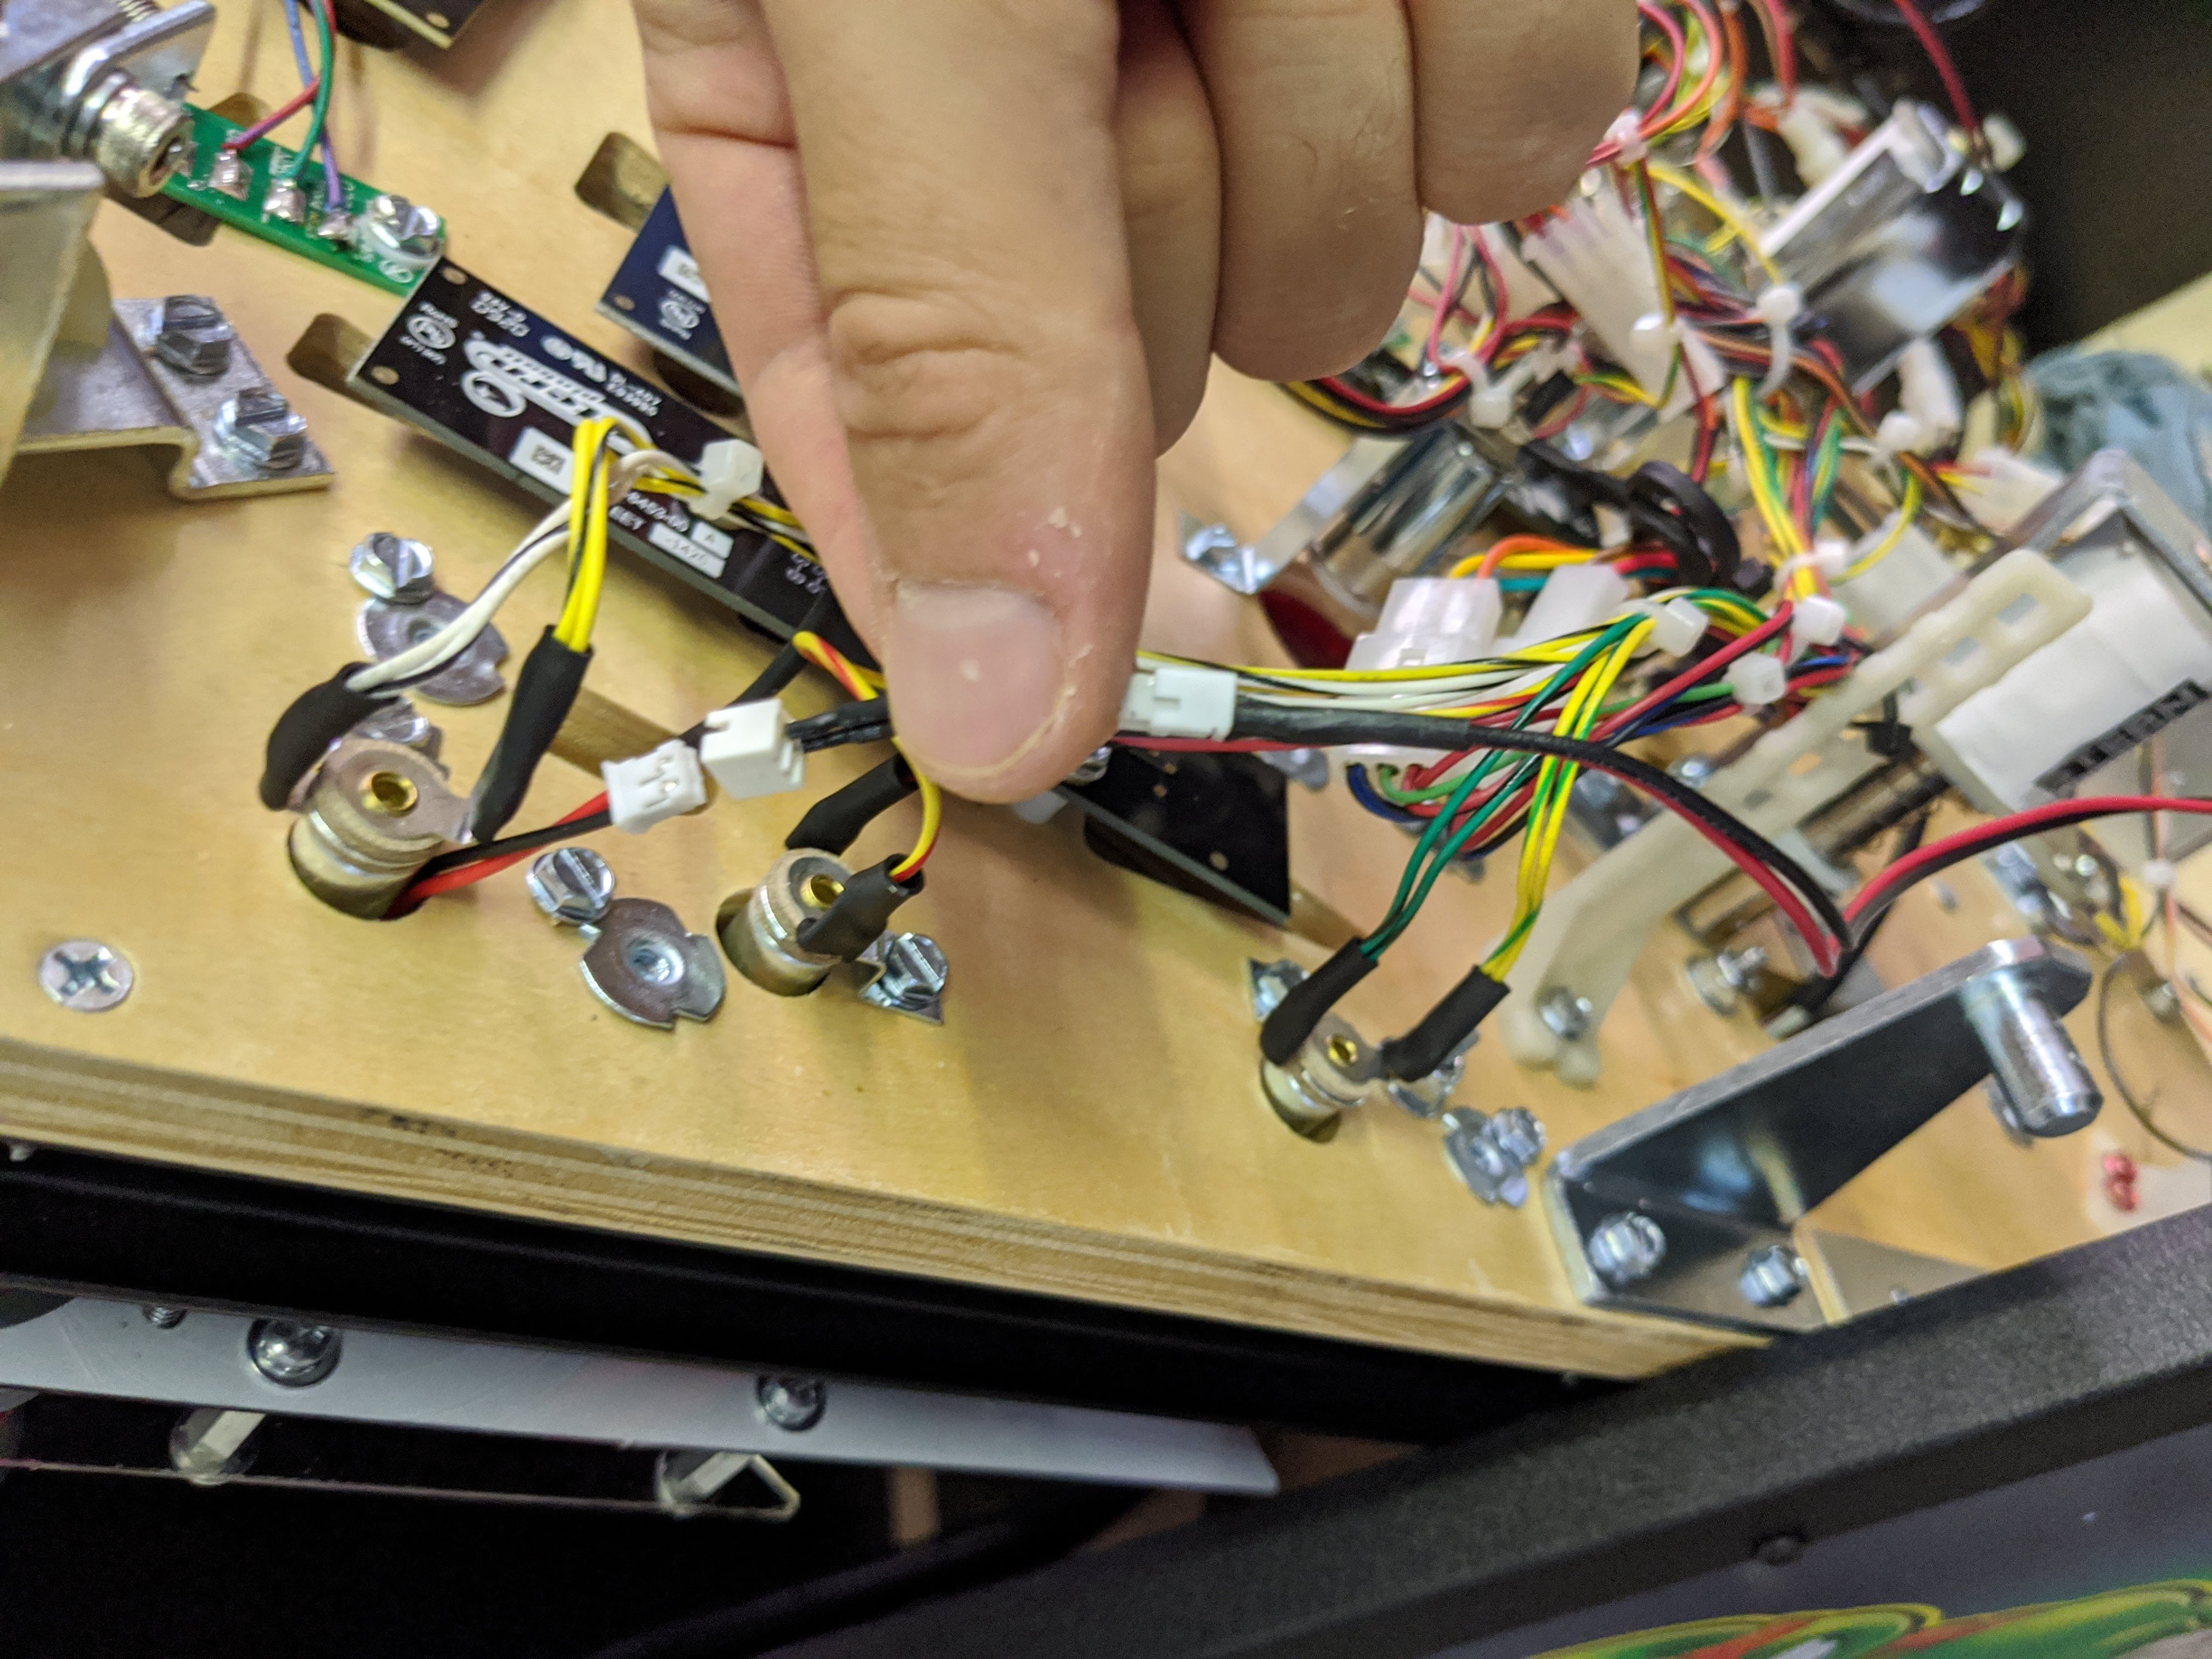
The power for this mod comes from a general illumination bulb on the playfield. The first part of this article is to install the replacement GI bulb.
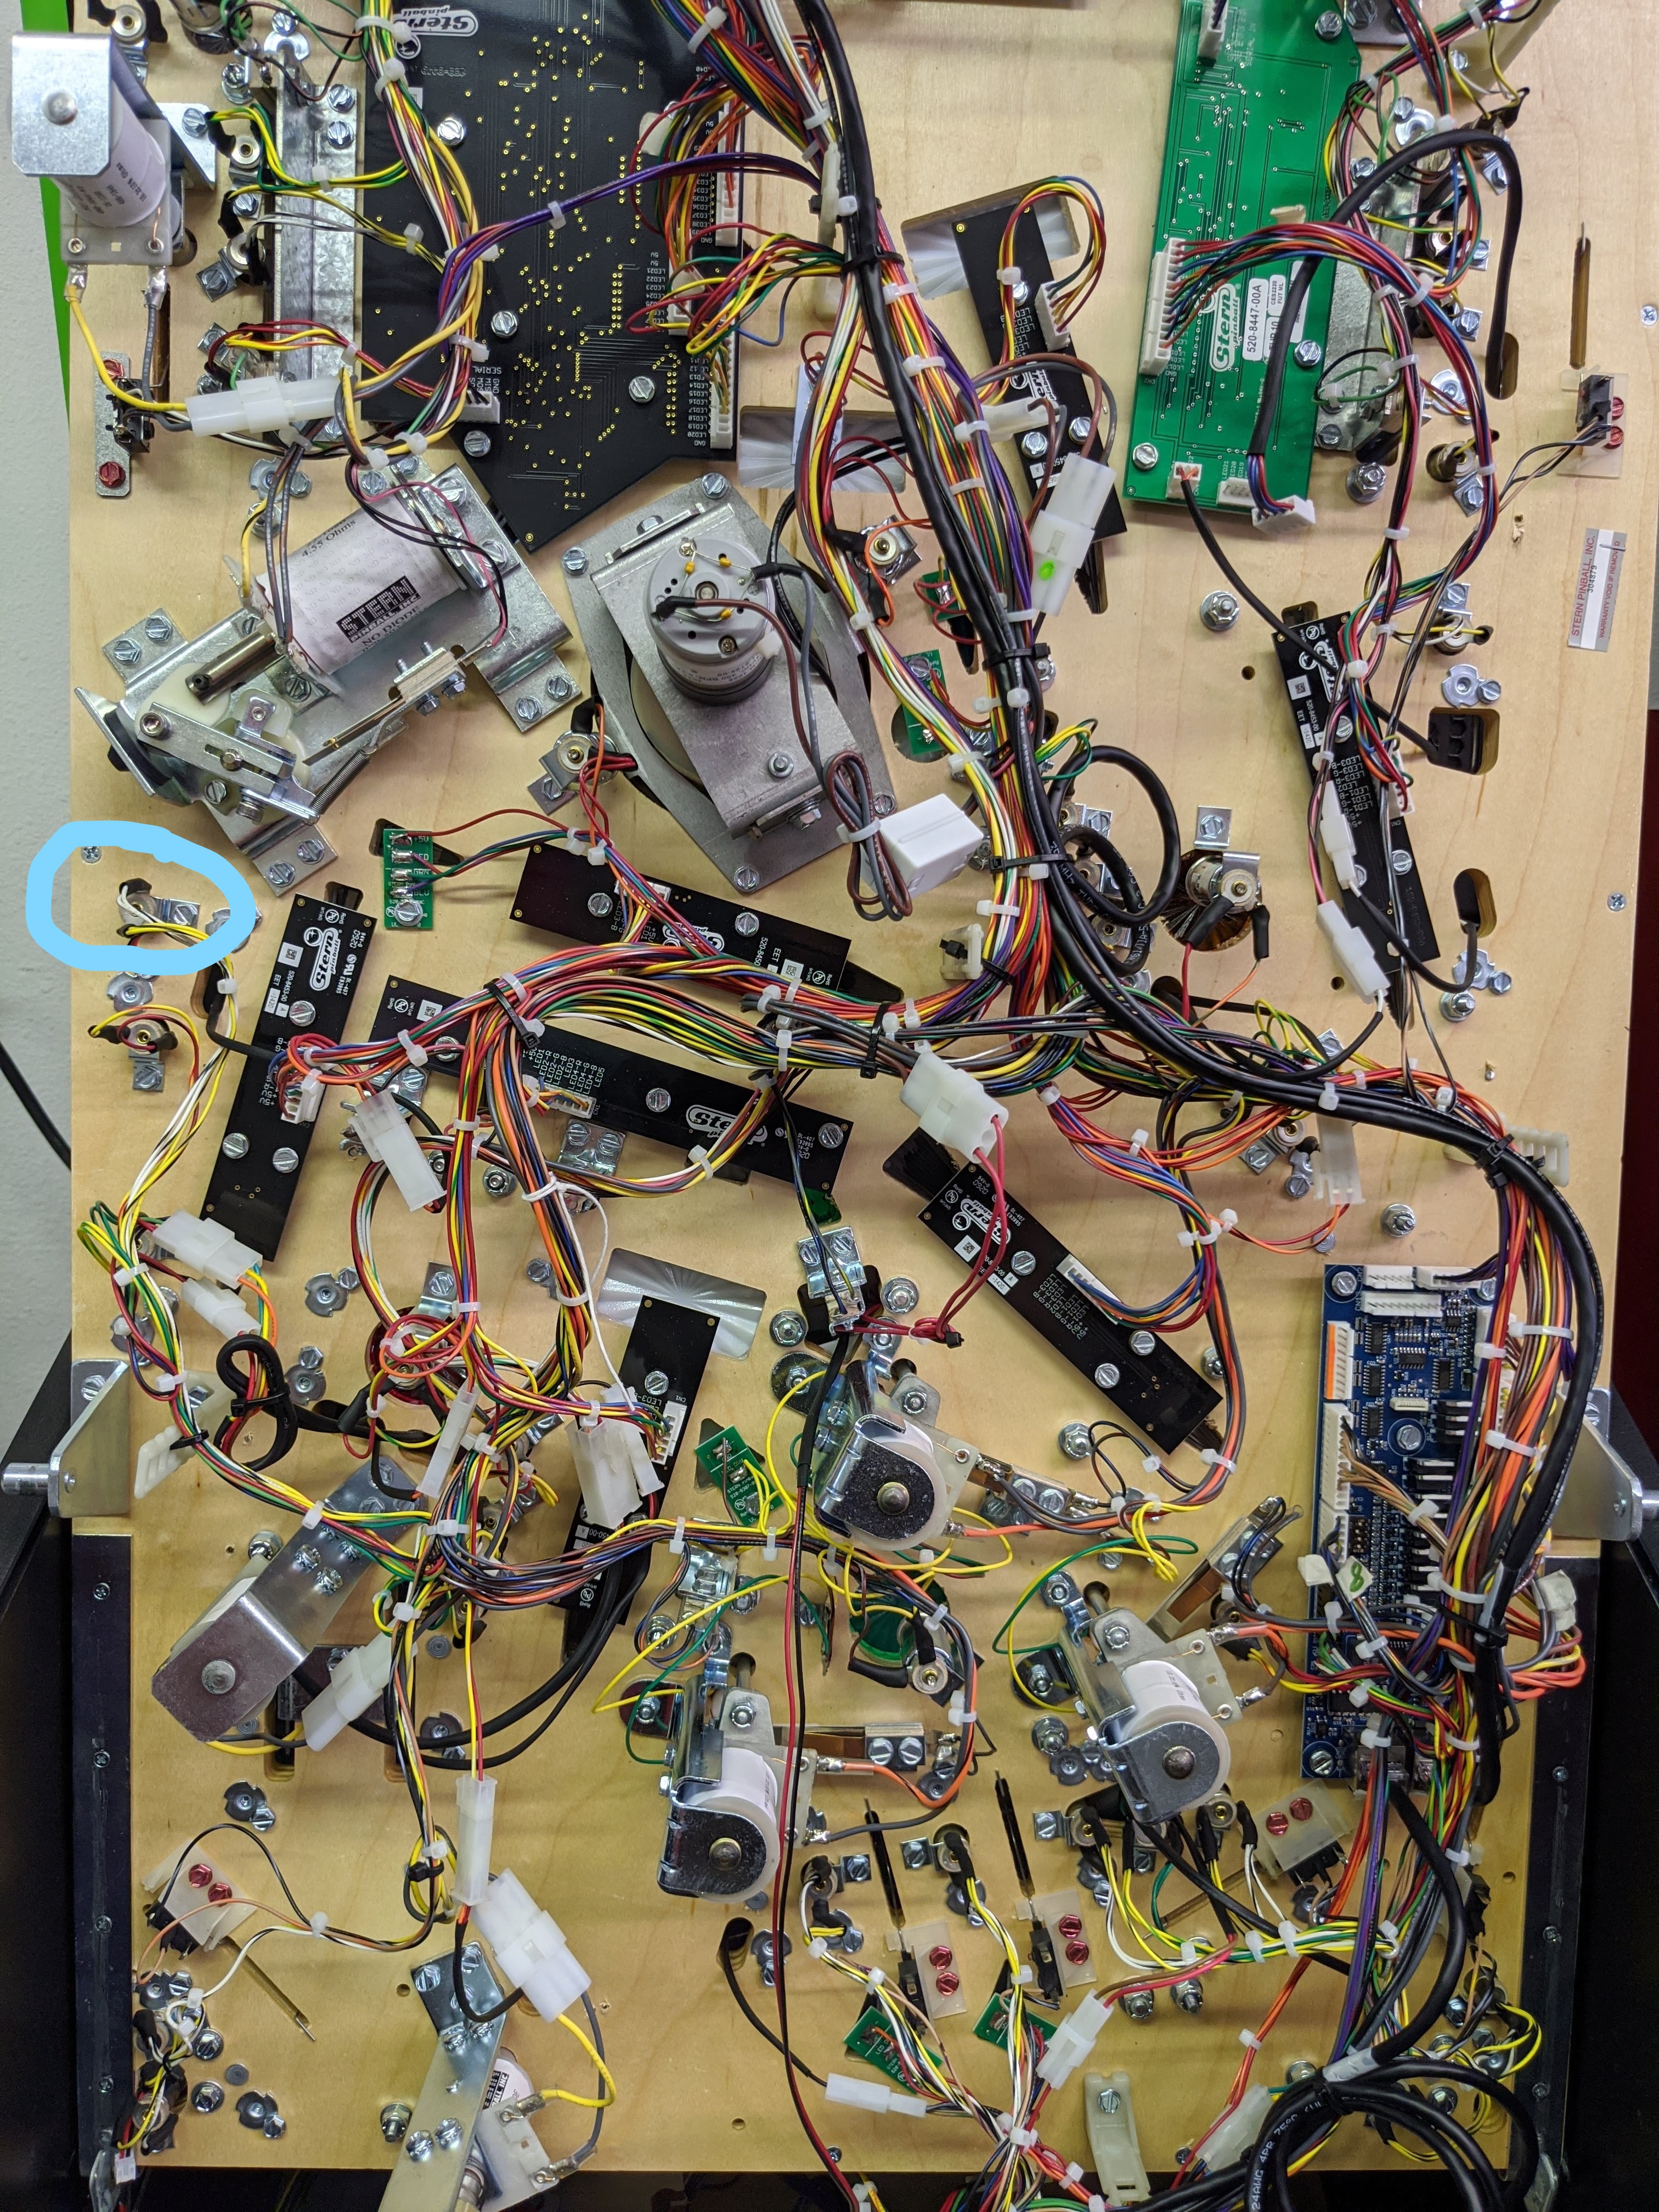
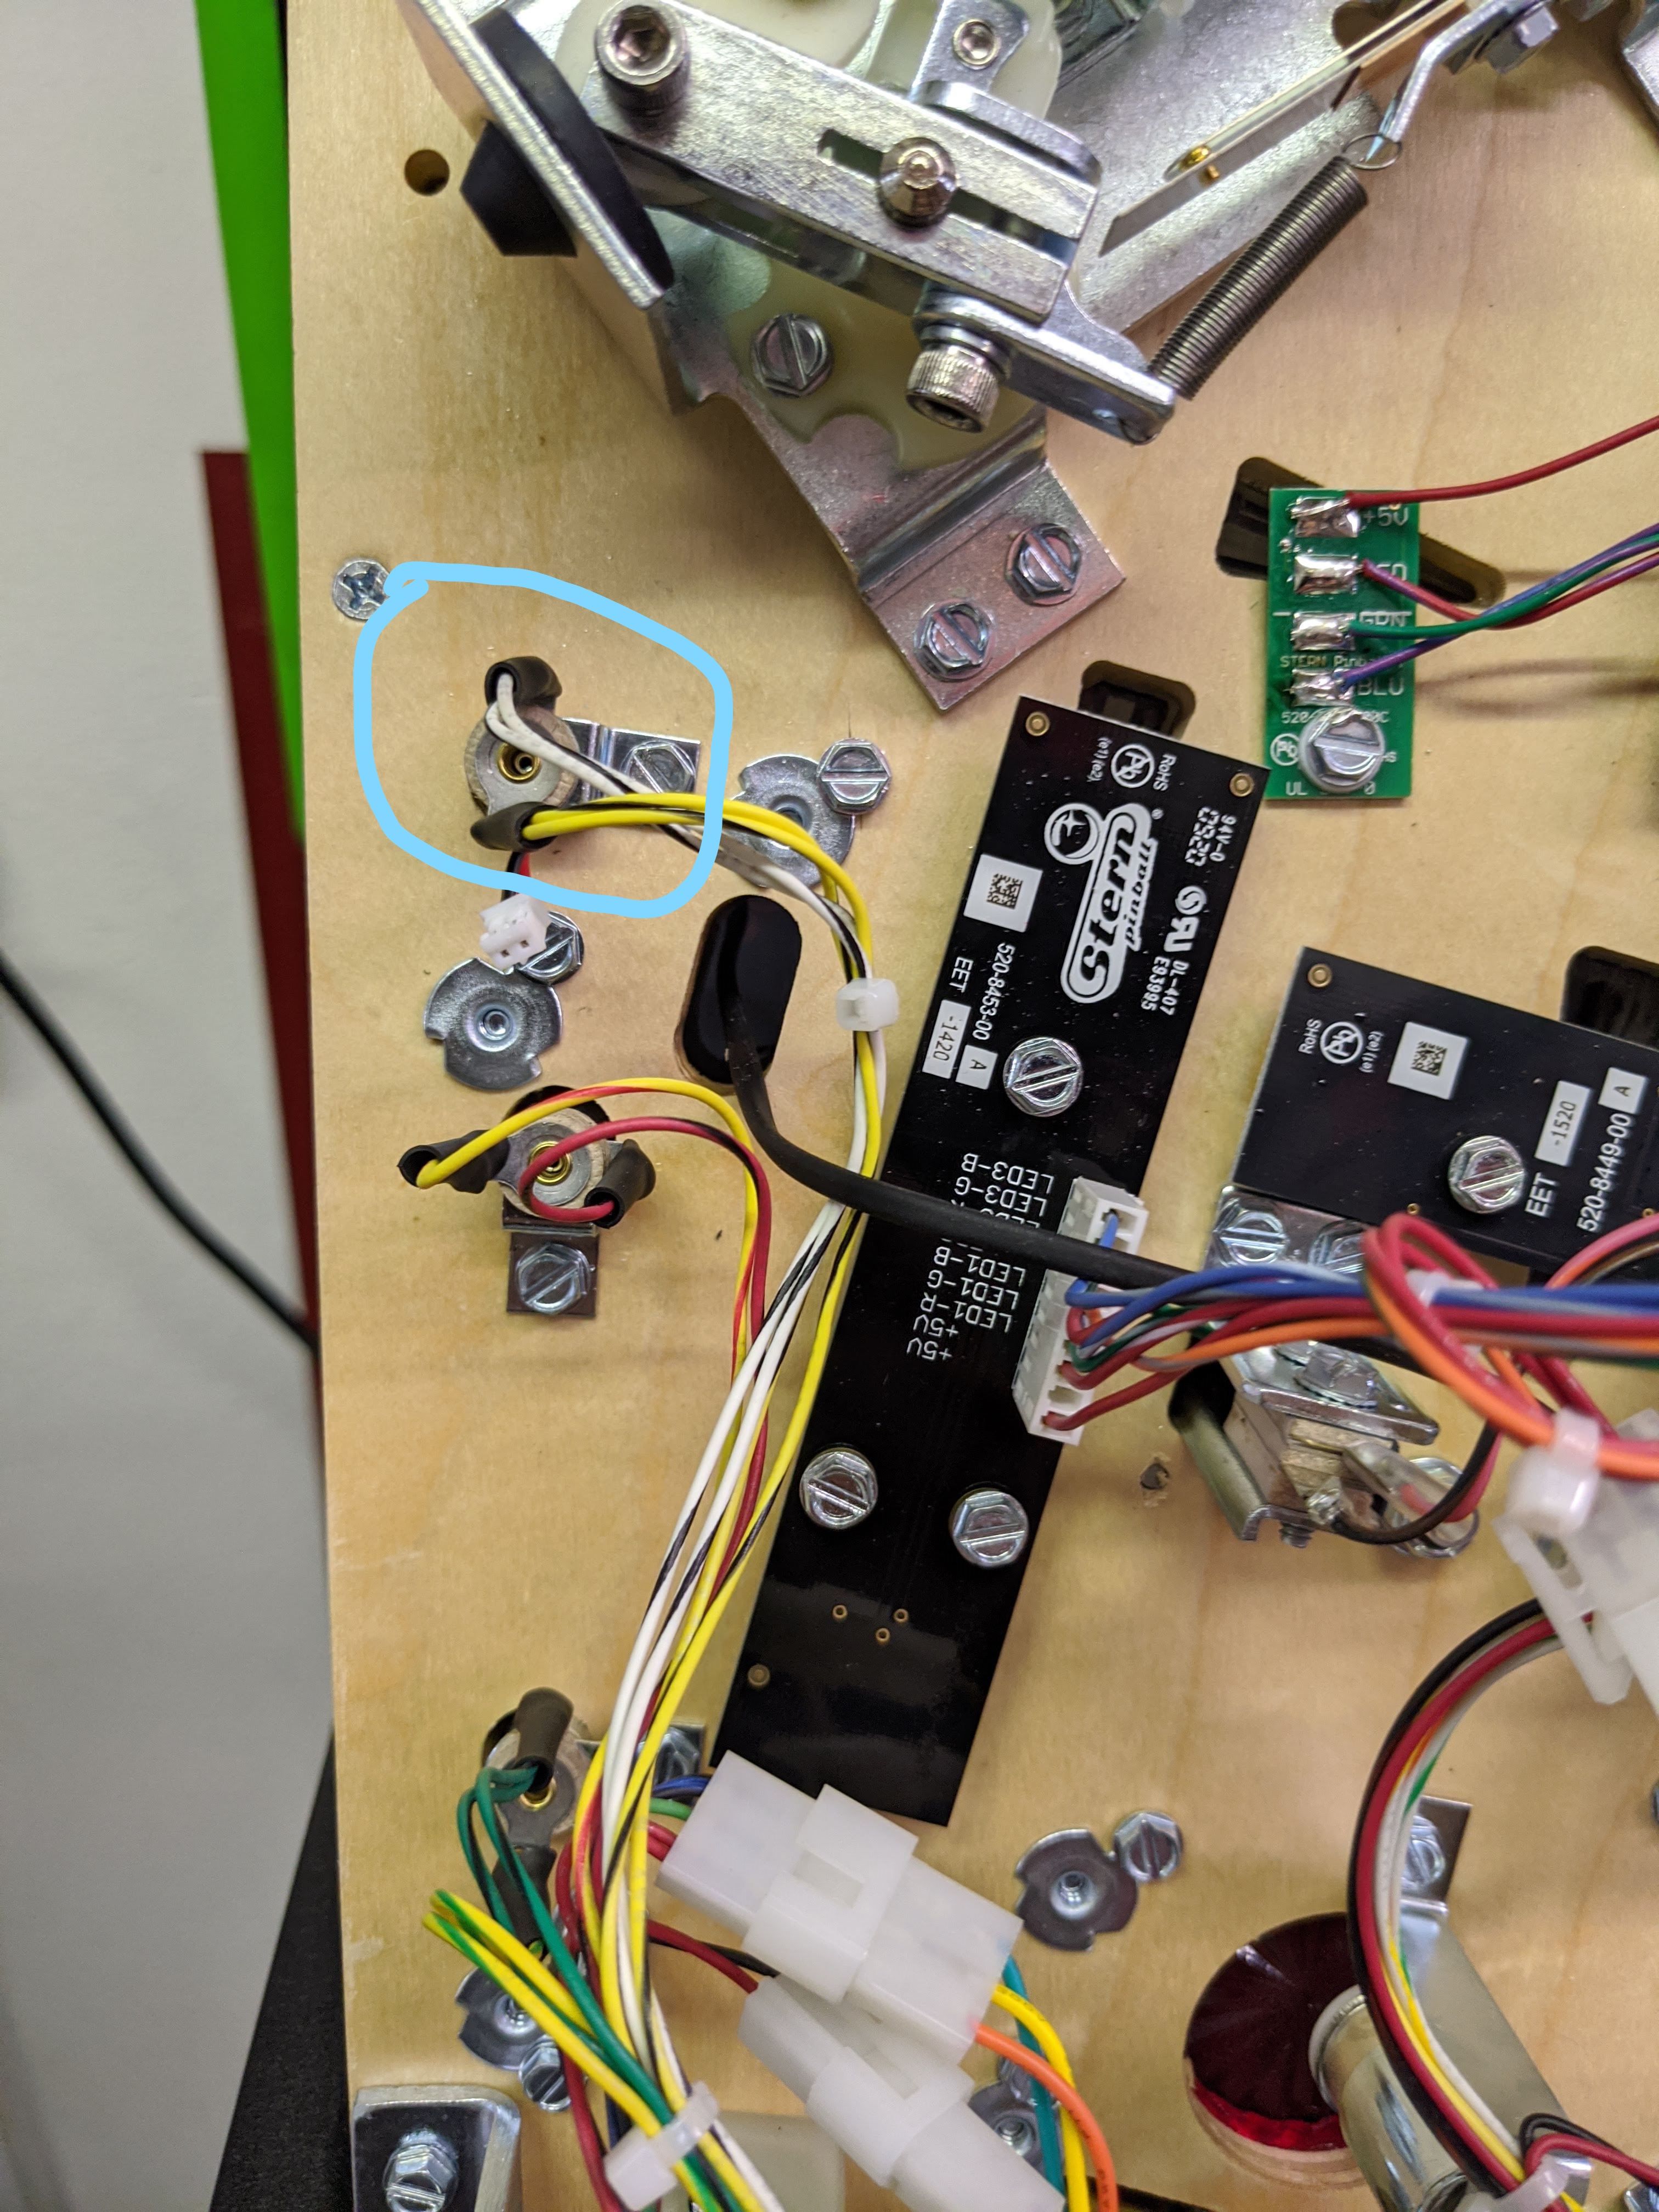
- Lift up the playfield and locate the highlighted bulb that we suggest using. (Note: you can use any GI bulb of your choice, but we recommend this one because it is white and it is in close proximity to the mod. If you have another mod using this bulb you can either us another bulb or use a splitter.)
- Follow the instructions HERE for the installation of the replacement bulb.
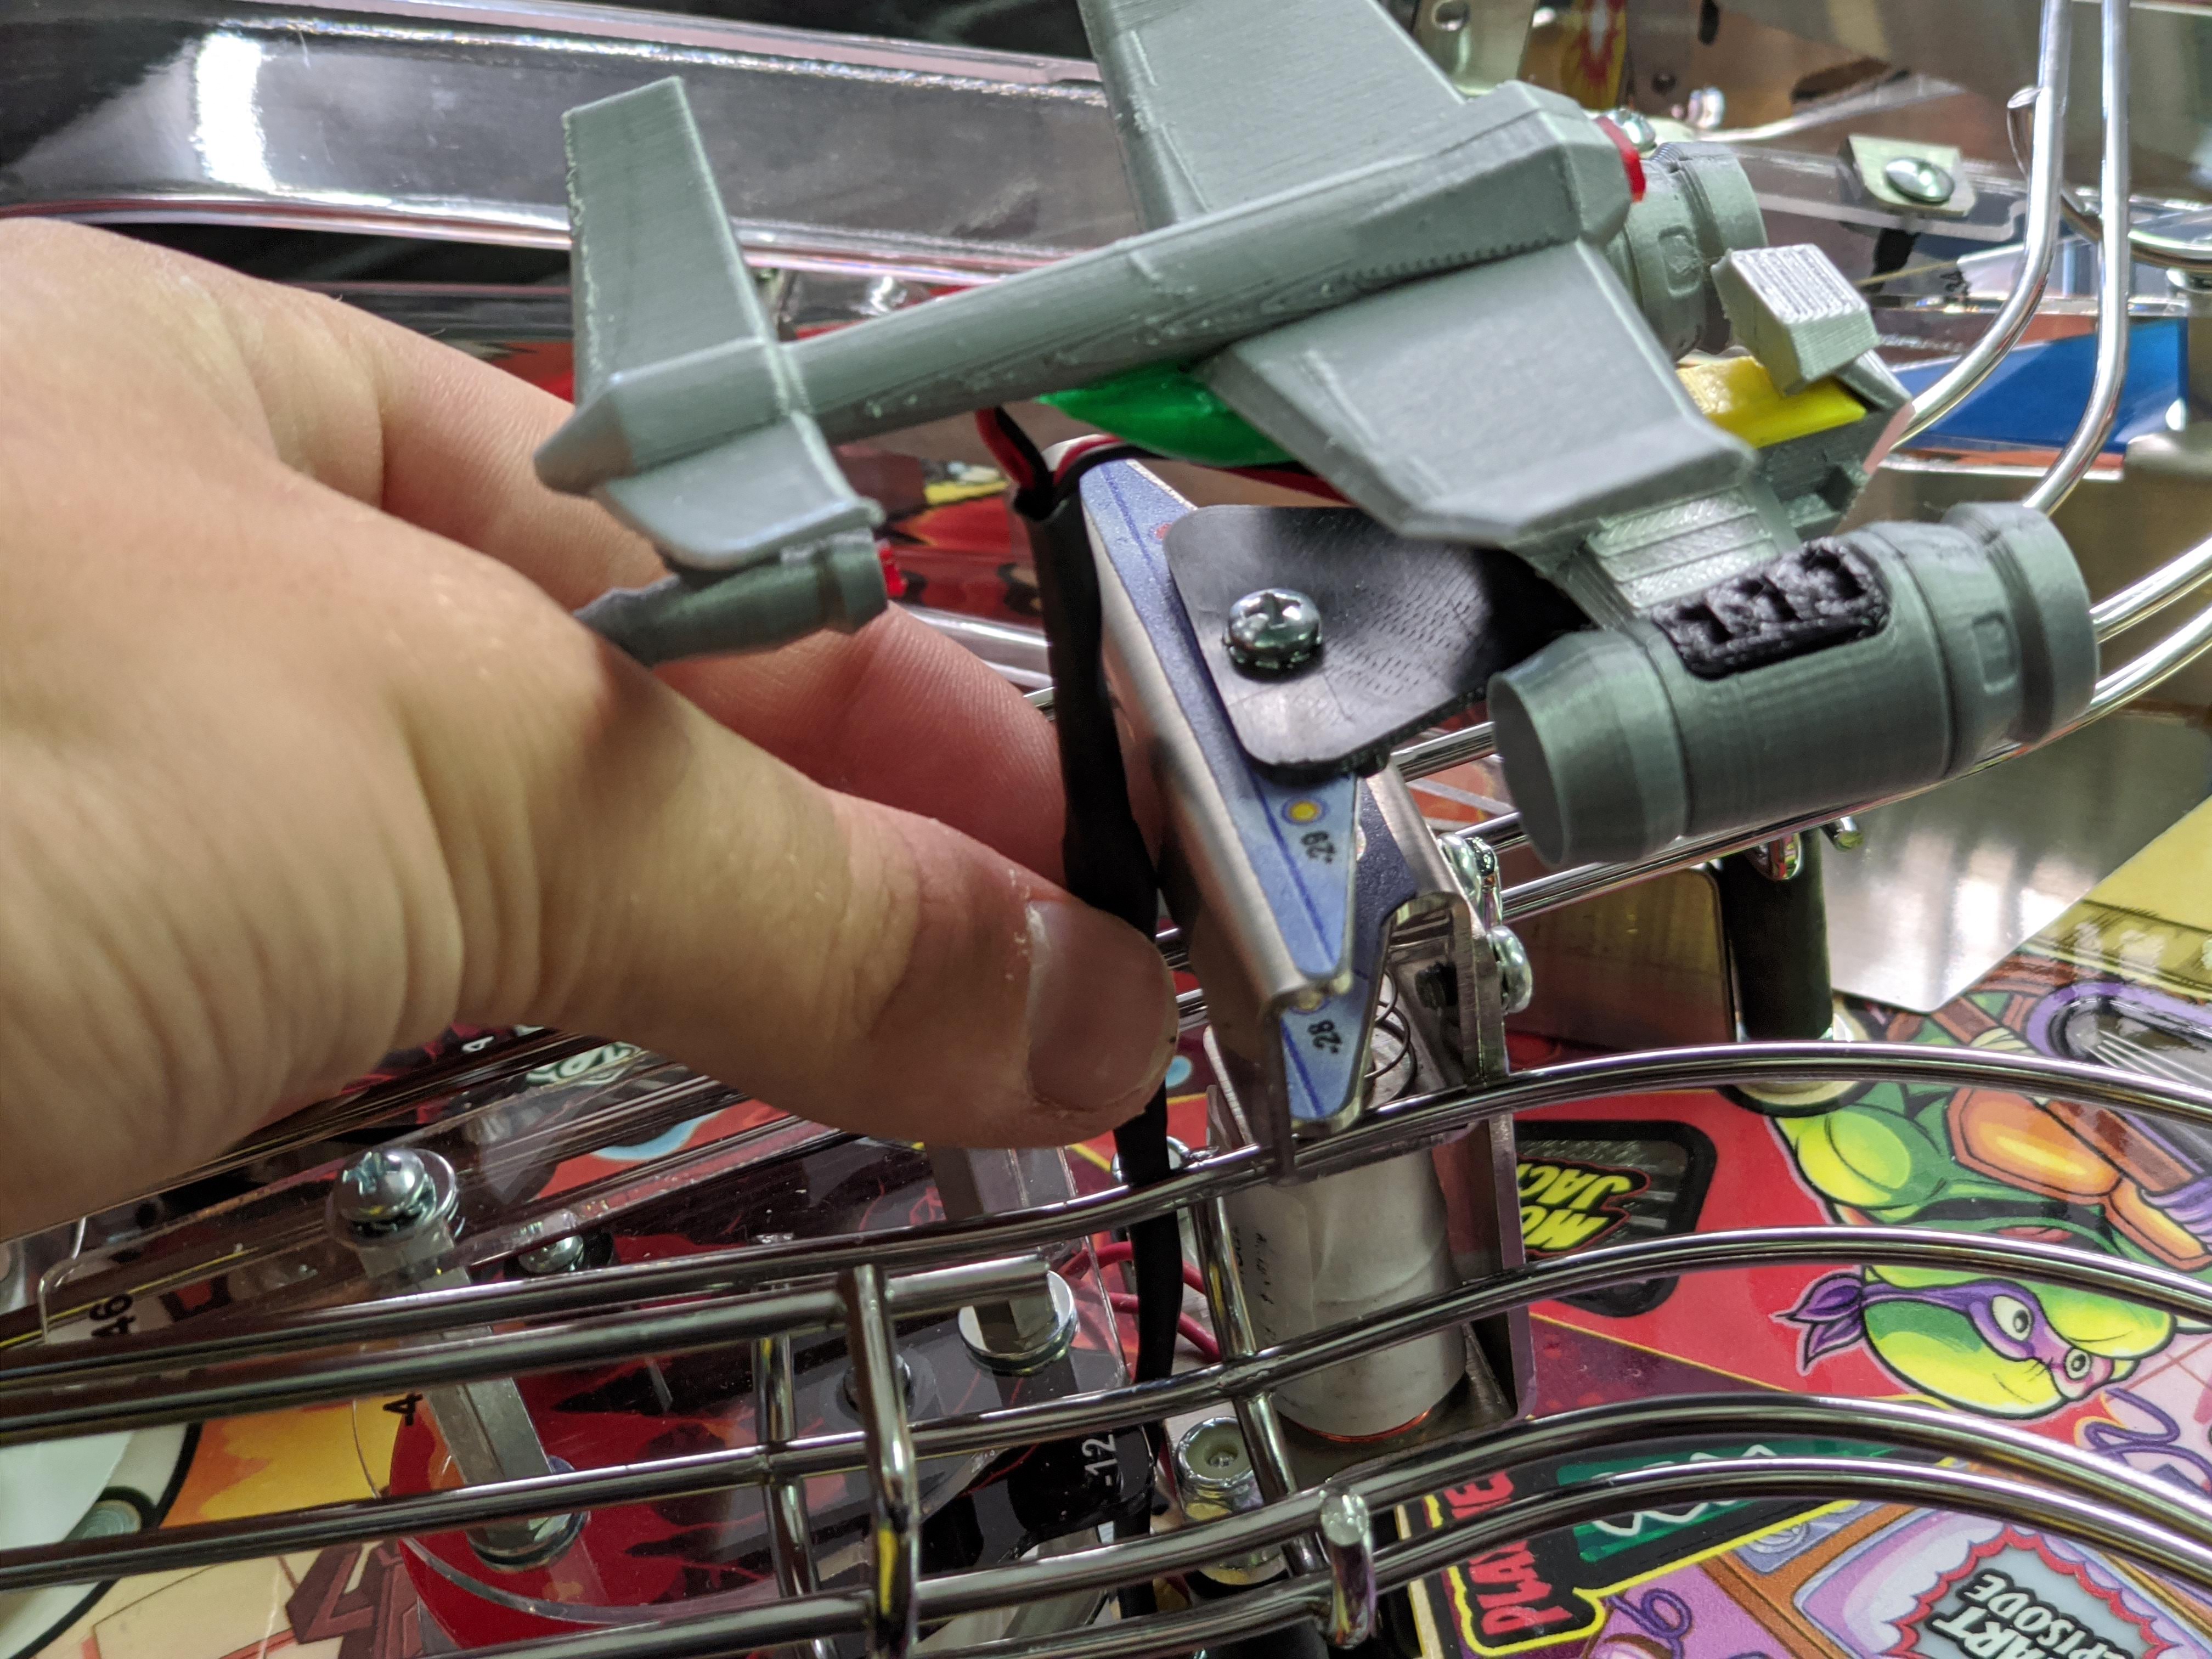
Glider Installation
- Start by feeding the power cable around the left ramp towards the hole in the playfield where the target is.
- Feed the power cable through the hole in the playfield behind the target. You will see that there is a slight notch in the pop bumper plastic for the wire to rest in.
- Feed the wire down until it is almost taught with the glider.

- Remove the screw on the top of the coil. Use a pair of pliers or a wrench to hold the shaft still while you remove the screw. There are two flat spots on the shaft where you can use pliers. You may have to rotate the shaft to expose them.
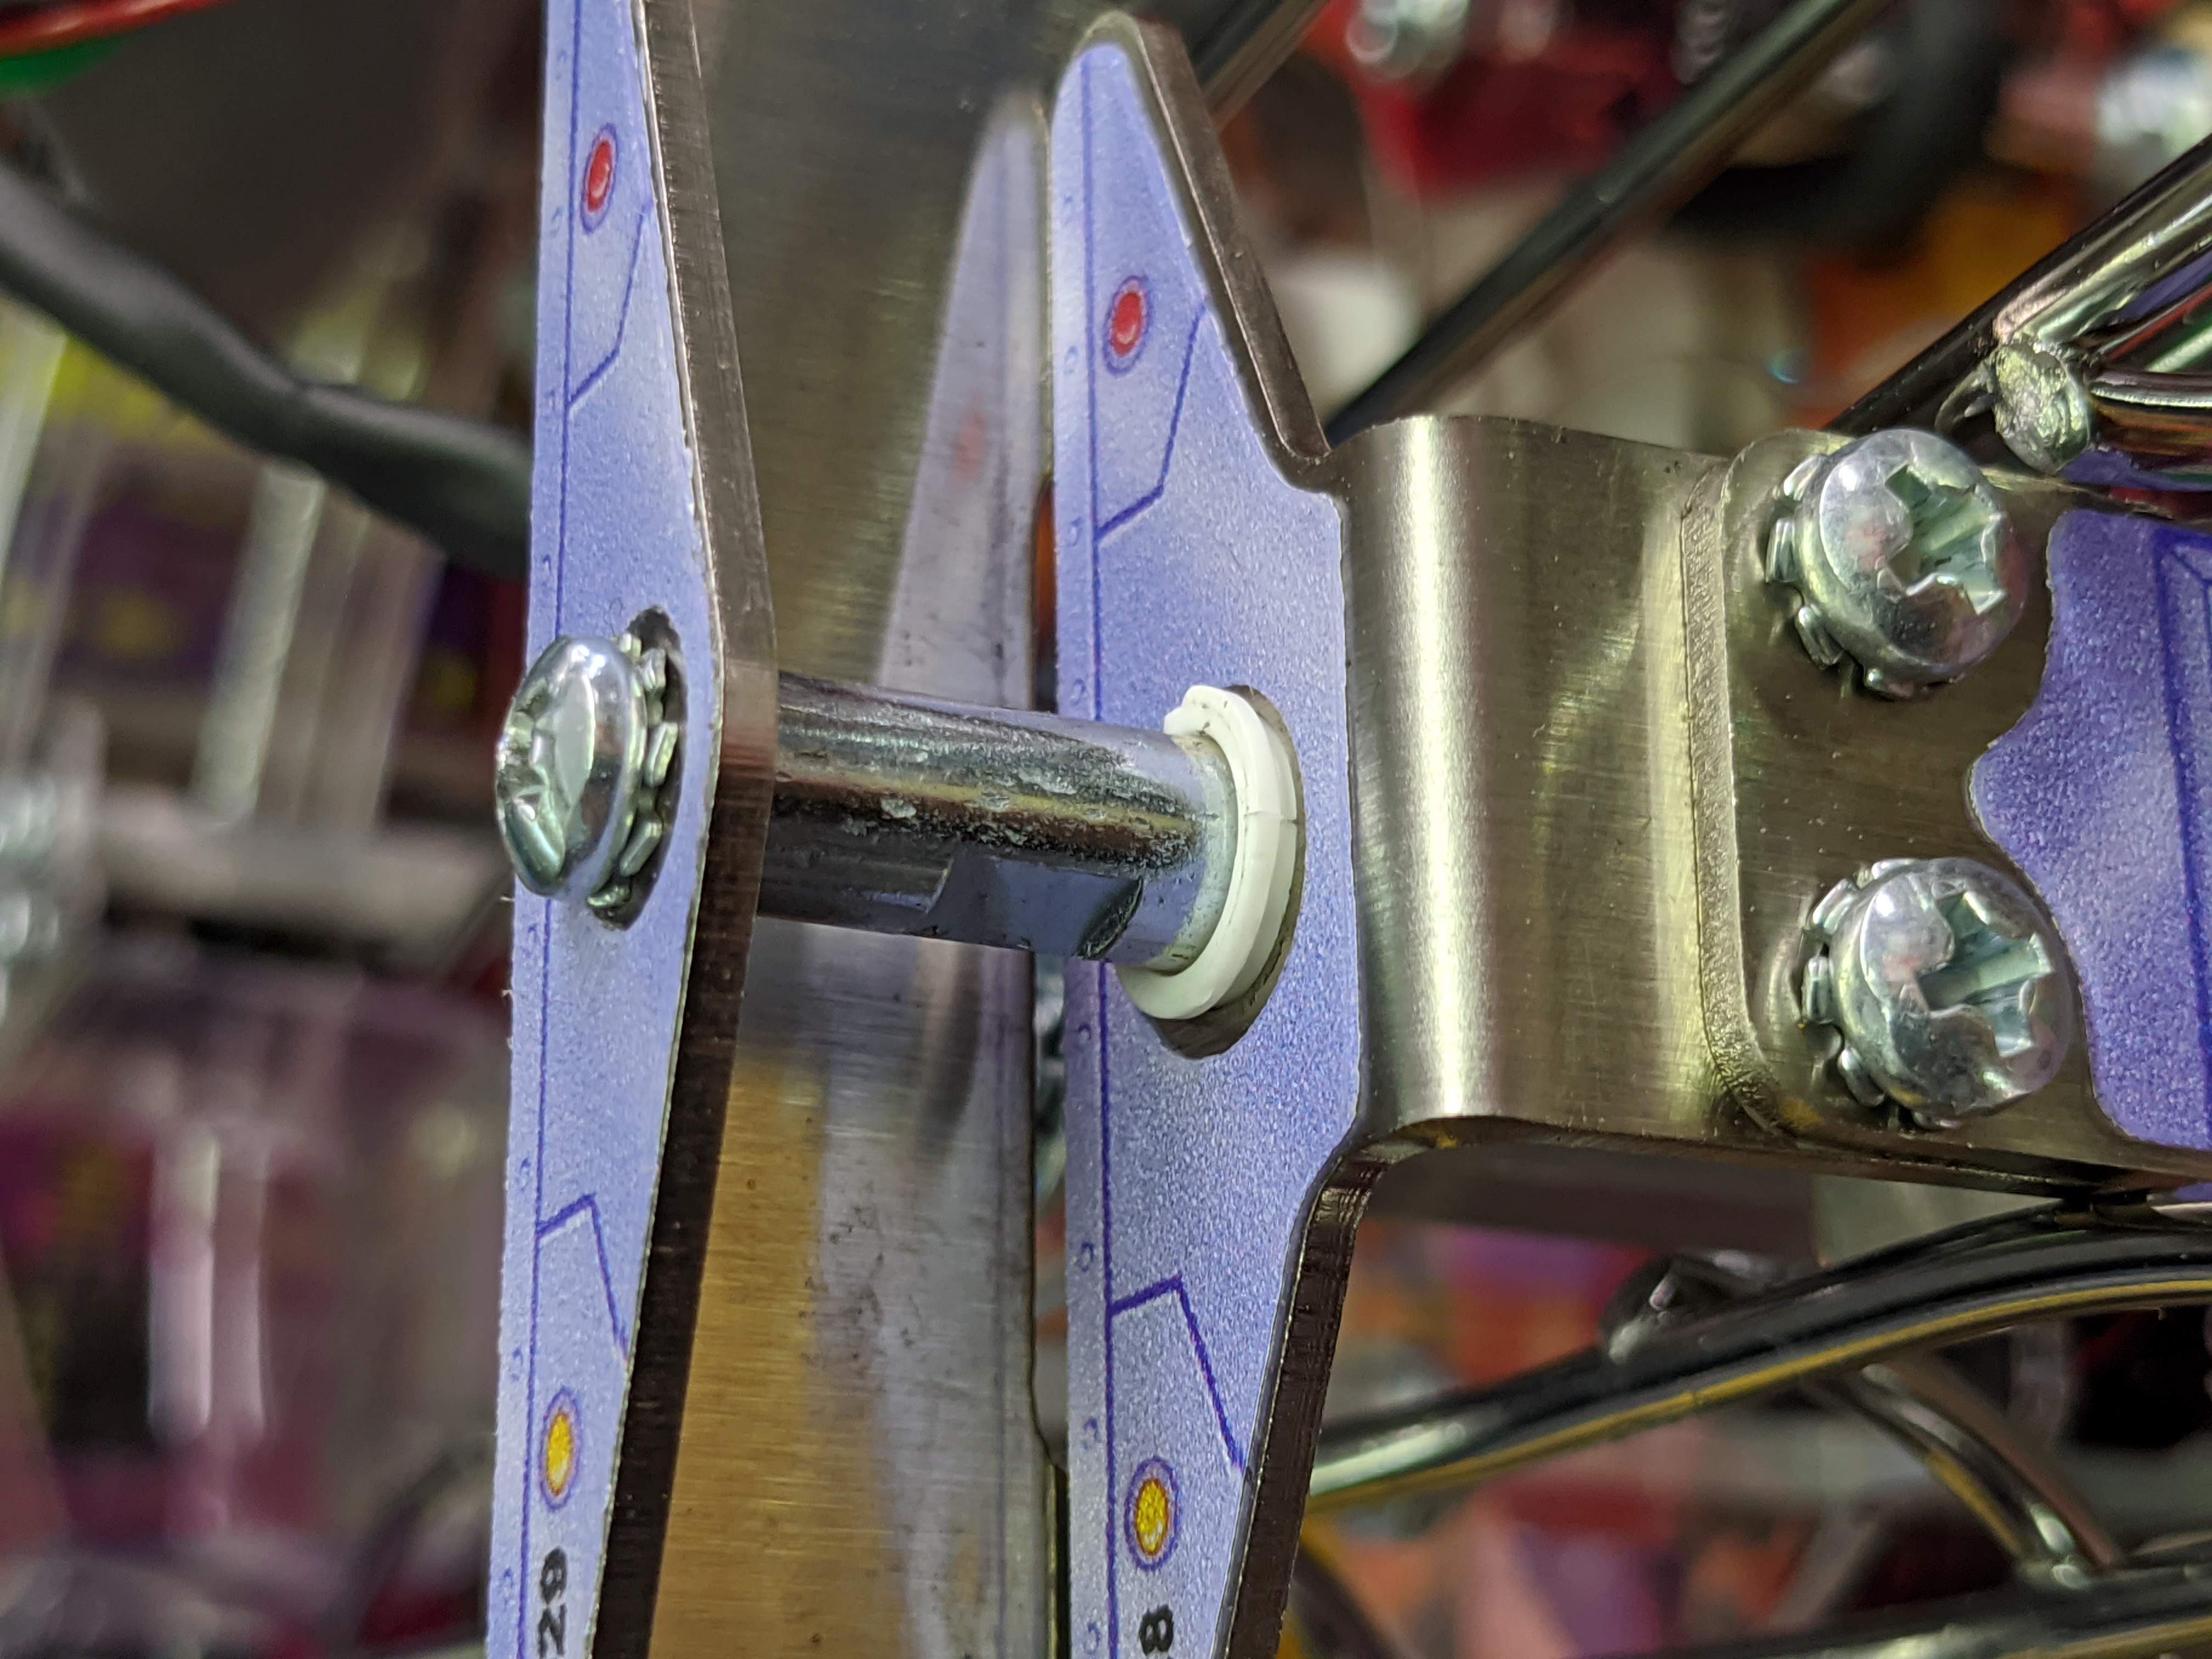

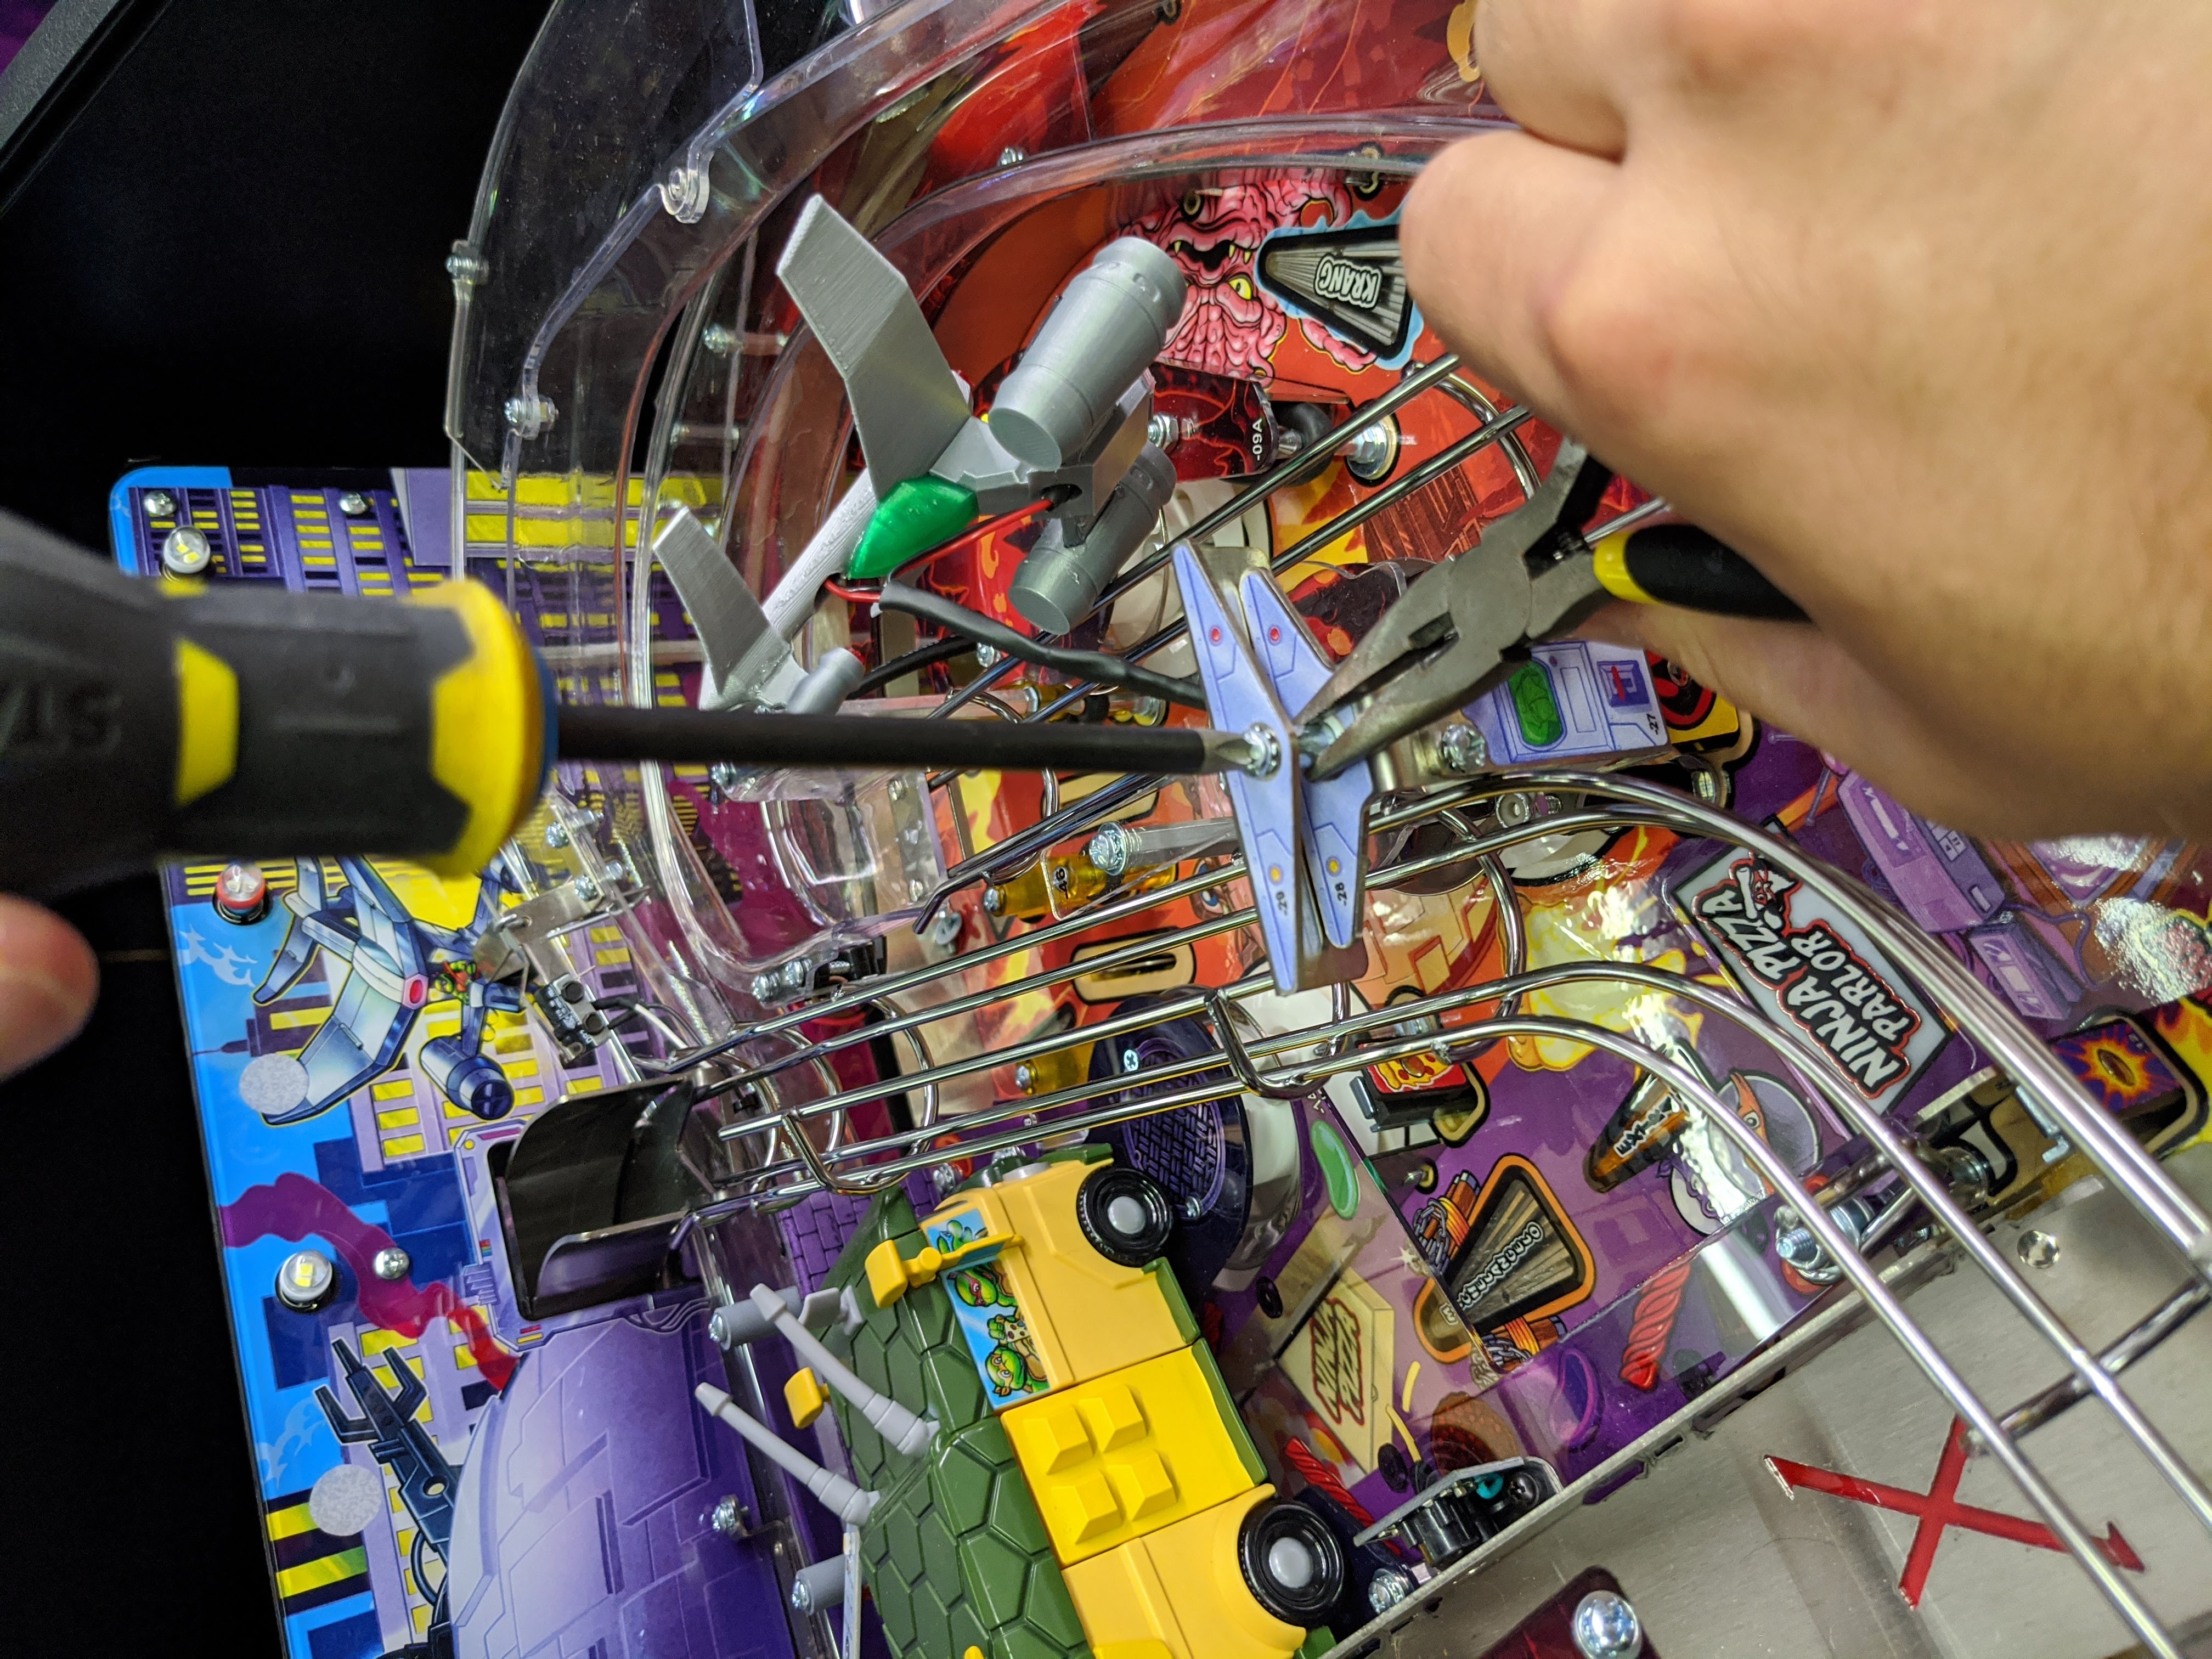
- Reverse the last step but install the included black mounting bracket tape side up. There is a "ridge" on the bottom side of the bracket that will align perfectly with the metal piece in the game.
- Remove the tape backing.
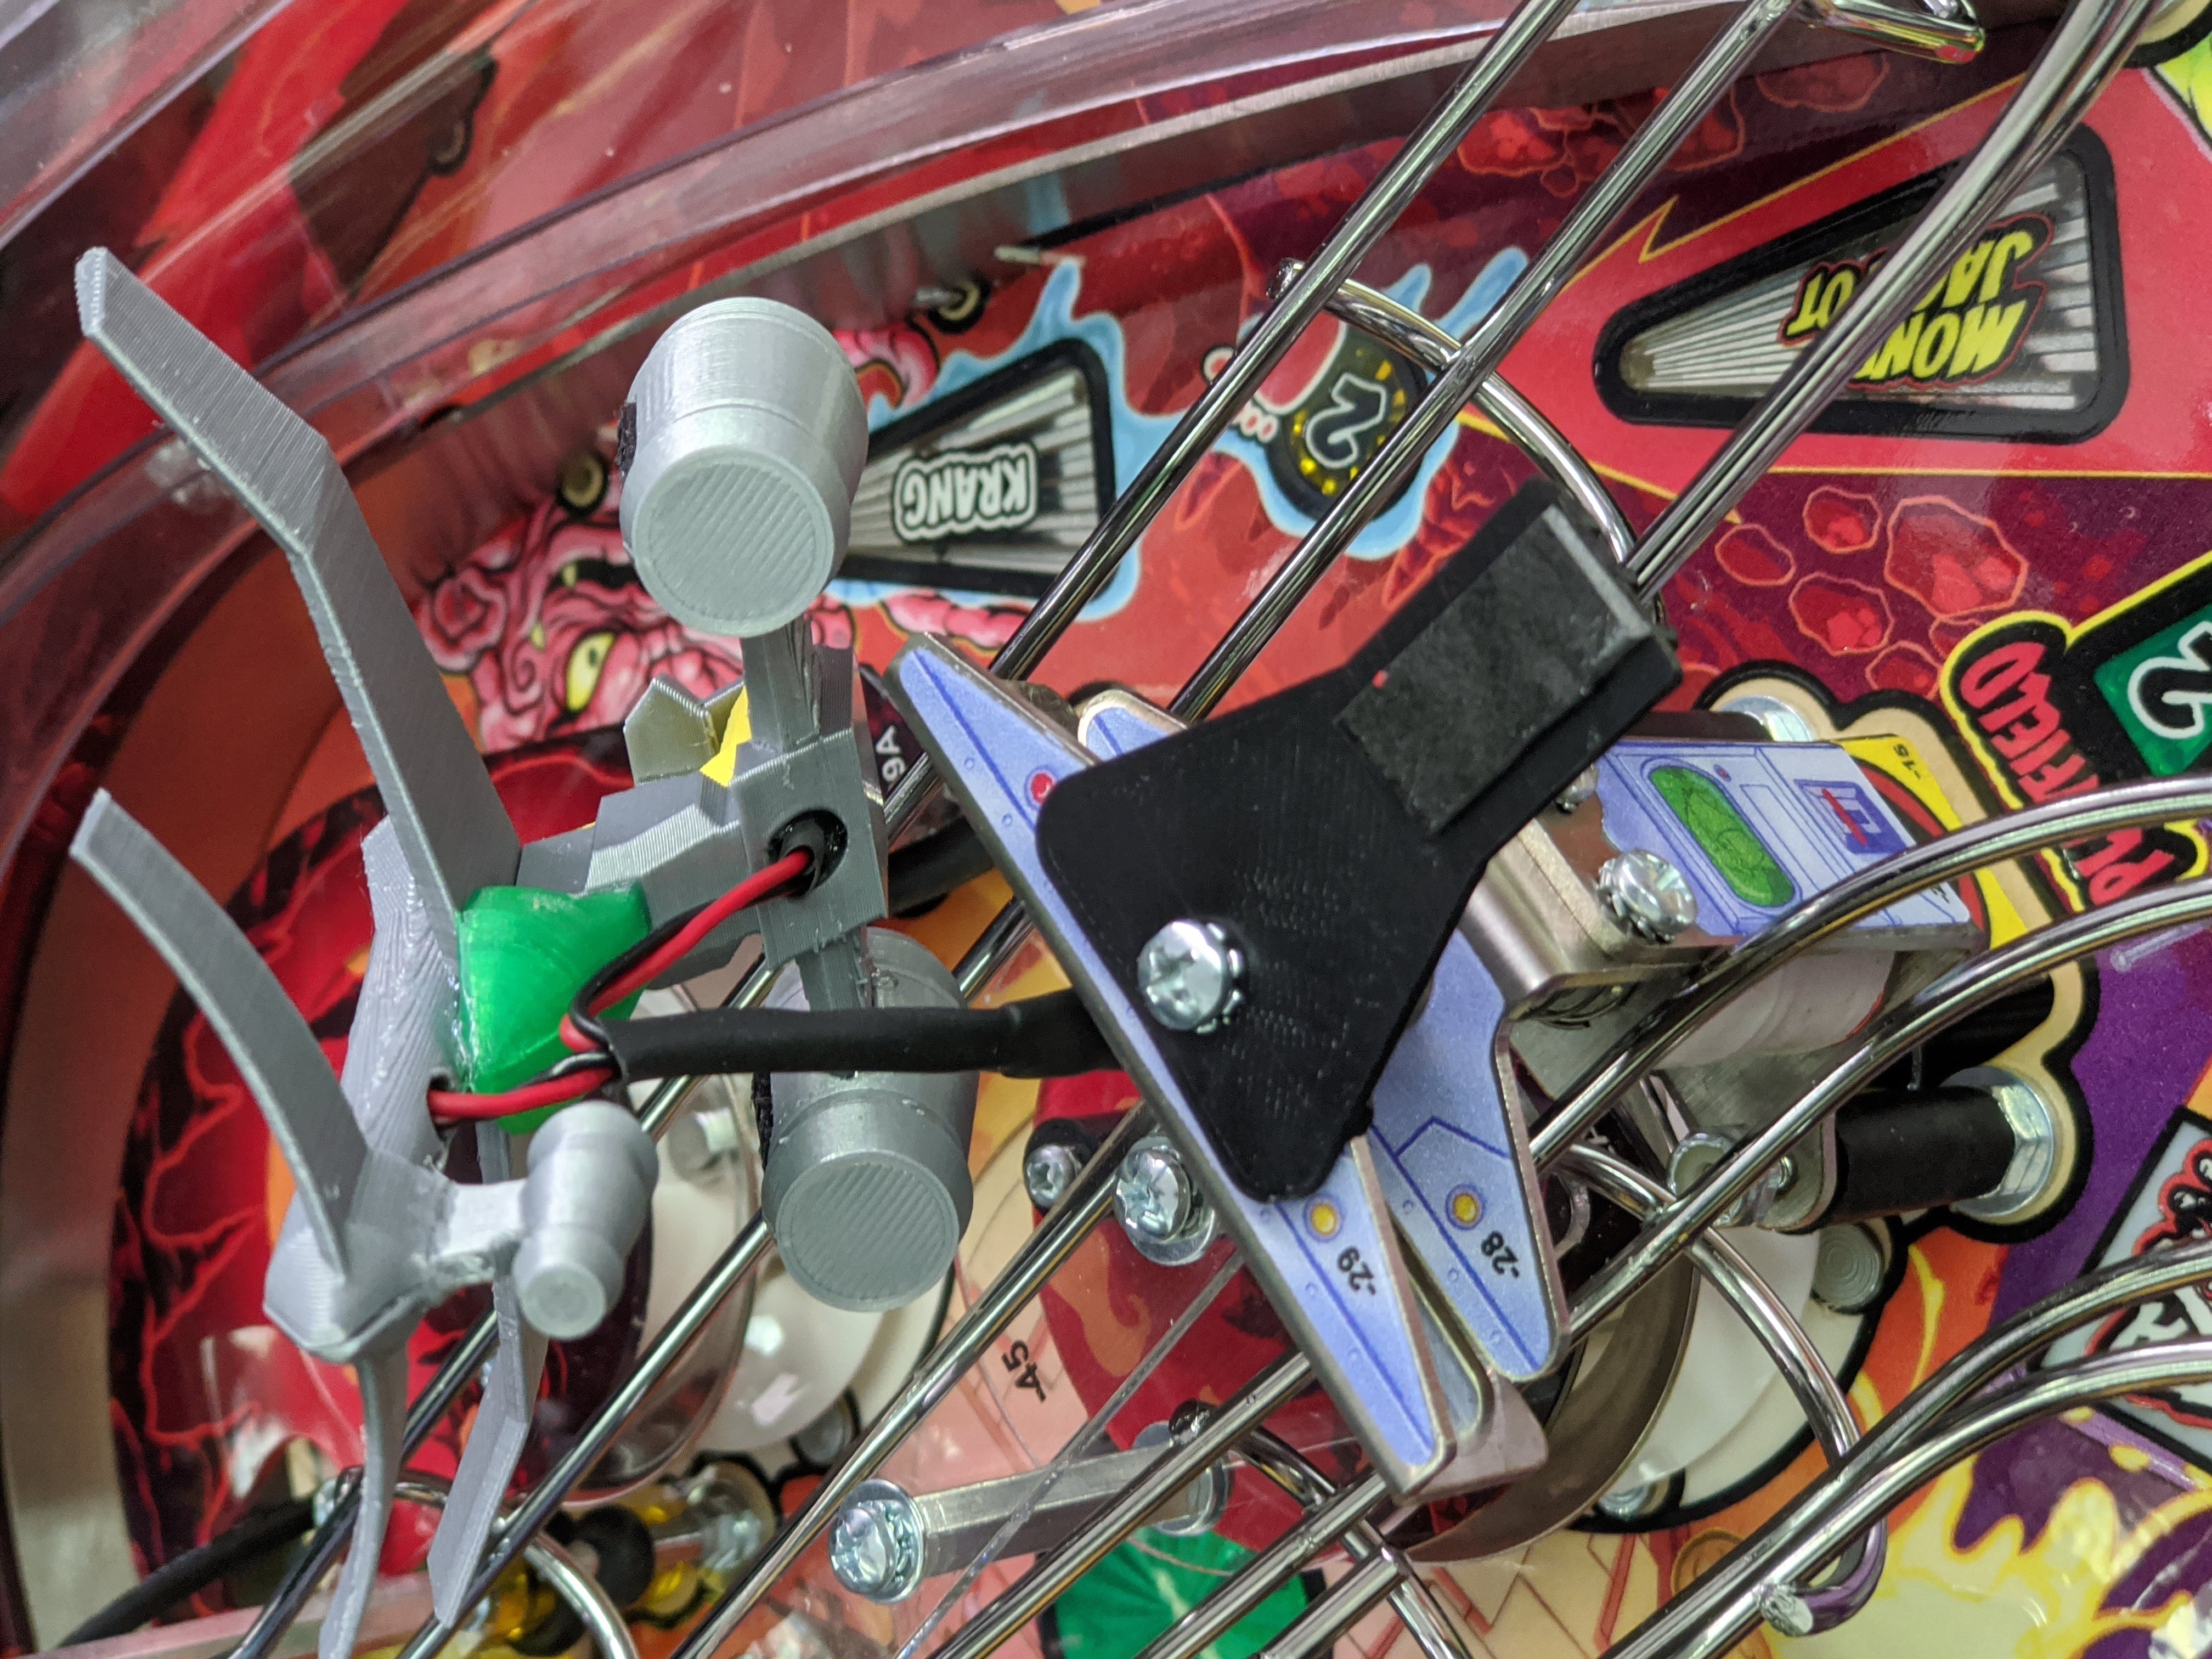
- Align the glider base to the front of the bracket (or however you like) and press down firmly to engage the tape. This tape will get stronger adhesion as time goes on - so do not worry if the adhesion is not ideal right away!
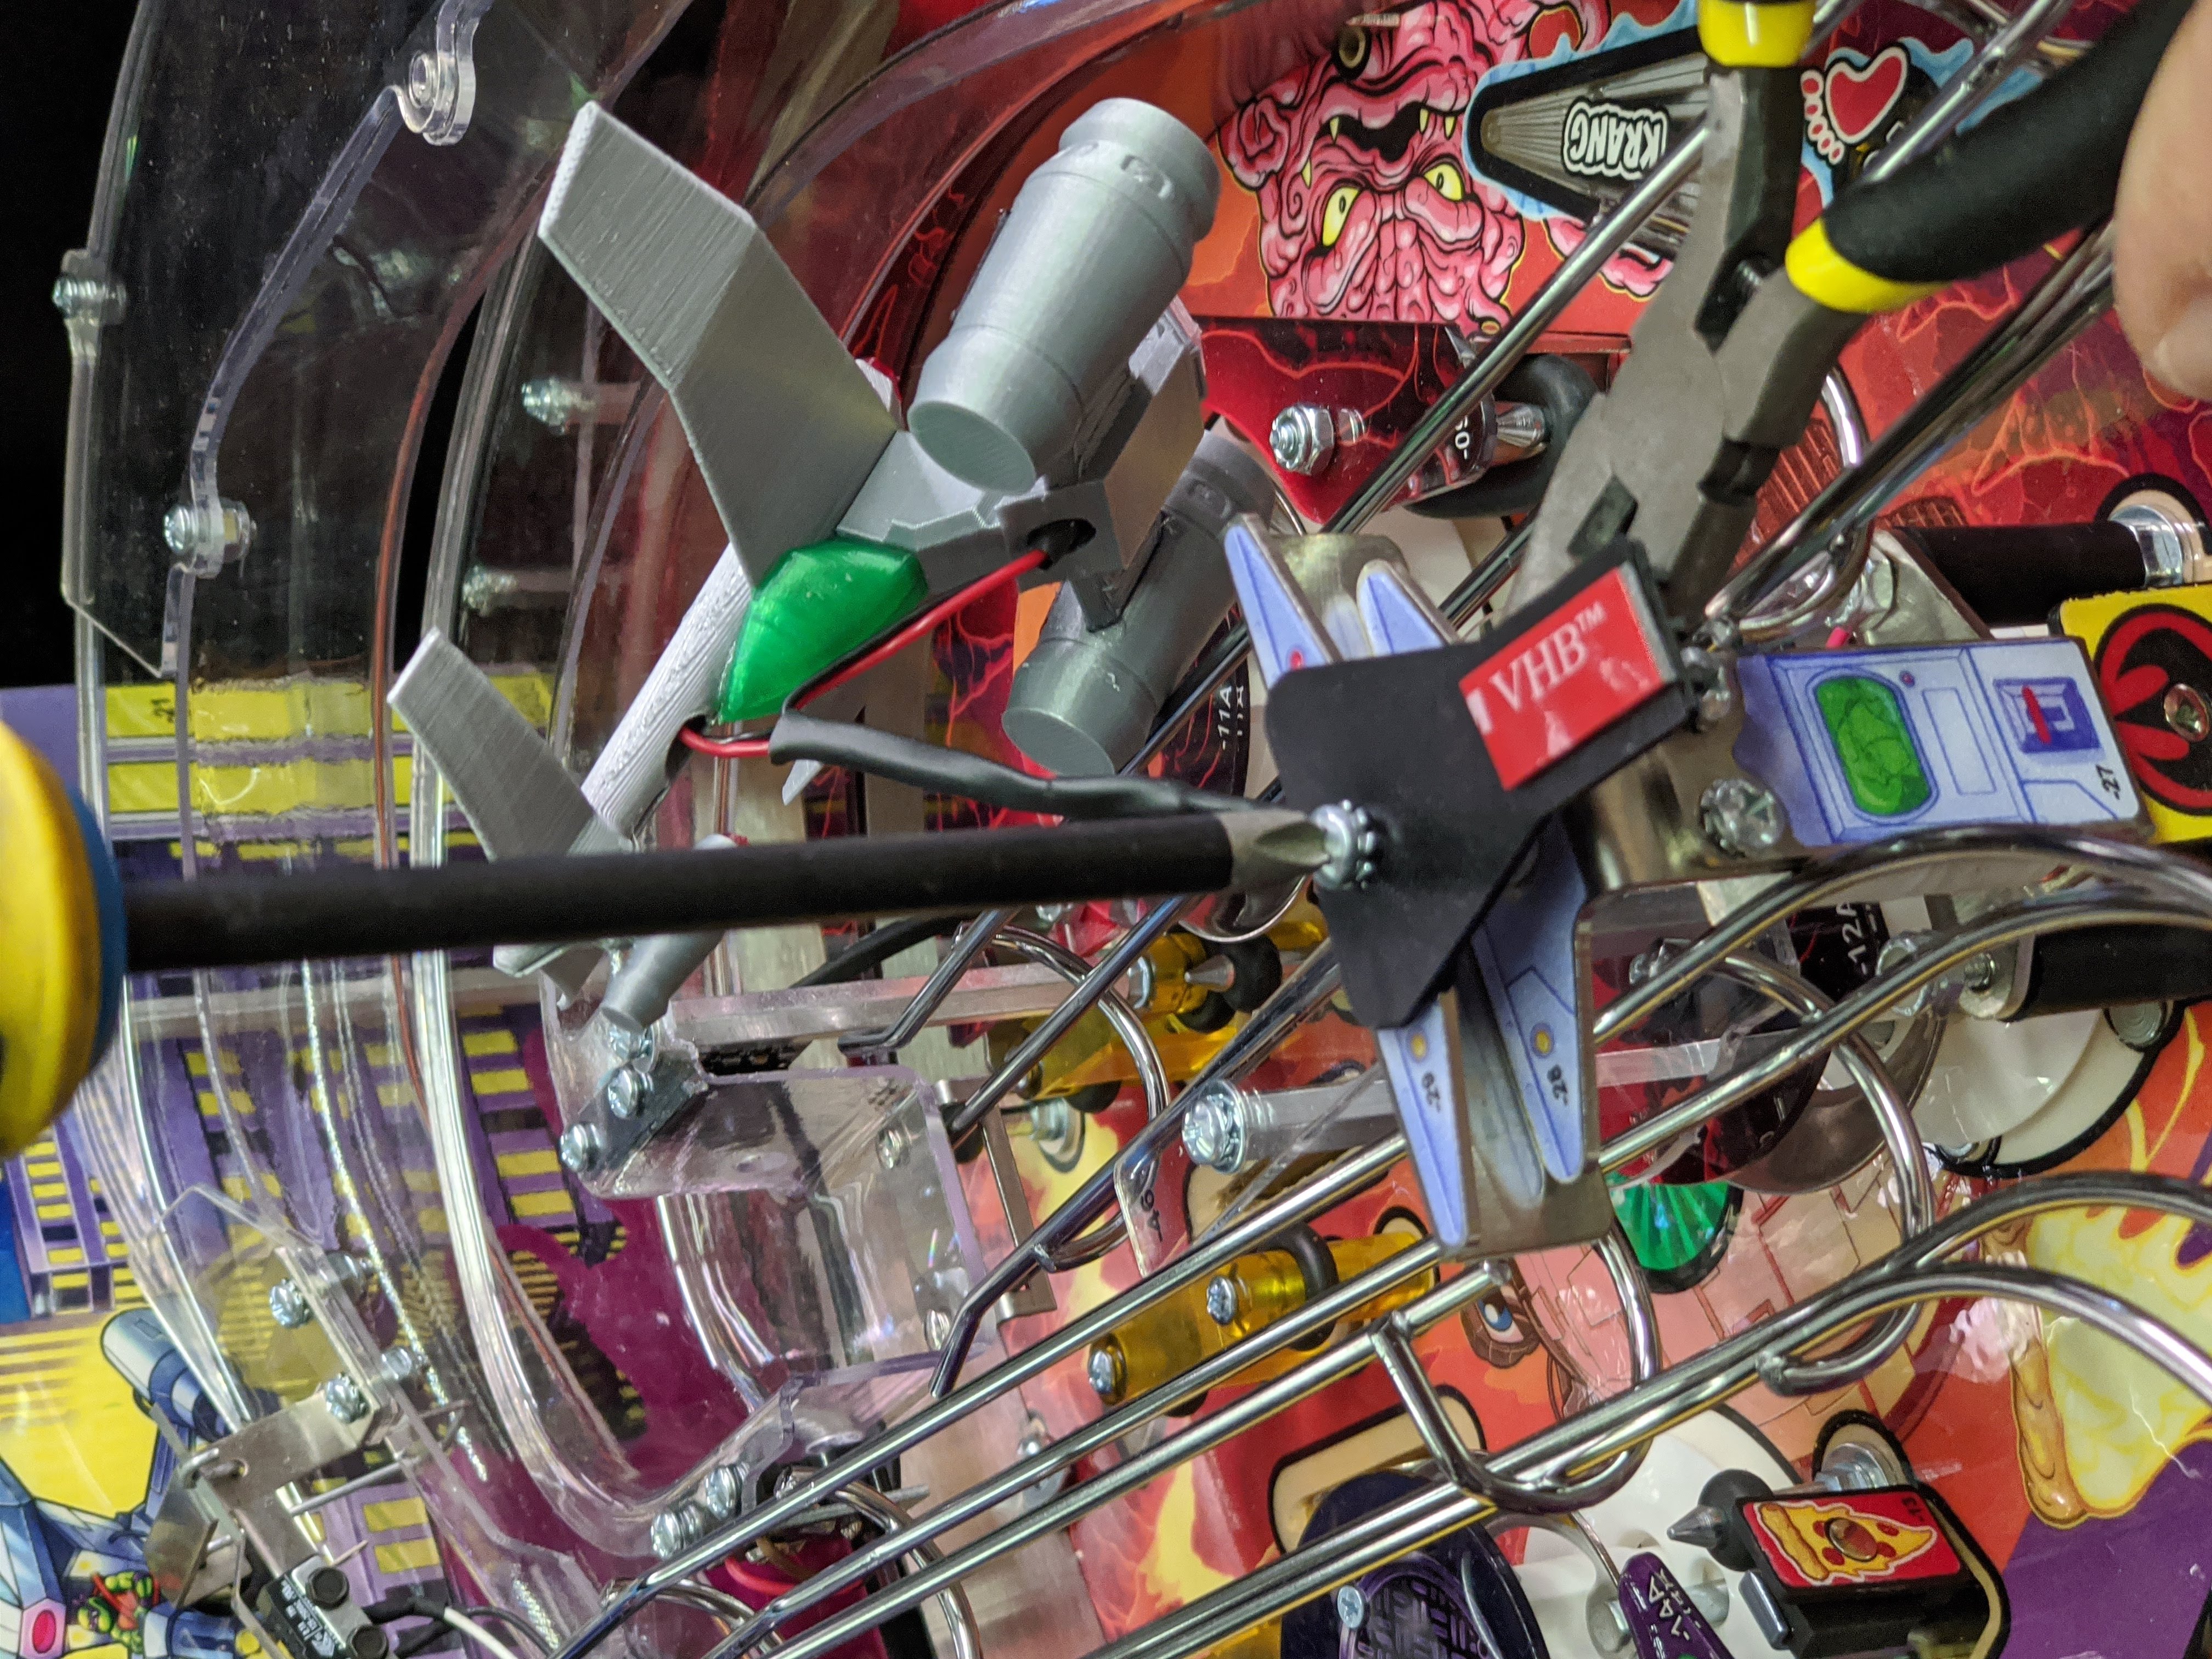
- Pull the power cable taught.
- Flip the playfield up again and plug in the power cable to the replacement GI bulb.
- Lower playfield. Turn on game to make sure that the lighting is working!

Install complete!
Comments
0 comments
Please sign in to leave a comment.