

DANGER ELECTRICAL SHOCK
Pinball machines have high voltages which can cause DANGER TO LIFE AND LIMB. TURN POWER OFF and UNPLUG PINBALL MACHINE prior to installation. Pinball machines are high voltage and can cause electrical shock.
SAFETY GLASSES are also recommended while working with or installing pinball parts.
Please follow these safety instructions as well as all installation instructions. Failure to follow these instructions may result in damage to the pinball machine, accessory or other parts. Please see our Disclaimer for associated risks and responsibilities (Section 13 in our Terms of Service) prior to installation.
Images included in these instructions are of an installed prototype and may vary from your product slightly.
If you have questions or concerns regarding the proper installation of this part, please contact us for assistance.
When removing screws from the playfield, reinstall by first turning them counter-clockwise to match the original groove in order to respect the integrity of the playfield wood.
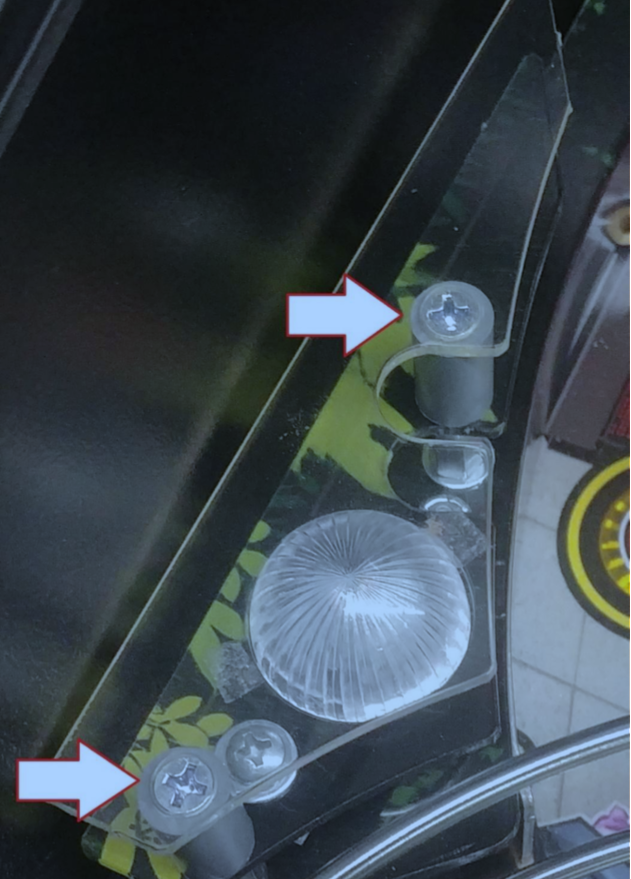
Etape 1 : Ouvrer votre flipper et déposer sa vitre. A l’aide d’un tournevis, dévisser les deux vis qui maintiennent le support transparent N°56 et placer à sa place le support gris fourni dans le kit. Ce support gris est légérement plus long que celui d’origine afin de permettre plus aisément le placement de l’unité centrale
Step 1: Open your pinball machine and remove its glass. Using a screwdriver, unscrew the two screws that hold the transparent support N°56 and place the gray support provided in the kit in its place. This gray support is slightly longer than the original one to allow easier placement of the central unit
Etape 2 : Déconnecter l’écran en séparant les deux petits connecteurs blancs que vous voyez sur l’image suivante
Step 2: Disconnect the screen by separating the two small white connectors that you see in the following image

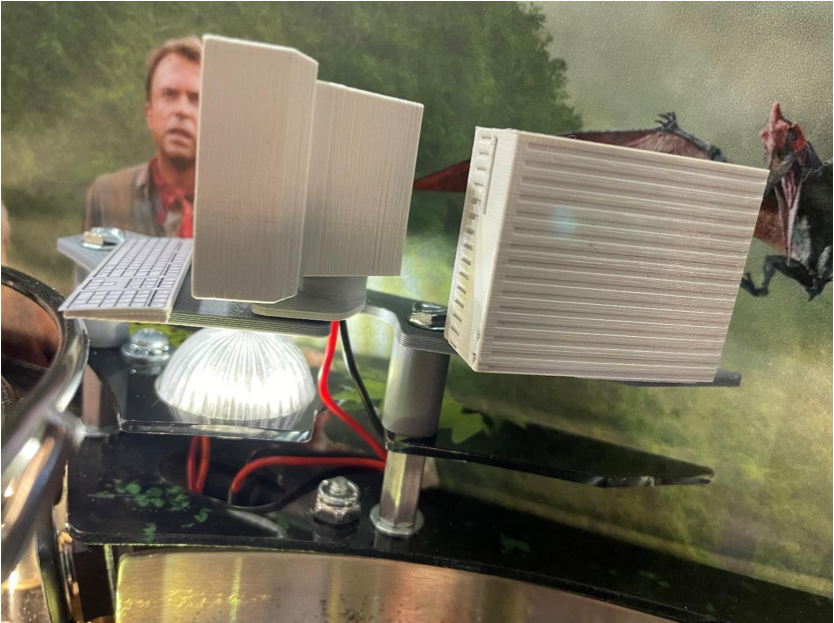
Etape 3 : Placer l’ordinateur de Nedry sur la platine grise et passer les cables dans le même trou où passent les cables qui alimentent le globle transparent
Step 3: Place Nedry's computer on the gray plate and pass the cables through the same hole where the cables pass that feed the transparent bulb
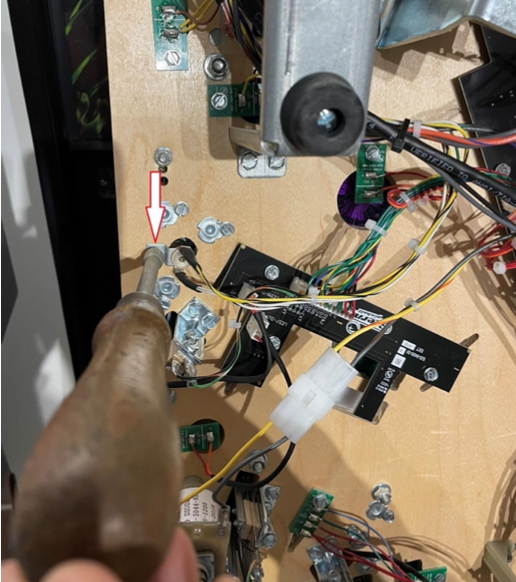
Etape 4 : Soulever votre plateau pour avoir tirer le cable rouge et noir que vous venez de positionner. Ces cables doivent sortir là où se situe la flèche blanche sur l’image suivante
Step 4: Lift your playfield to pull the red and black cable that you have just positioned. These cables should exit where the white arrow is in the following image
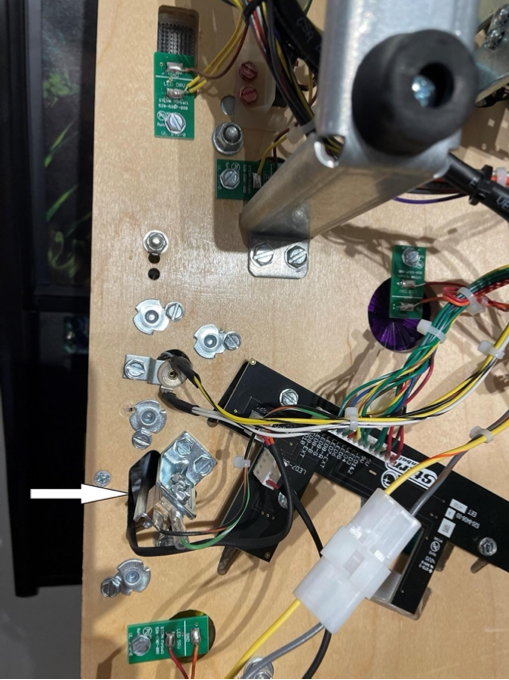
Voici une image de ce que vous devez obtenir une fois le cable passé Here is a picture of what you should get once the cable is passed
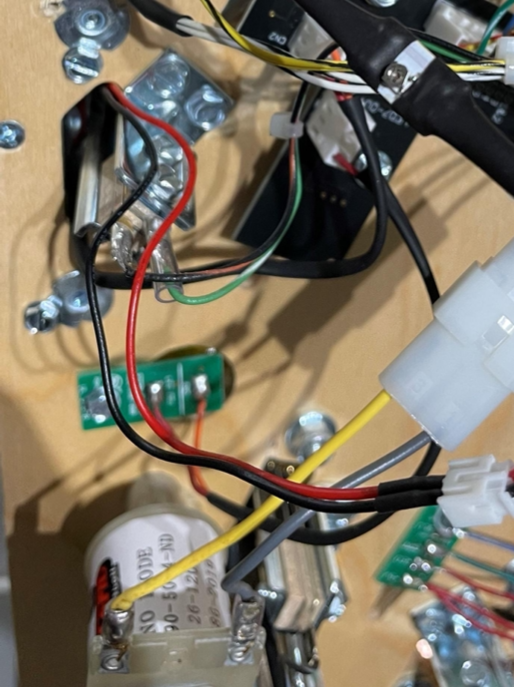
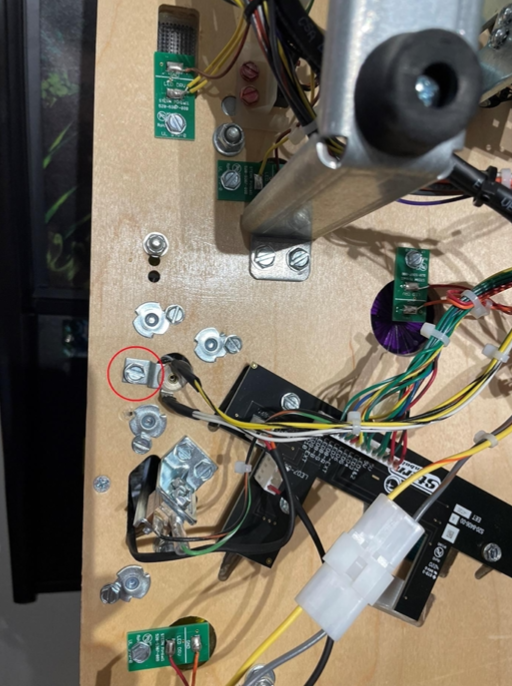
Etape 5 : Démonter maintenant la vis cerclée de rouge sur l’image suivante
Step 5: Now remove the screw circled in red on the following image
Etape 6 : Une fois le support de l’ampoule démonté, placer l’ampoule spéciale fournie avec le kit afin de permettre une connection supplémentaire en 5v et revisser le support de l’ampoule sur le plateau
Step 6: Once the bulb holder has been removed, place the special bulb supplied with the kit to allow an additional 5v connection and screw the bulb holder back onto the playfield

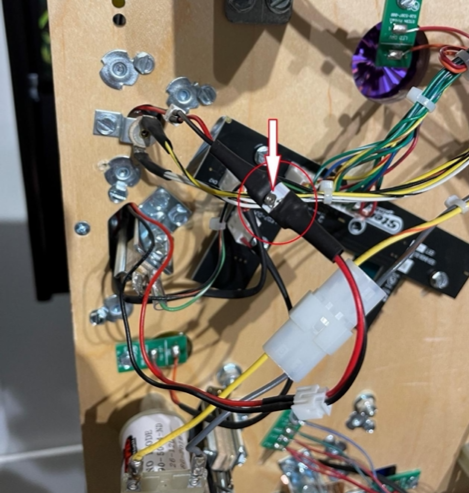
Etape 7 : Placer maintenant entre les deux connecteurs blancs le connecteur central qui dispose d’une vis (voir schéma, une flêche blanche indique où se trouve la vis) permettant de faire varier l’intensité lumineuse dans l’écran de l’ordinateur de Nedry.
Step 7: Now place between the two white connectors the central connector which has a screw (see diagram, a white arrow indicates where the screw is) allowing to vary the light intensity in the computer screen of Nedry.
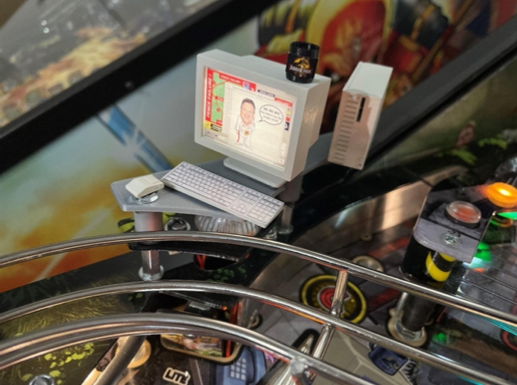
Etape 8 : Remettez votre plateau en place. Nedry est prêt à jouer avec vous. Il ne vous restera plus qu’à placer sur le support gris les eléments restants, souris, clavier, unité centrale et le fameux mug de Nedry ! Tous ces élements disposent d’un autocollant double-face. Placez les où vous le souhaitez. Ci-dessous un exemple de ce que vous devez obtenir. Replacer la vitre et refermer votre flipper
Step 8: Put your playfield back in place. Nedry is ready to play with you. All you have to do is place the remaining parts, mouse, keyboard, central unit and Nedry's famous mug on the gray support! All these elements have a double-sided sticker. Place them where you want. Below is an example of what you should get. Replace the glass and close your pinball machine

Comments
0 comments
Please sign in to leave a comment.