

DANGER ELECTRICAL SHOCK
Pinball machines have high voltages which can cause DANGER TO LIFE AND LIMB. TURN POWER OFF and UNPLUG PINBALL MACHINE prior to installation. Pinball machines are high voltage and can cause electrical shock.
SAFETY GLASSES are also recommended while working with or installing pinball parts.
Please follow these safety instructions as well as all installation instructions. Failure to follow these instructions may result in damage to the pinball machine, accessory or other parts. Please see our Disclaimer for associated risks and responsibilities (Section 13 in our Terms of Service) prior to installation.
Images included in these instructions are of an installed prototype and may vary from your product slightly.
If you have questions or concerns regarding the proper installation of this part, please contact us for assistance.
When removing screws from the playfield, reinstall by first turning them counter-clockwise to match the original groove in order to respect the integrity of the playfield wood.
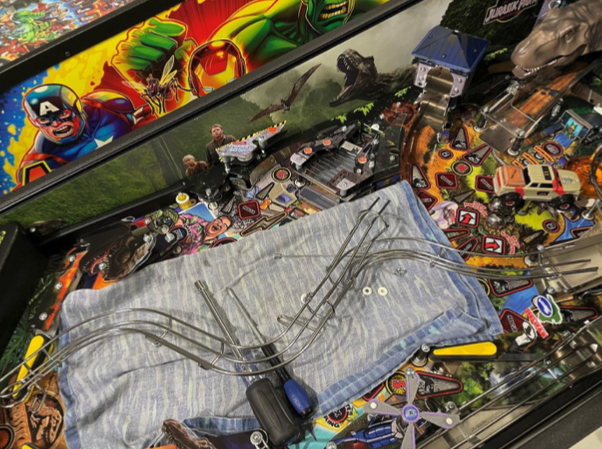
Etape 1 : Déposer la rampe de gauche
Step 1: Remove the left hand rail
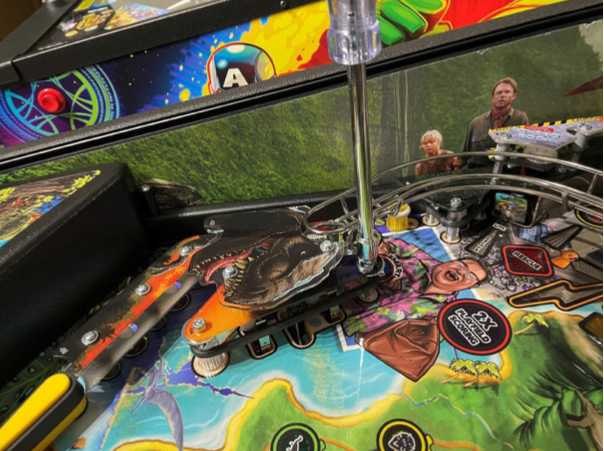
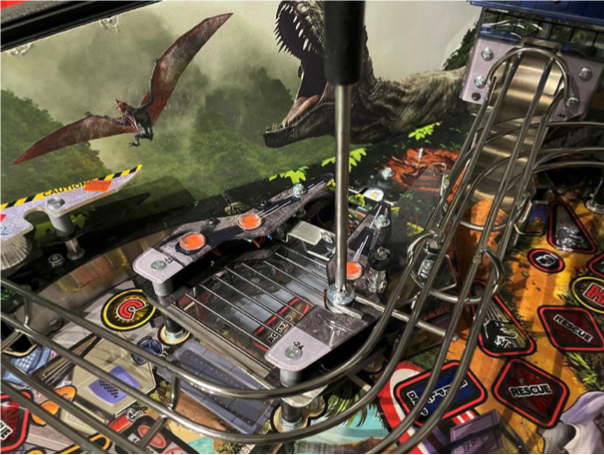
Etape 2 : Dévisser les deux vis de devant afin de démonter le plastique de la cage du Vélociraptor
Step 2: Unscrew the two front screws to remove the plastic from the Velociraptor cage
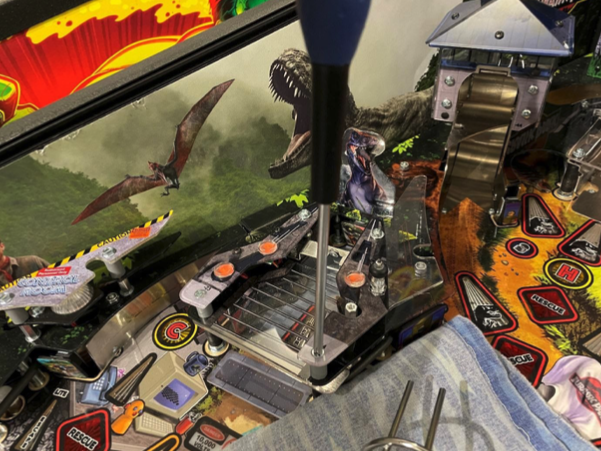
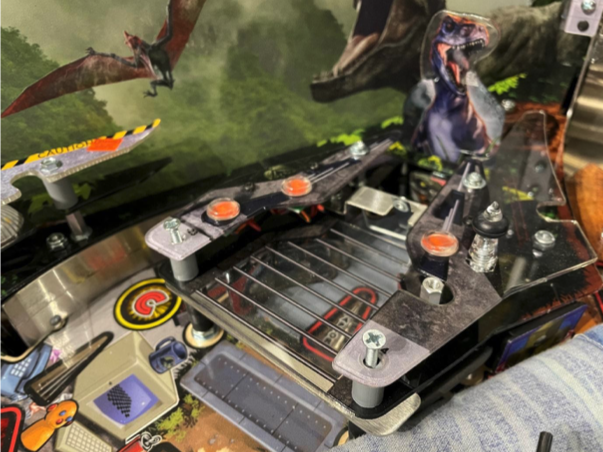
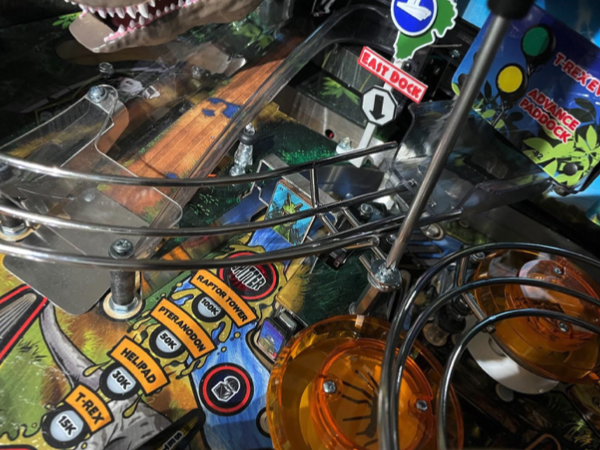
Etape 3 : Dévisser les 3 écrous suivants
Step 3: Unscrew the following 3 nuts
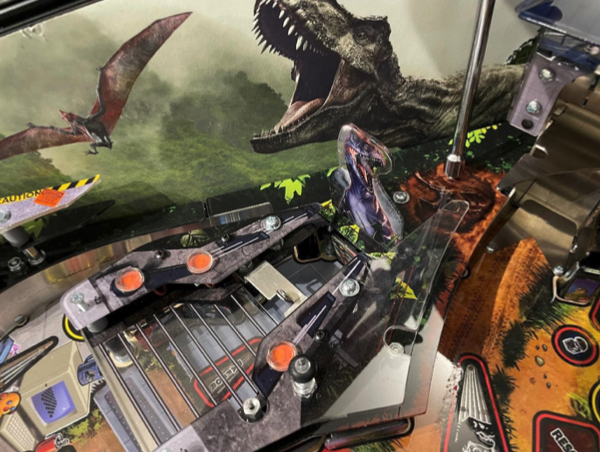
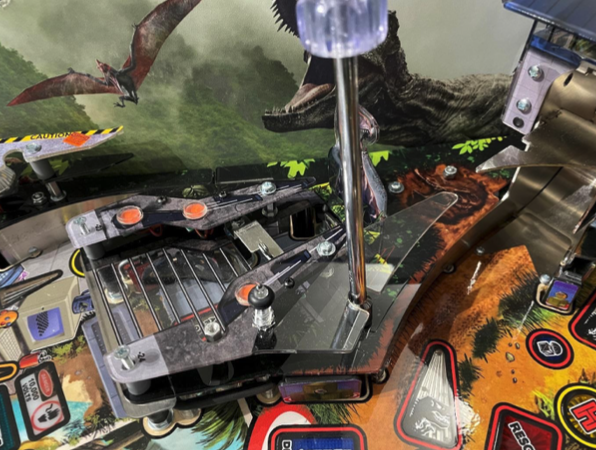
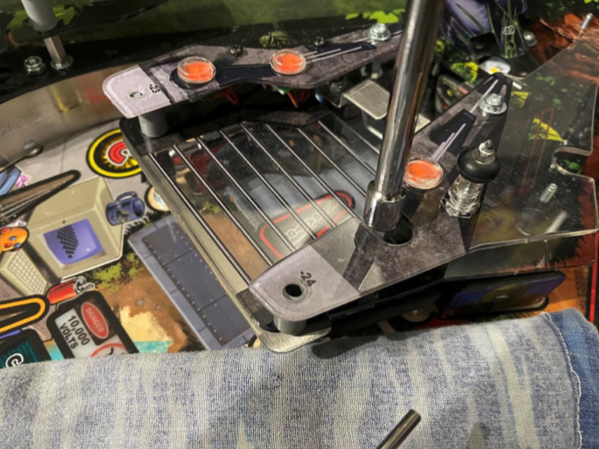
Etape 4 : Soulever le plastique de la cage du Vélociraptor afin d’accéder aux deux petites vis à dévisser tenant le plastique N°89 en forme de tête de Vélociraptor
Step 4: Lift the plastic of the Velociraptor cage to access the two small screws to unscrew holding the plastic N°89 in the shape of a Velociraptor head
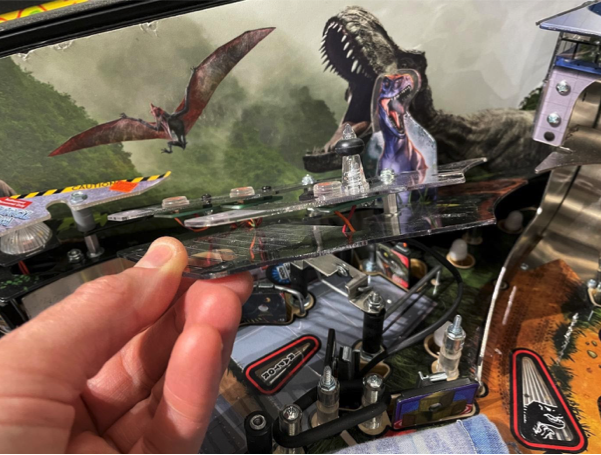
Etape 5 : Dévisser les deux petites vis tenant le décor du Vélociraptor (N°89)
Step 5: Unscrew the two small screws holding the decoration of the Velociraptor (N°89)
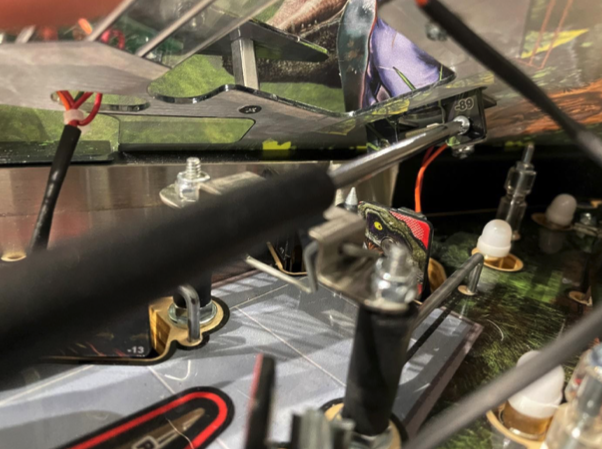
Etape 6 : Déposer ainsi le plastique N°89
Step 6: Remove the plastic N ° 89 in this way
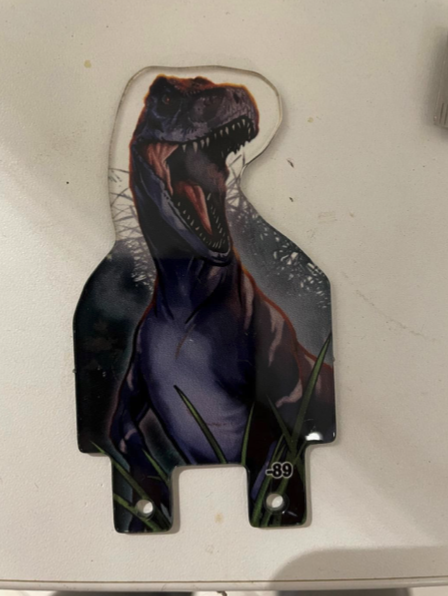
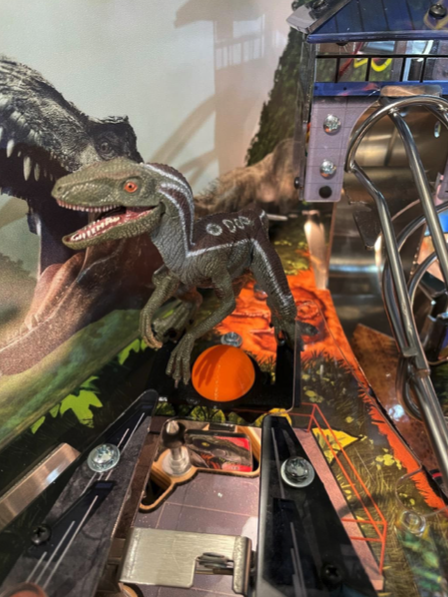
Etape 7 : Mettre à sa place notre mod Velociraptor
Step 7: Put our Velociraptor mod in its place
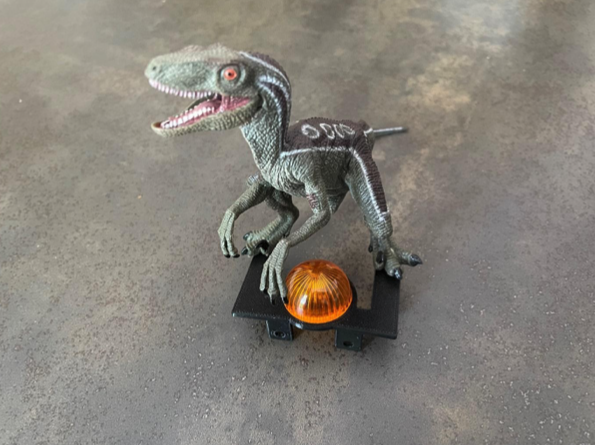
Etape 8 : Revisser les deux petites vis qui le soutiennent et remonter l’ensemble des eléments démontés précédemment
Step 8: Tighten the two small screws that support it and reassemble all the elements removed previously

Comments
0 comments
Please sign in to leave a comment.