
These instructions are applicable to the following products:
- MM-TS4-FIG-MOUNT


DANGER ELECTRICAL SHOCK
Pinball machines have high voltages which can cause DANGER TO LIFE AND LIMB. TURN POWER OFF and UNPLUG PINBALL MACHINE prior to installation. Pinball machines are high voltage and can cause electrical shock.
SAFETY GLASSES are also recommended while working with or installing pinball parts.
Please follow these safety instructions as well as all installation instructions. Failure to follow these instructions may result in damage to the pinball machine, accessory or other parts. Please see our Disclaimer for associated risks and responsibilities (Section 13 in our Terms of Service) prior to installation.
Images included in these instructions are of an installed prototype and may vary from your product slightly.
If you have questions or concerns regarding the proper installation of this part, please contact us for assistance.
When removing screws from the playfield, reinstall them by first turning them counter-clockwise to match the original groove in order to respect the integrity of the playfield wood.
Required Tools:
11/32" Socket or combo wrench.
Step 1
Remove glass from game and store in a safe location.
Step 2
Proceed to remove one of the following 8/32 Nylon Nuts to install new Figurine Mount.
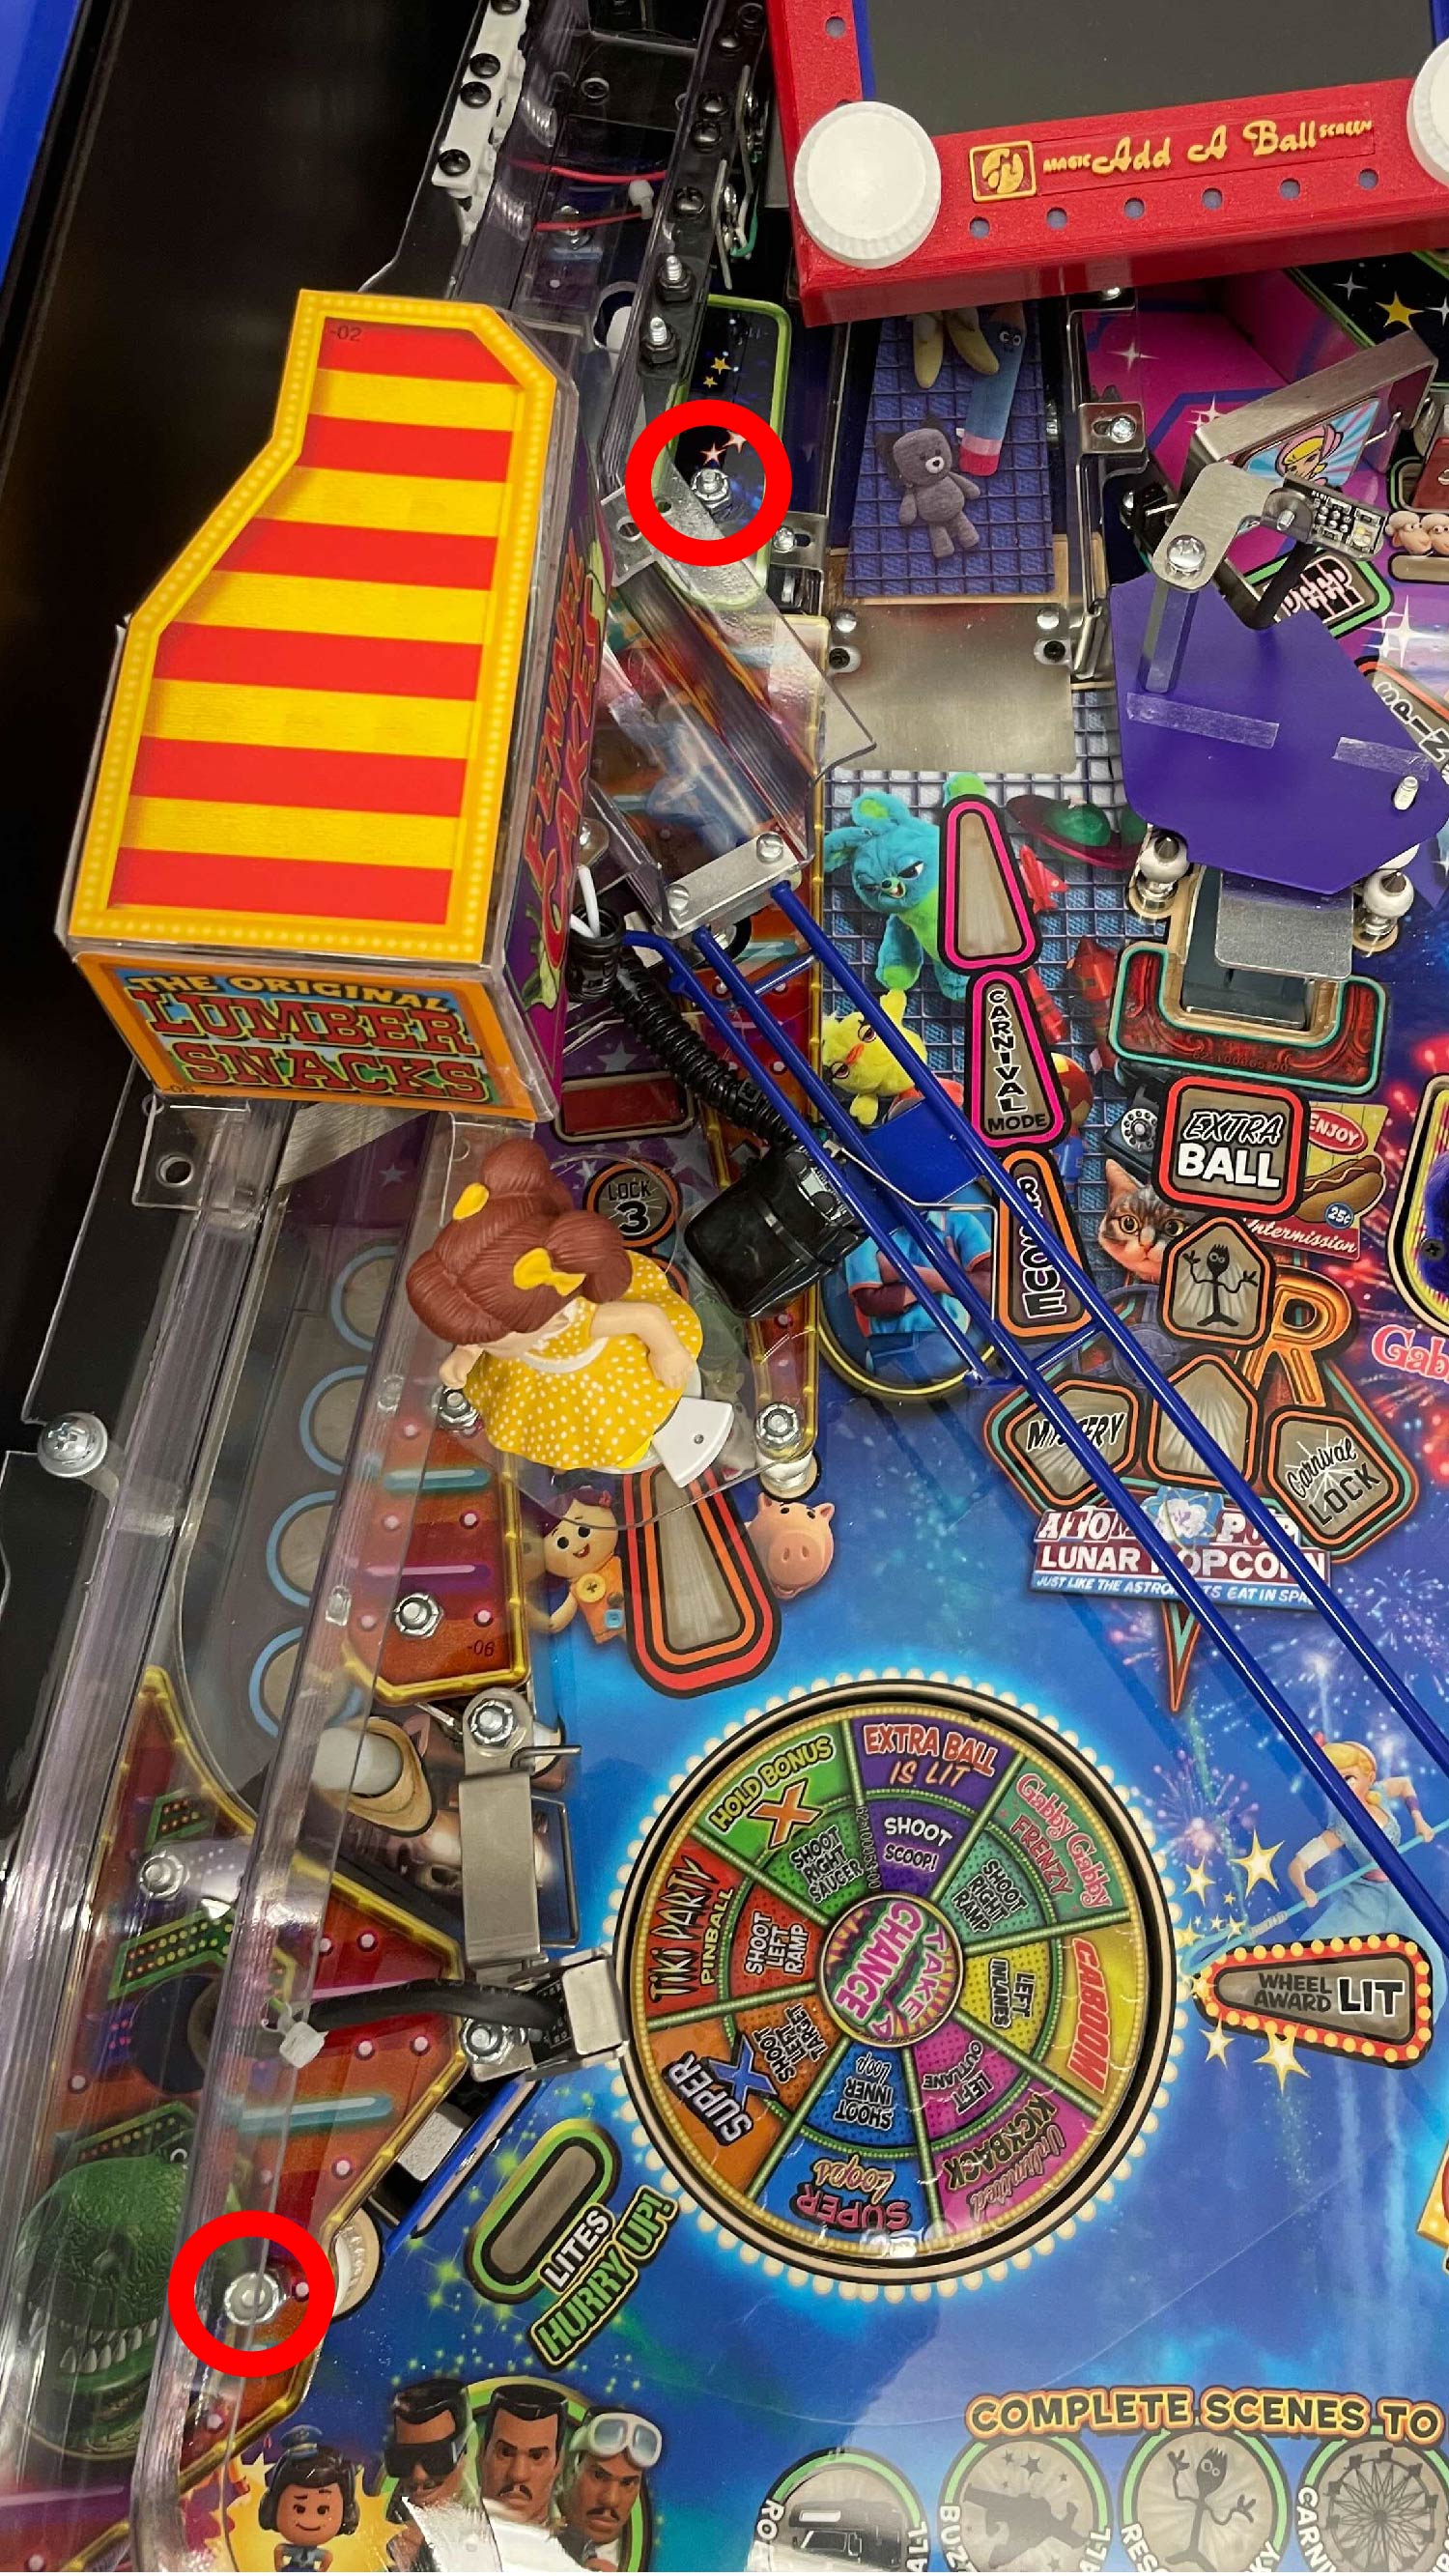
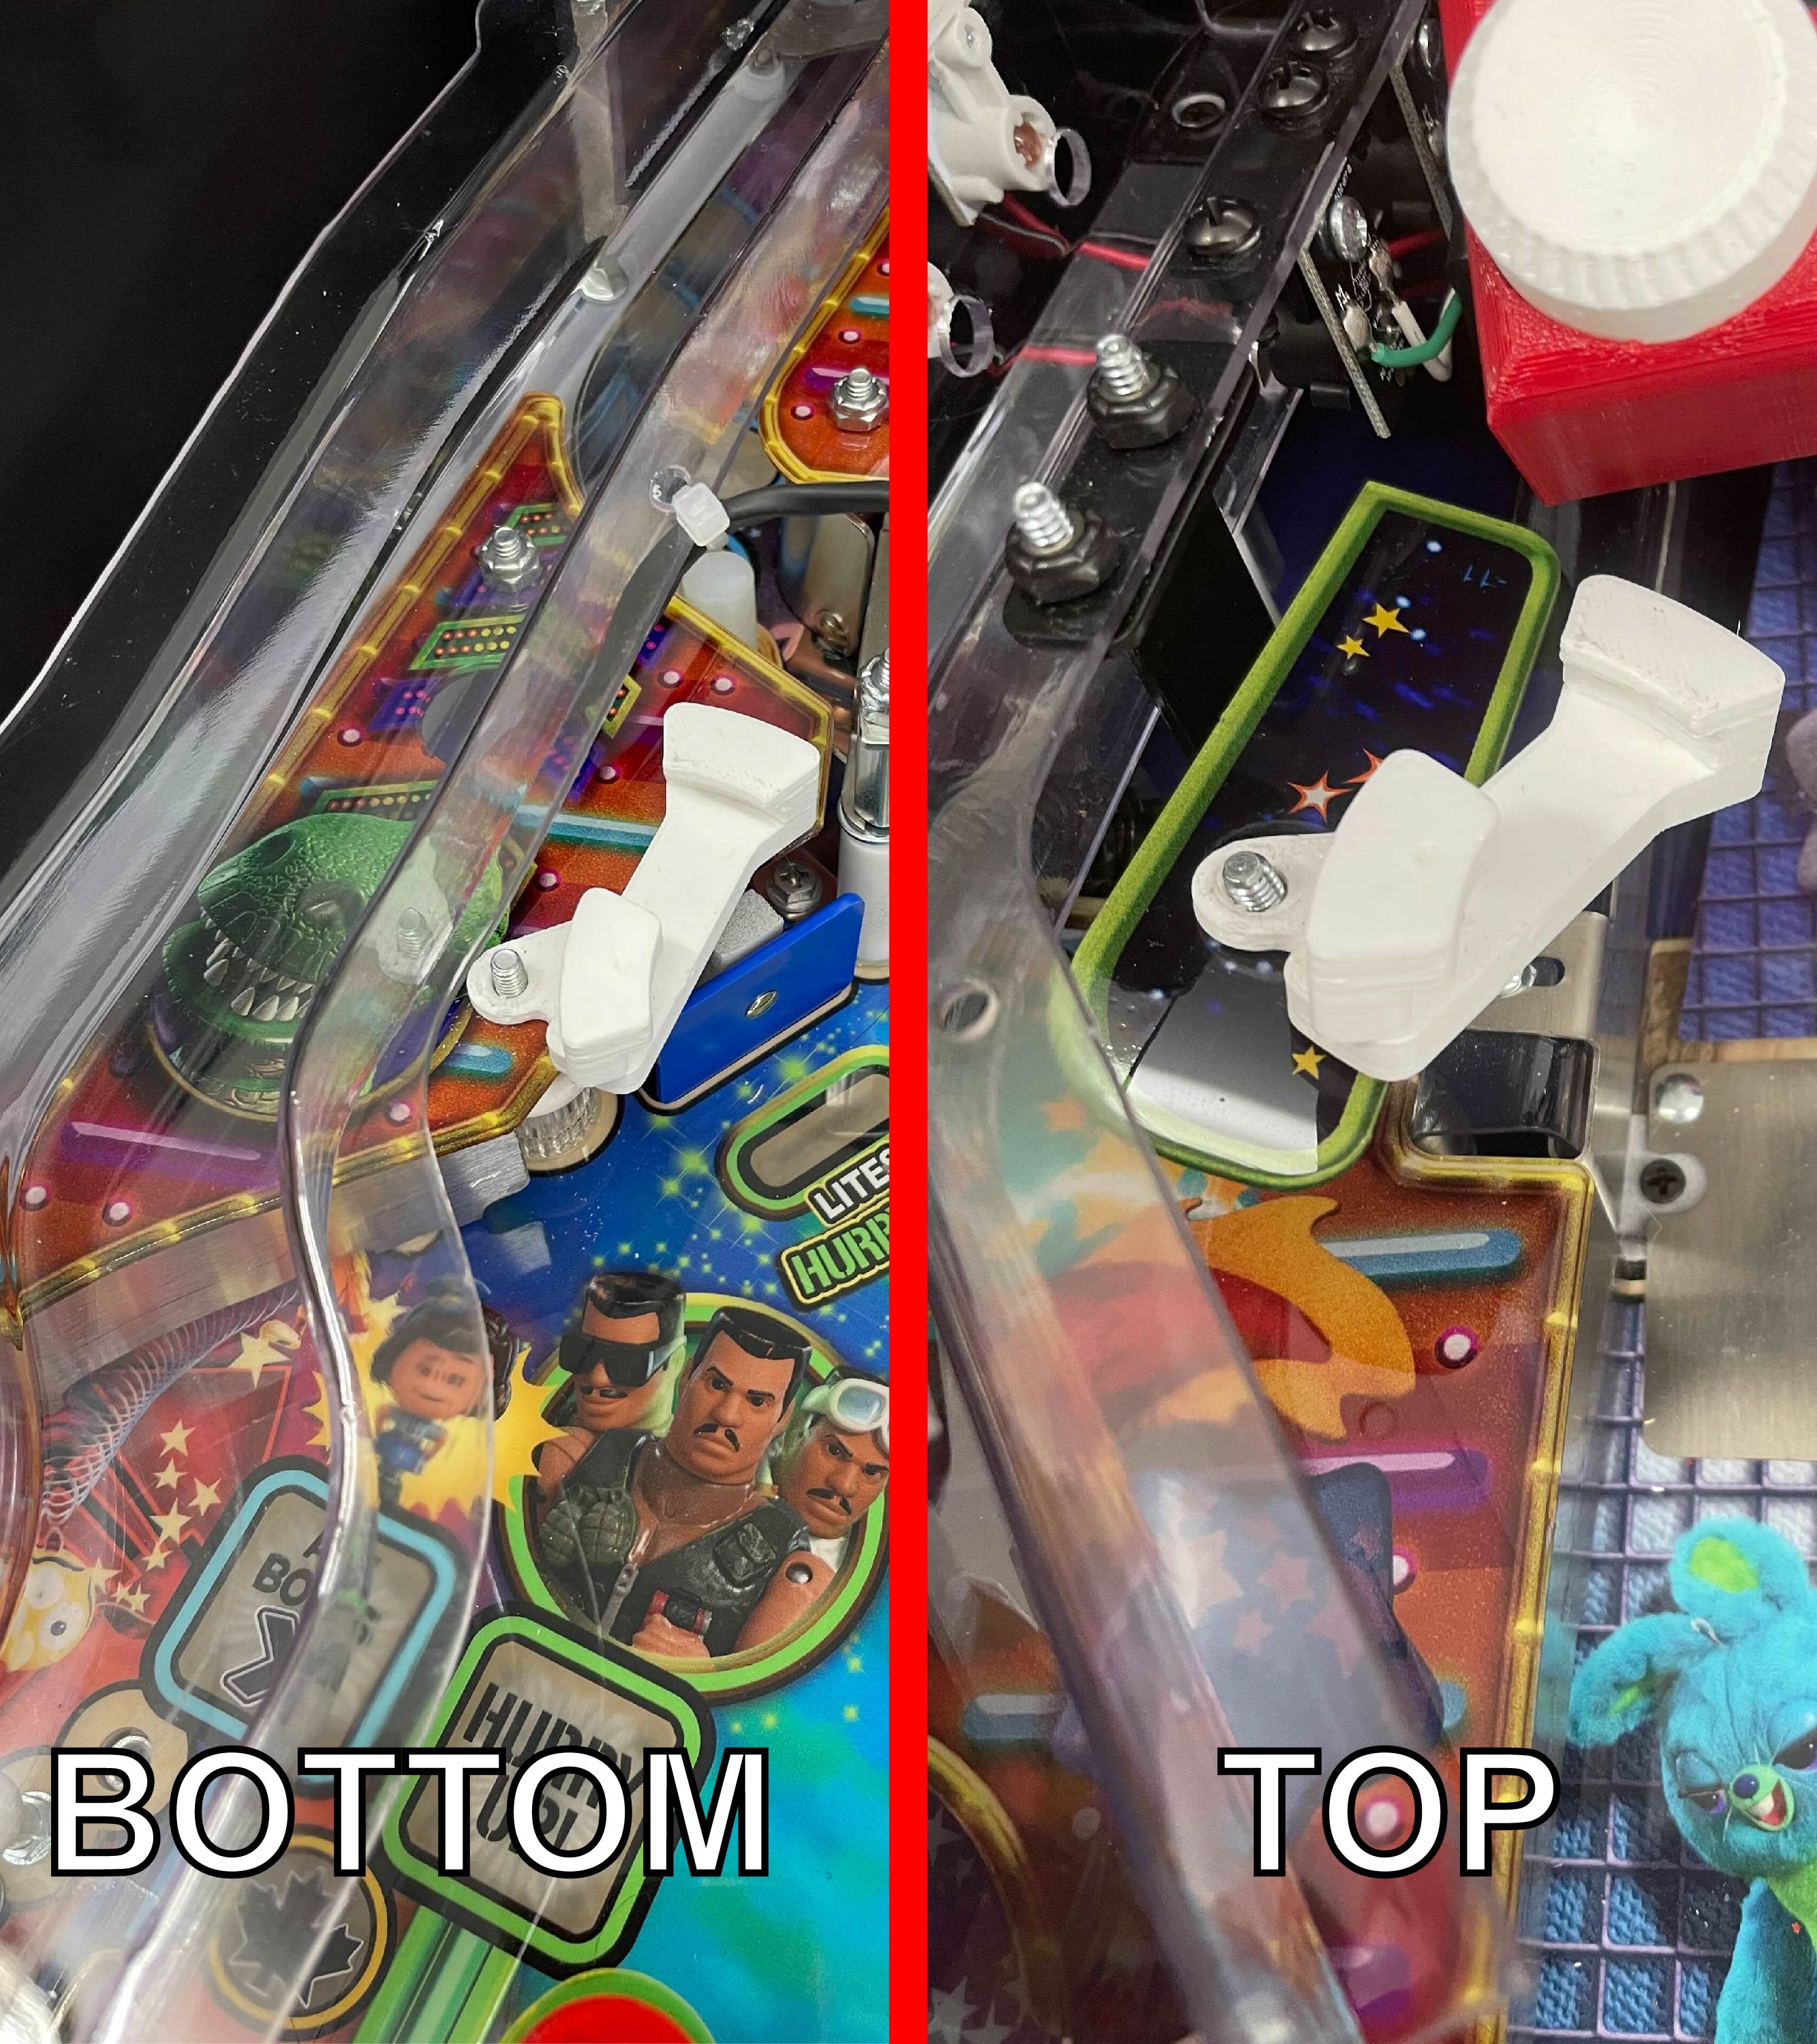
Step 3
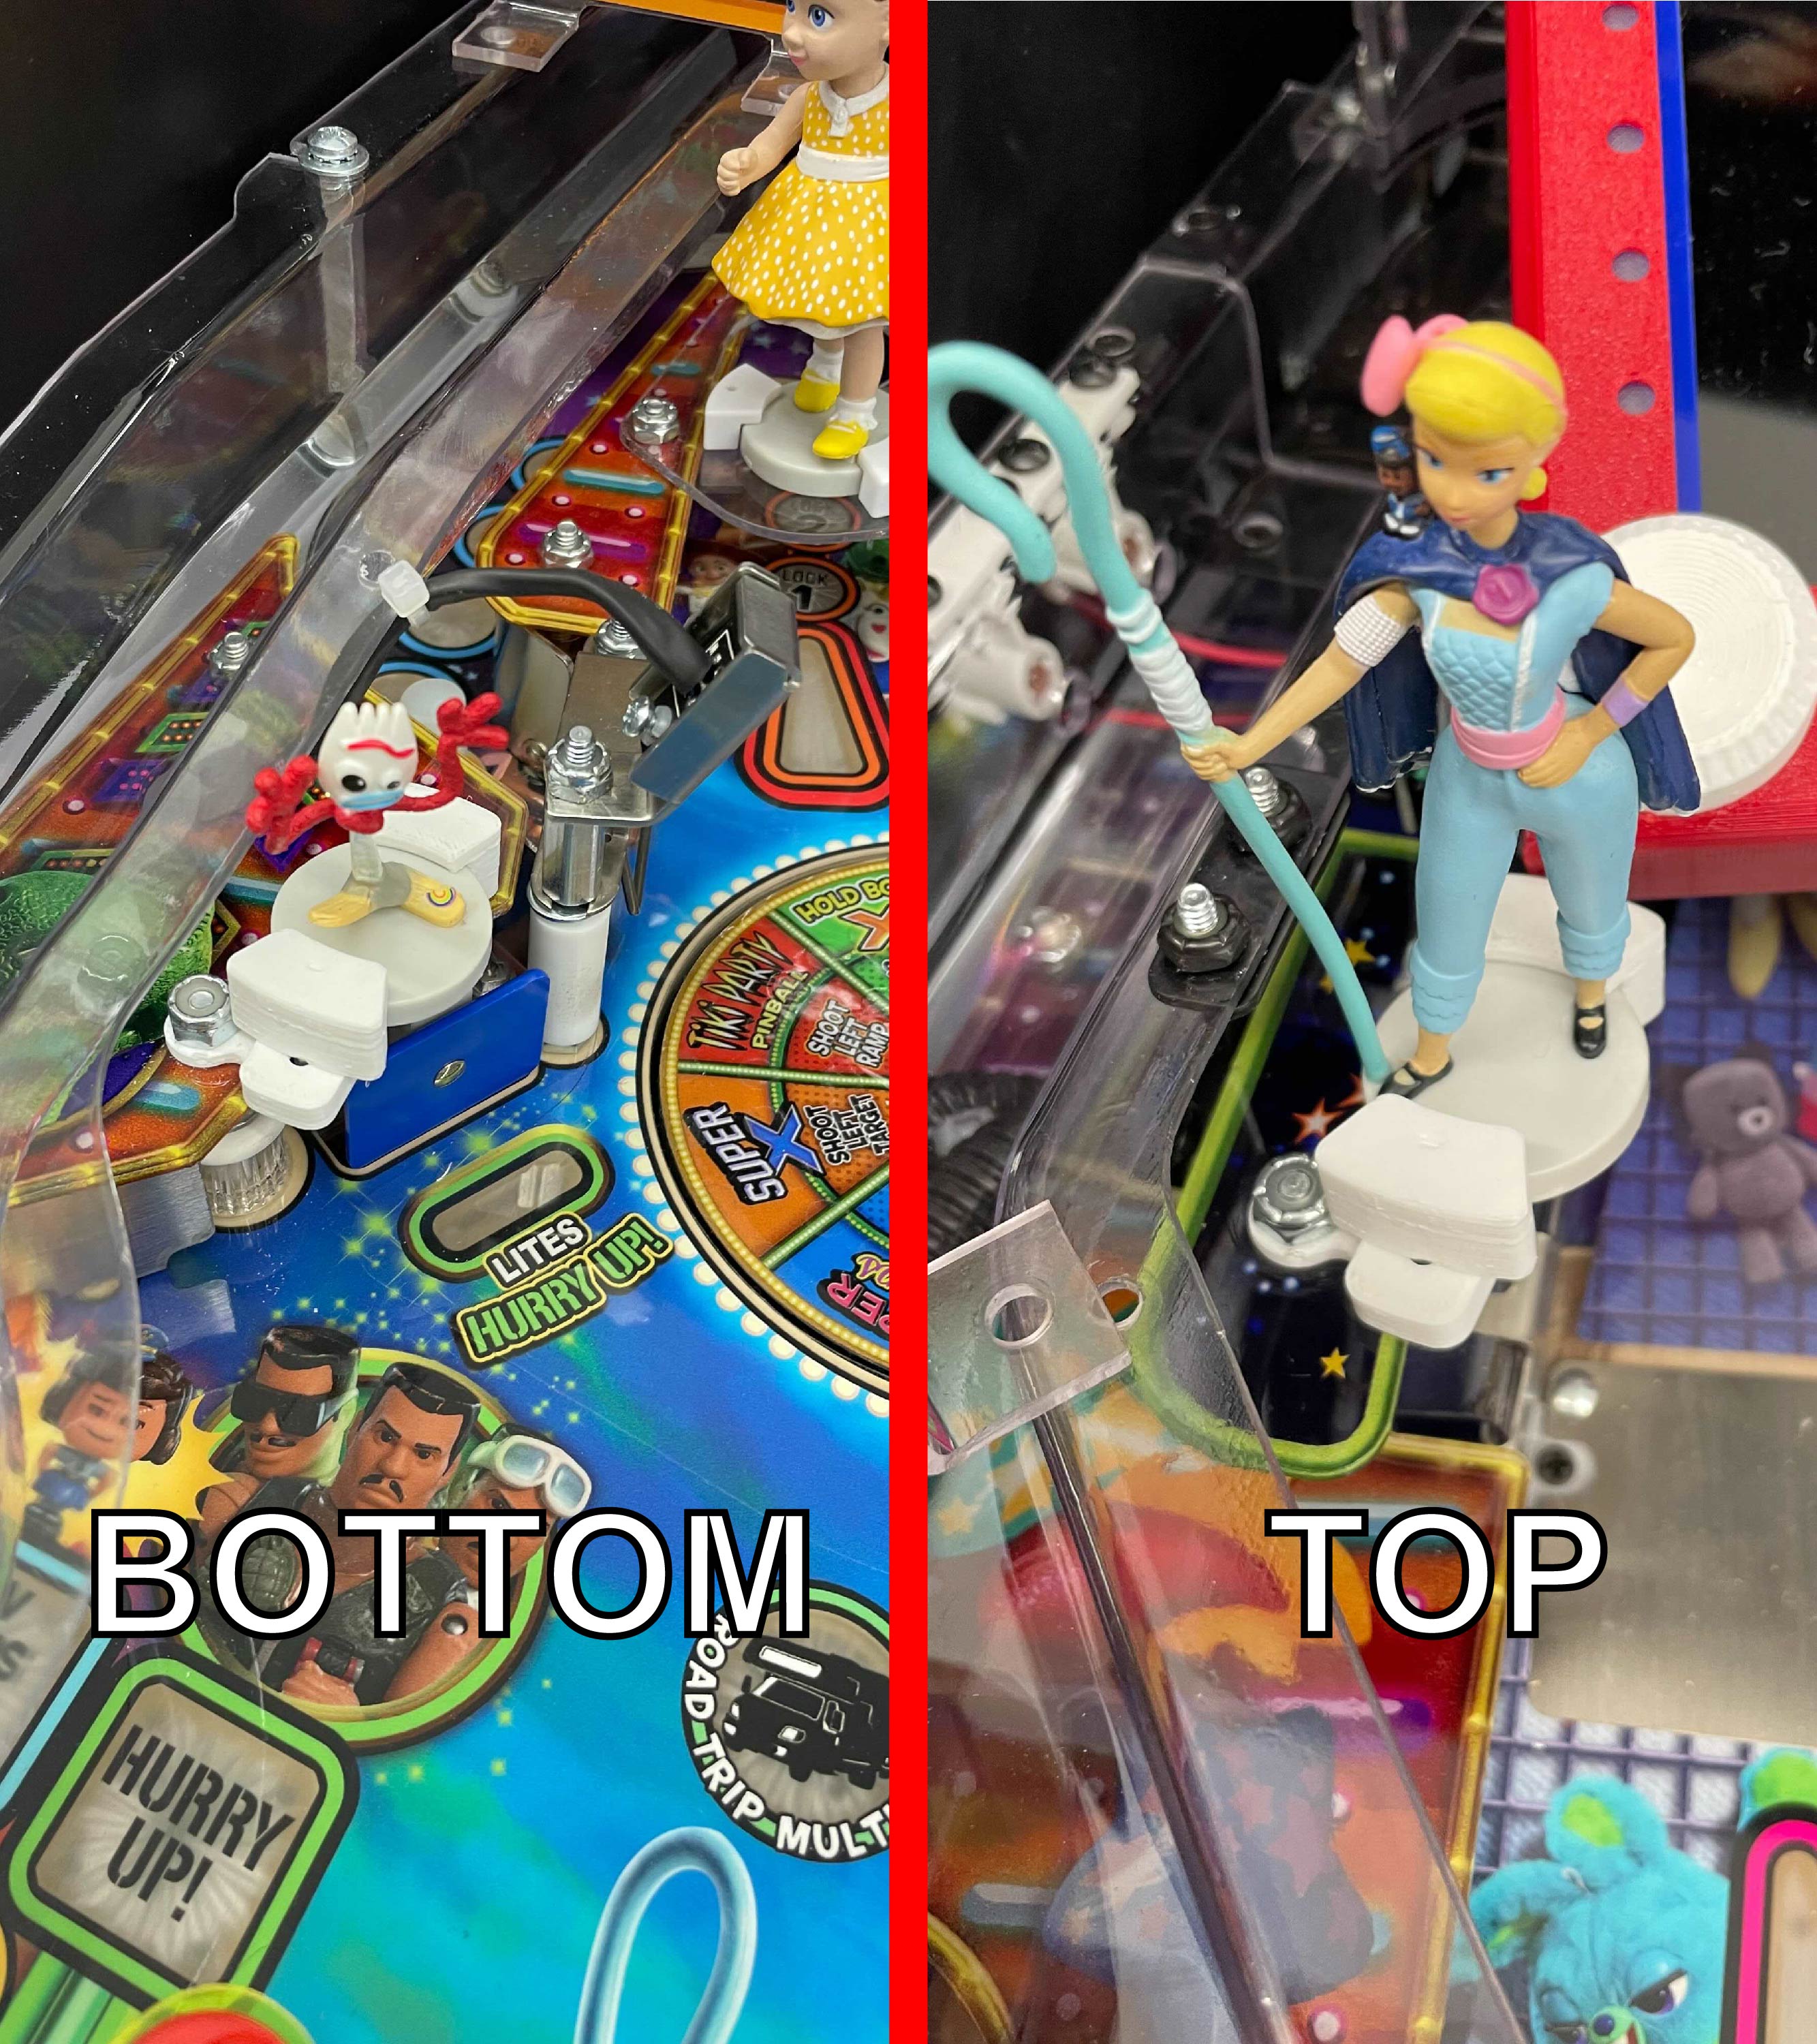
Once Figurine Mount is placed on threaded rod, replace Nylon nut and take care not to over torque. Place your figurine of choice in mount and install by sliding mount in the depicted BLUE direction to secure figurine.
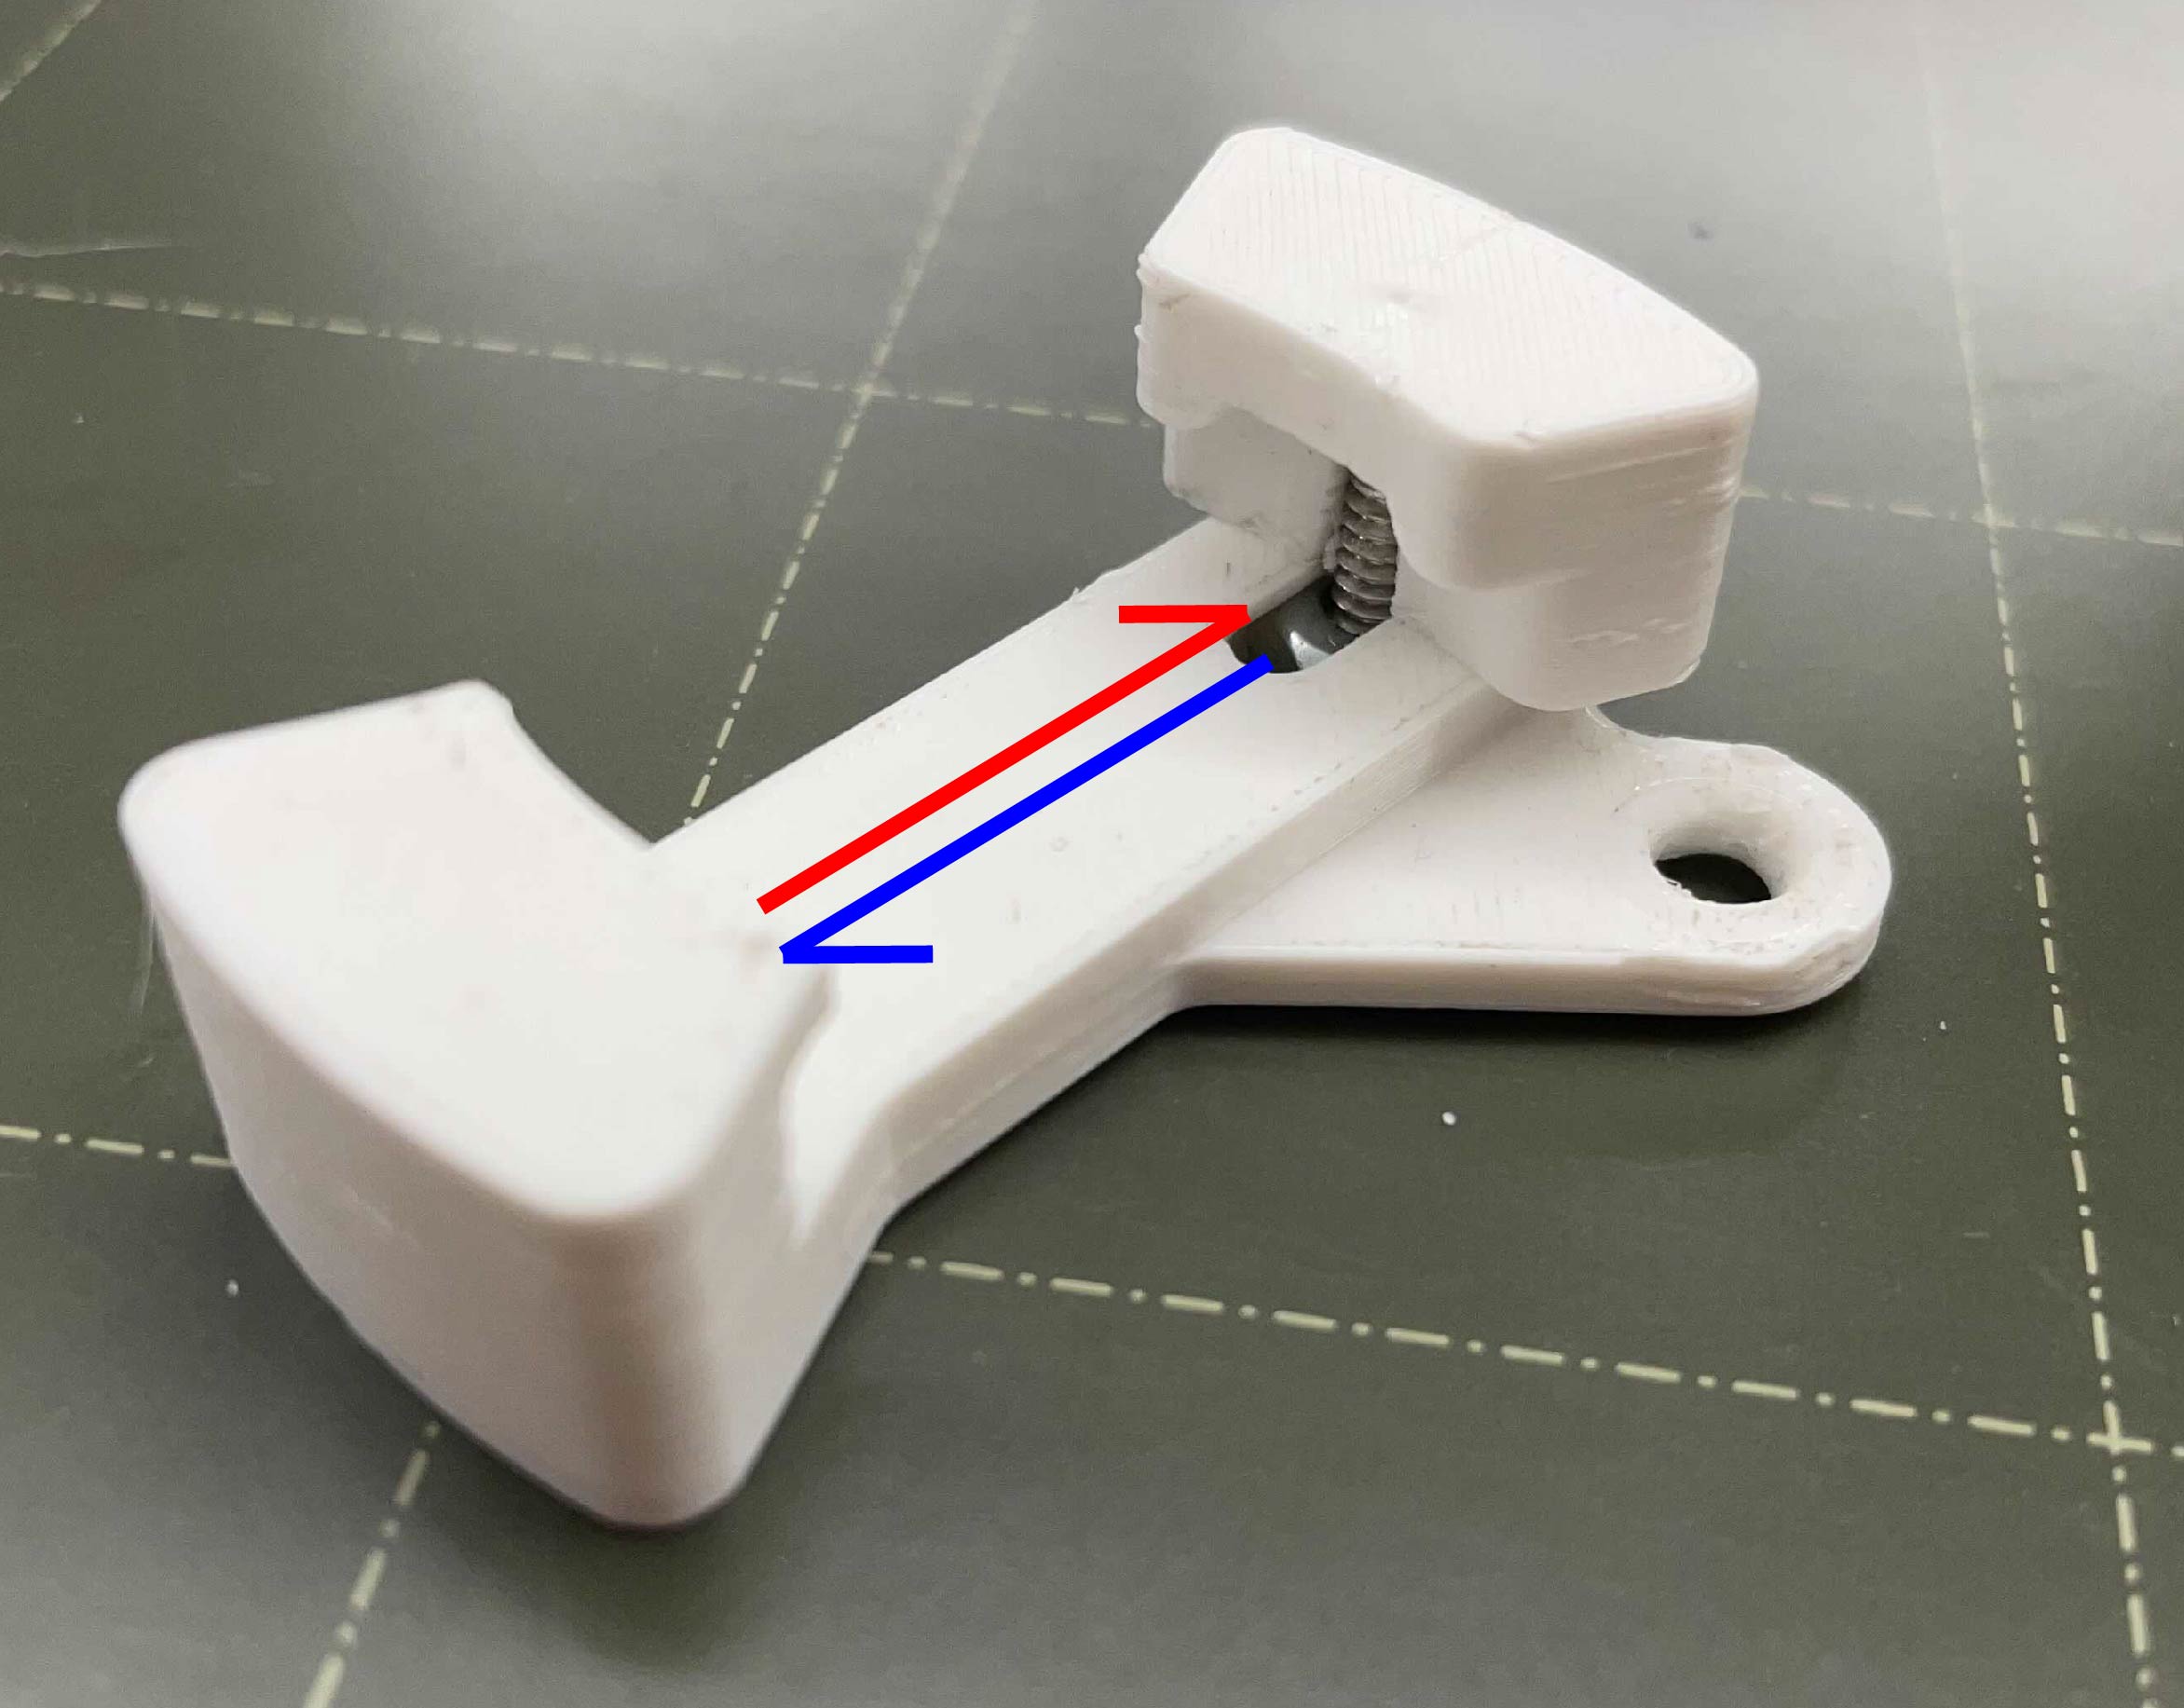
HELPFUL TIP #1
Slide in the BLUE direction to SECURE figurine. Slide in RED direction to UNSECURE figurine. As shown below.
HELPFUL TIP #2
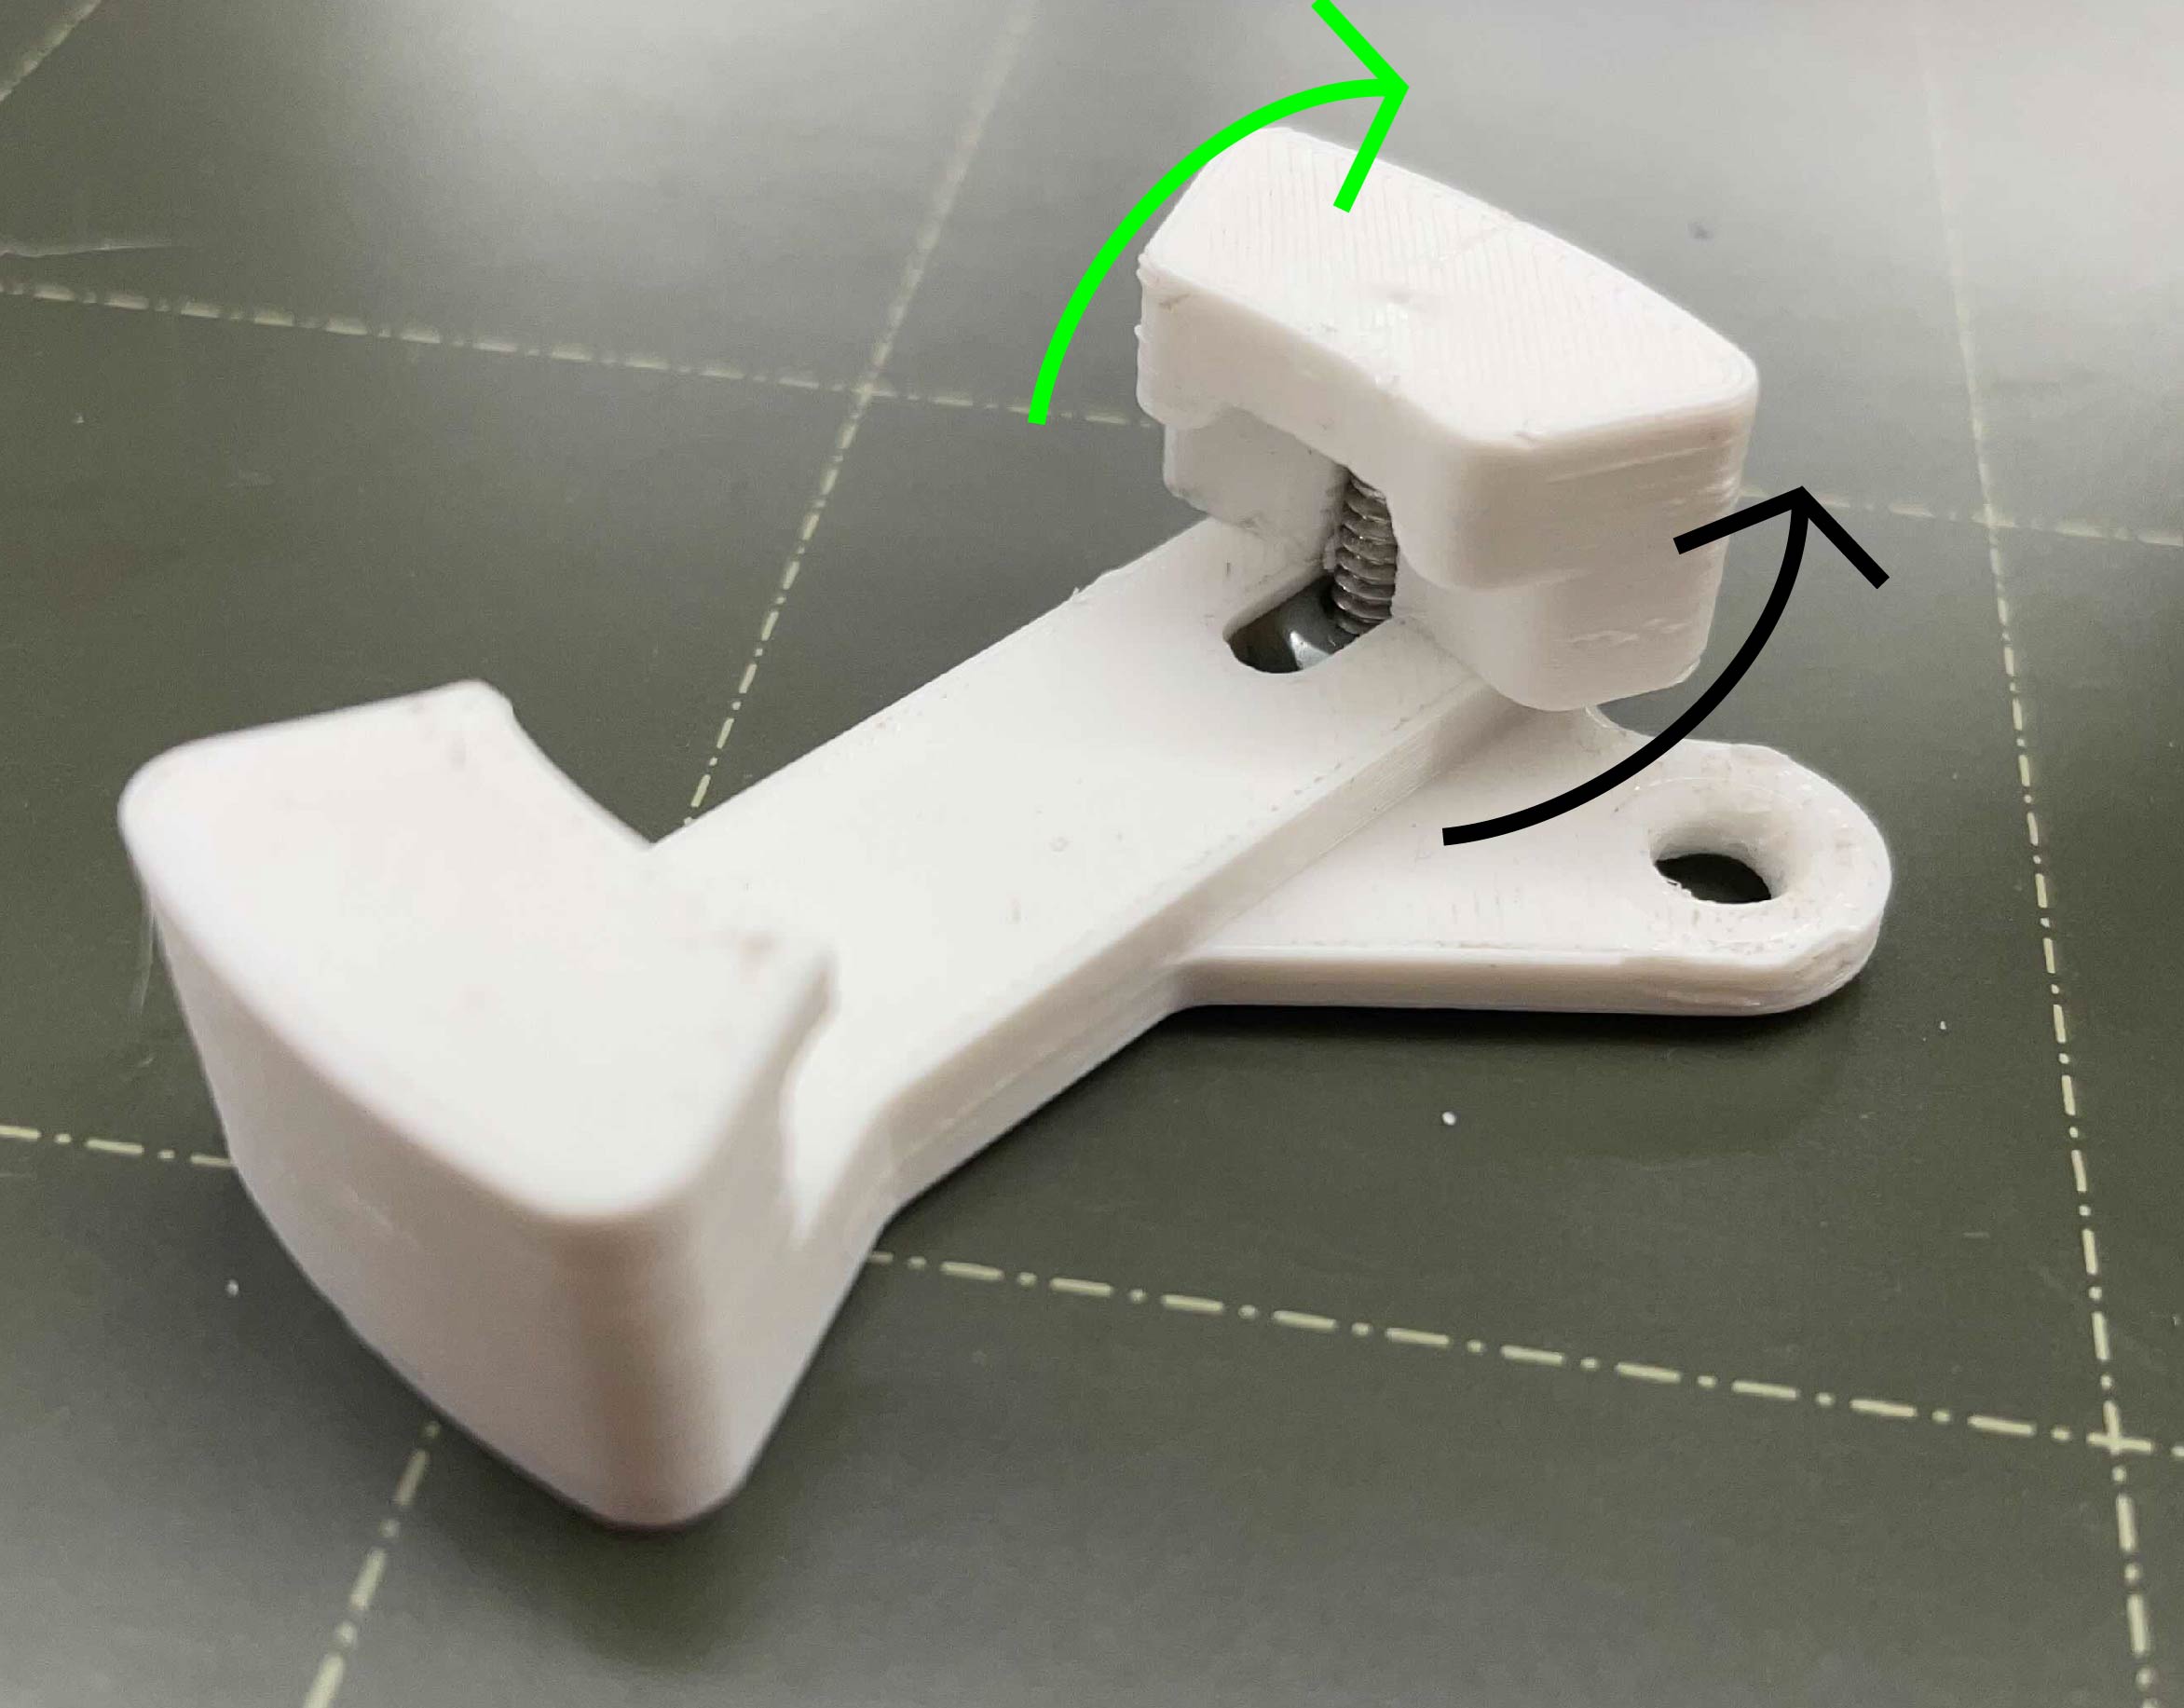
Rotate the Top Piece in the LIME GREEN direction, CLOCKWISE from a TOP view, to have a more secure tighter fit.
Rotate the Top Piece in the BLACK direction, ANTI-CLOCKWISE from the TOP view, to loosen the fit. Useful if sliding action is too tight.
Comments
0 comments
Please sign in to leave a comment.