These instructions are applicable to the following products:
- MM-ALIEN-HYPESLEEP


DANGER ELECTRICAL SHOCK
Pinball machines have high voltages which can cause DANGER TO LIFE AND LIMB. TURN POWER OFF and UNPLUG PINBALL MACHINE prior to installation. Pinball machines are high voltage and can cause electrical shock.
SAFETY GLASSES are also recommended while working with or installing pinball parts.
Please follow these safety instructions as well as all installation instructions. Failure to follow these instructions may result in damage to the pinball machine, accessory or other parts. Please see our Disclaimer for associated risks and responsibilities (Section 13 in our Terms of Service) prior to installation.
Images included in these instructions are of an installed prototype and may vary from your product slightly.
If you have questions or concerns regarding the proper installation of this part, please contact us for assistance.
When removing screws from the playfield, reinstall them by first turning them counter-clockwise to match the original groove in order to respect the integrity of the playfield wood.
Required Items:
Hyper Sleep Chamber |
|
(Sold Separately) |
|
Setup:
Remove the glass and then we recommend lifting the playfield up and out about 5 to 8 inches. Don't forget to secure the pinballs with something or remove them and use cabinet protectors (sold separately) to prevent any damage.

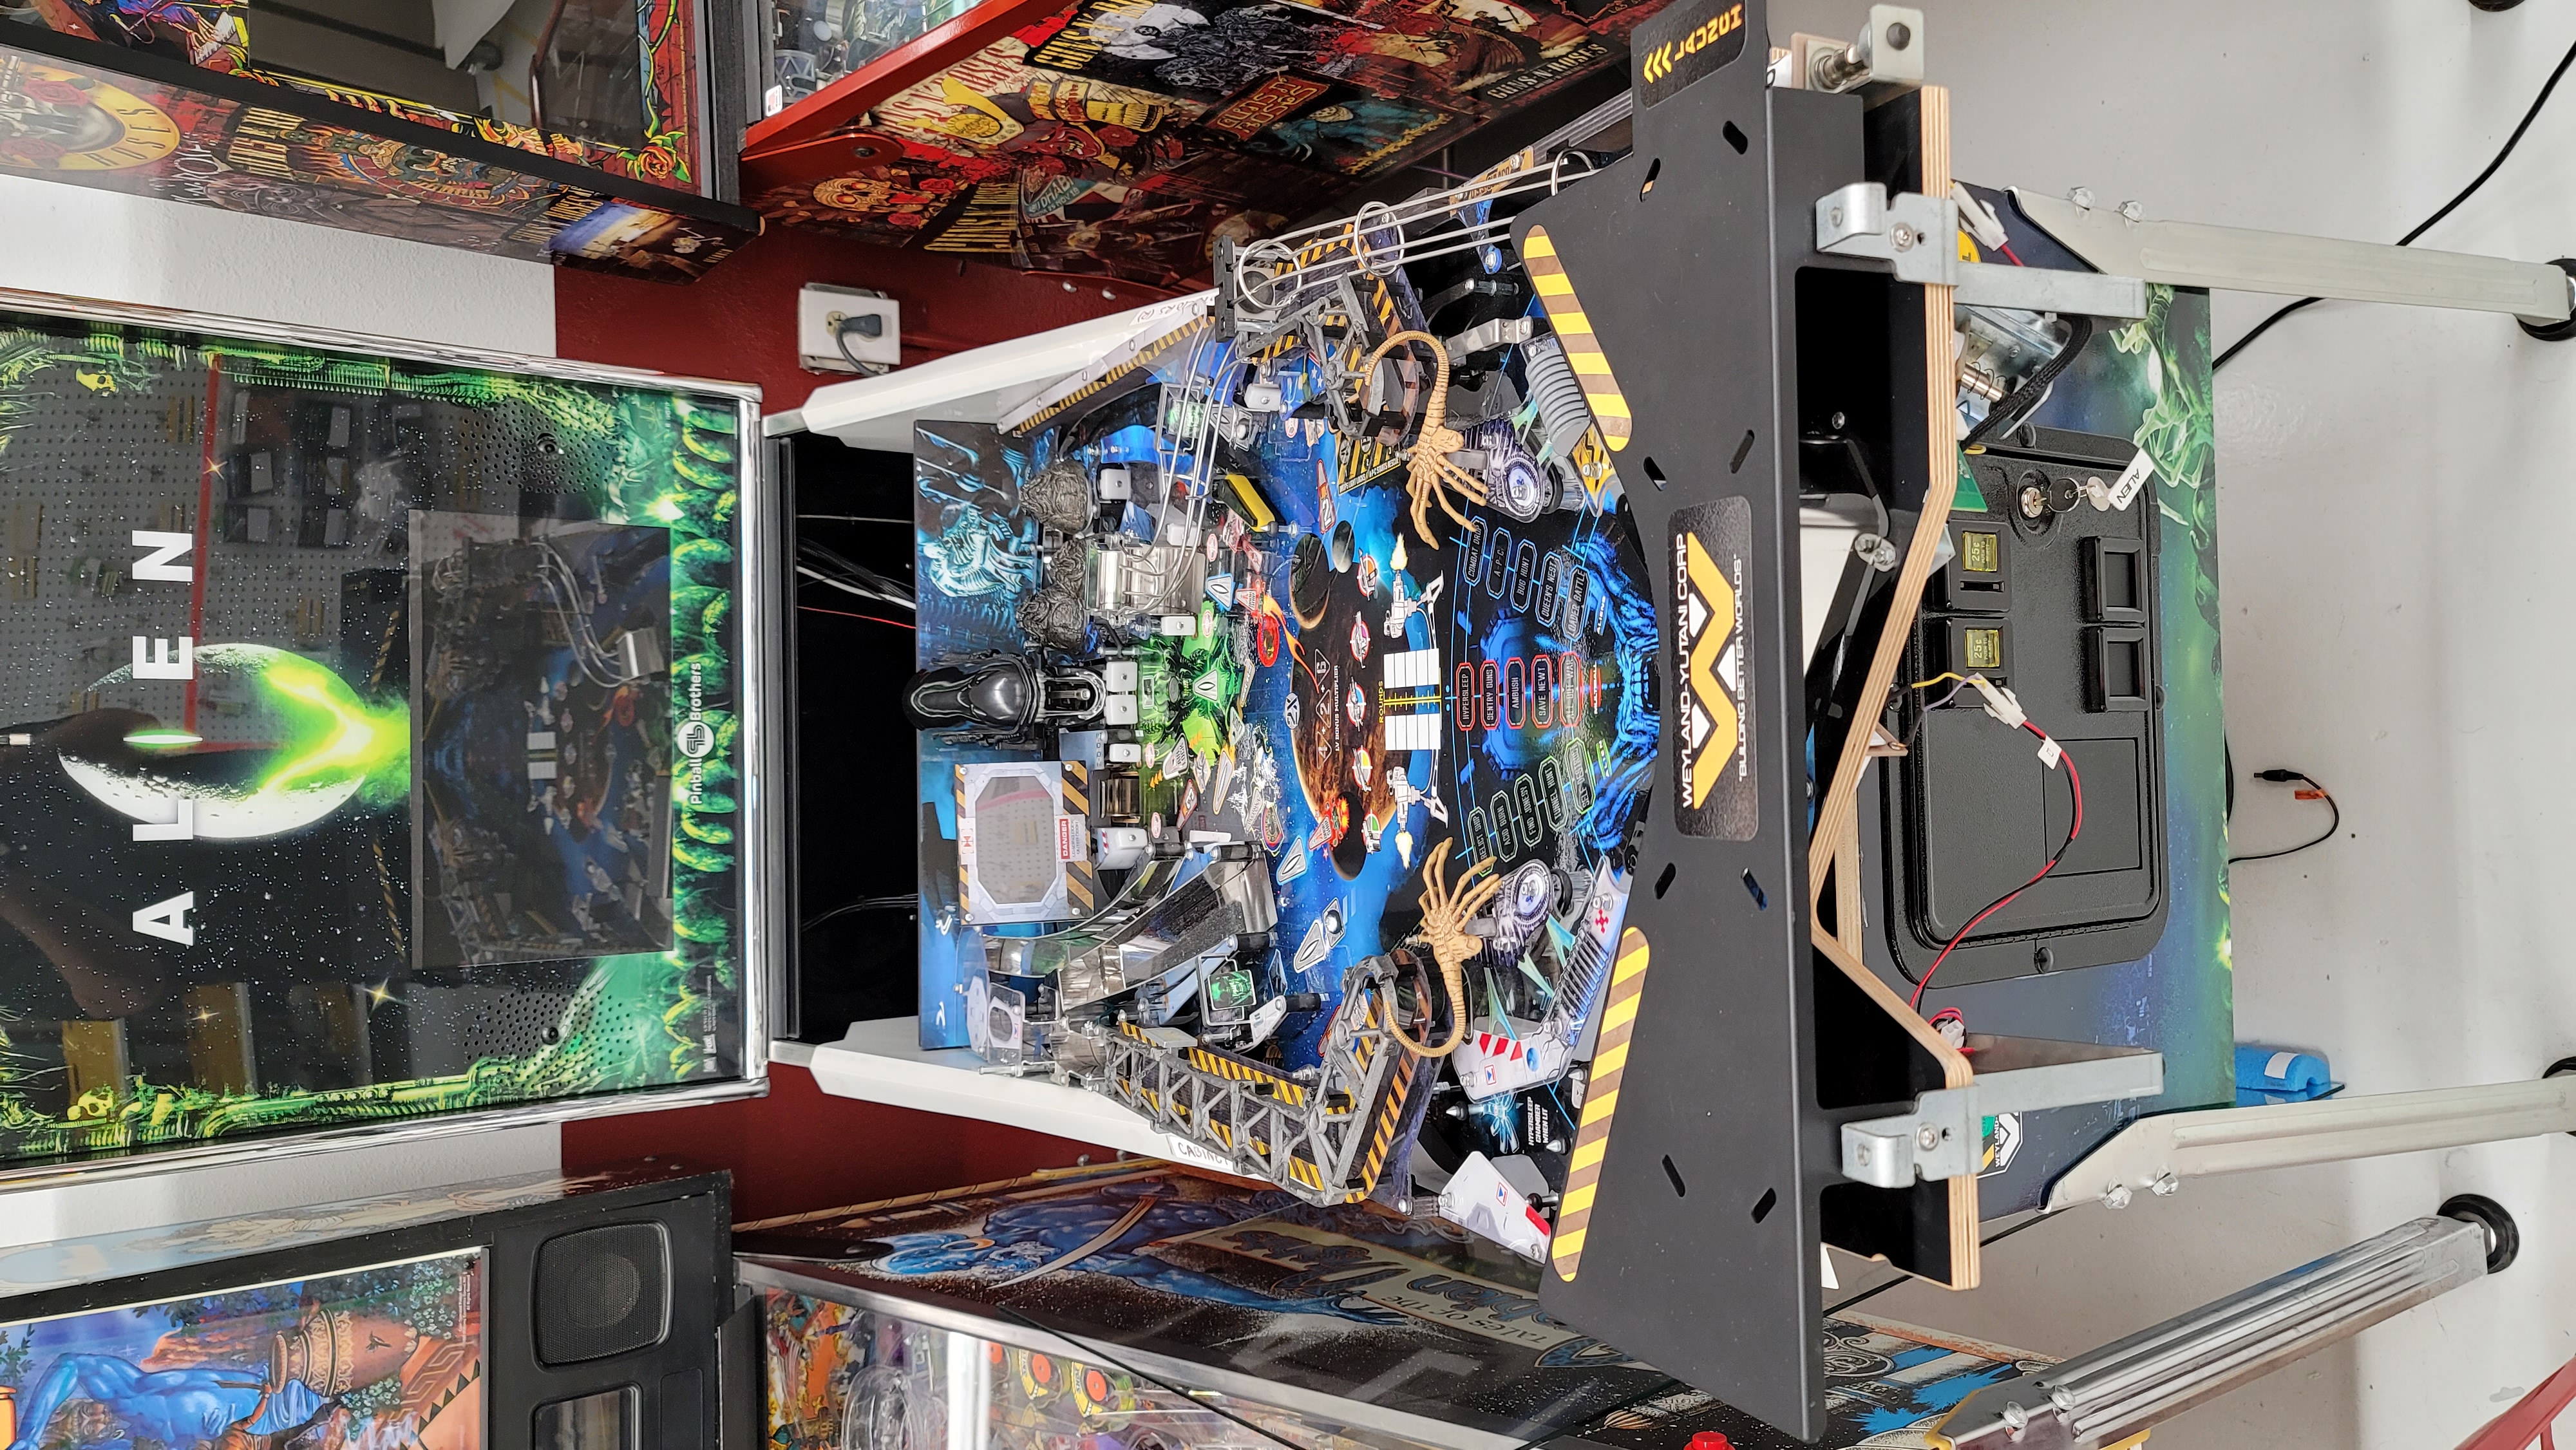
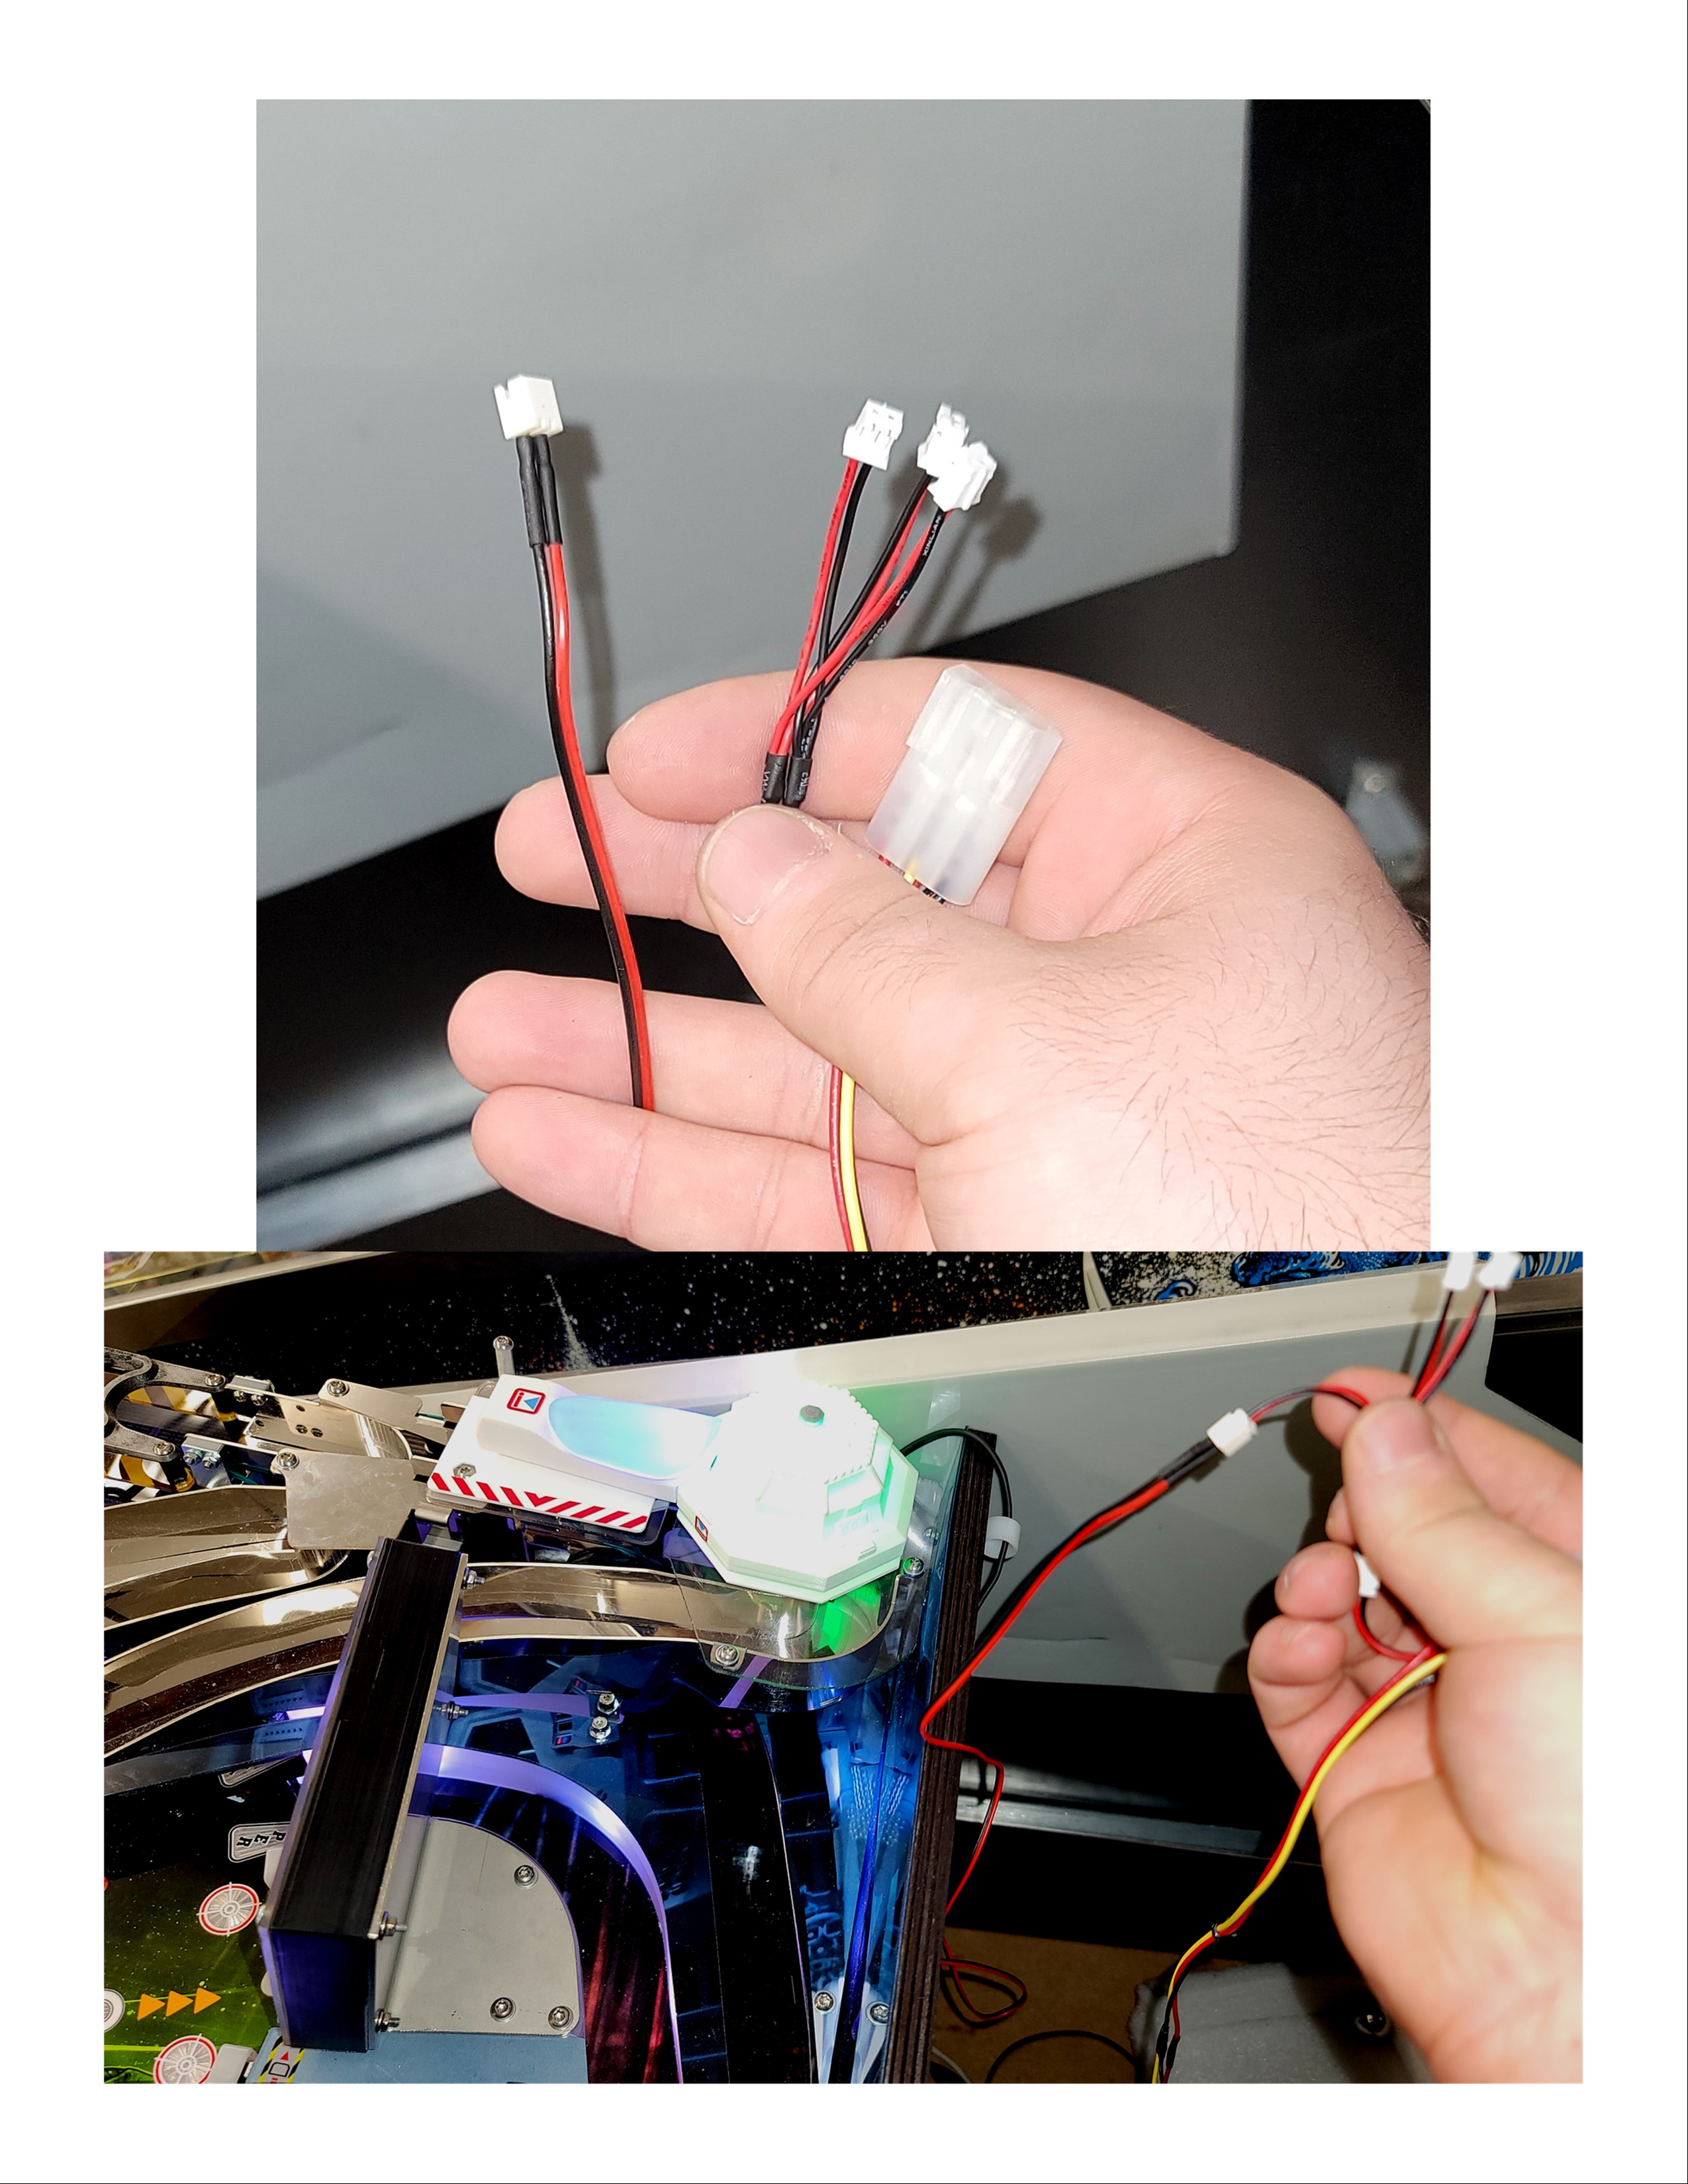
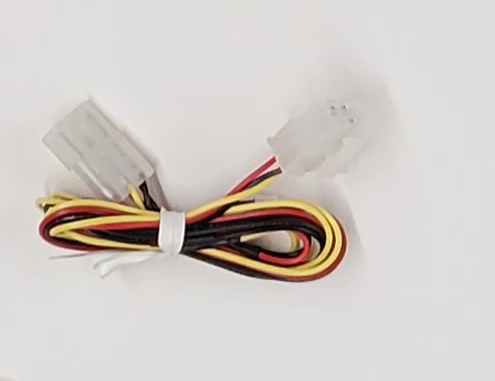
Then you'll need to install the Alien-Pinball Brothers Power Adapter (Sold Separately) the installations are below or Click Here.
Install:
Part reference:
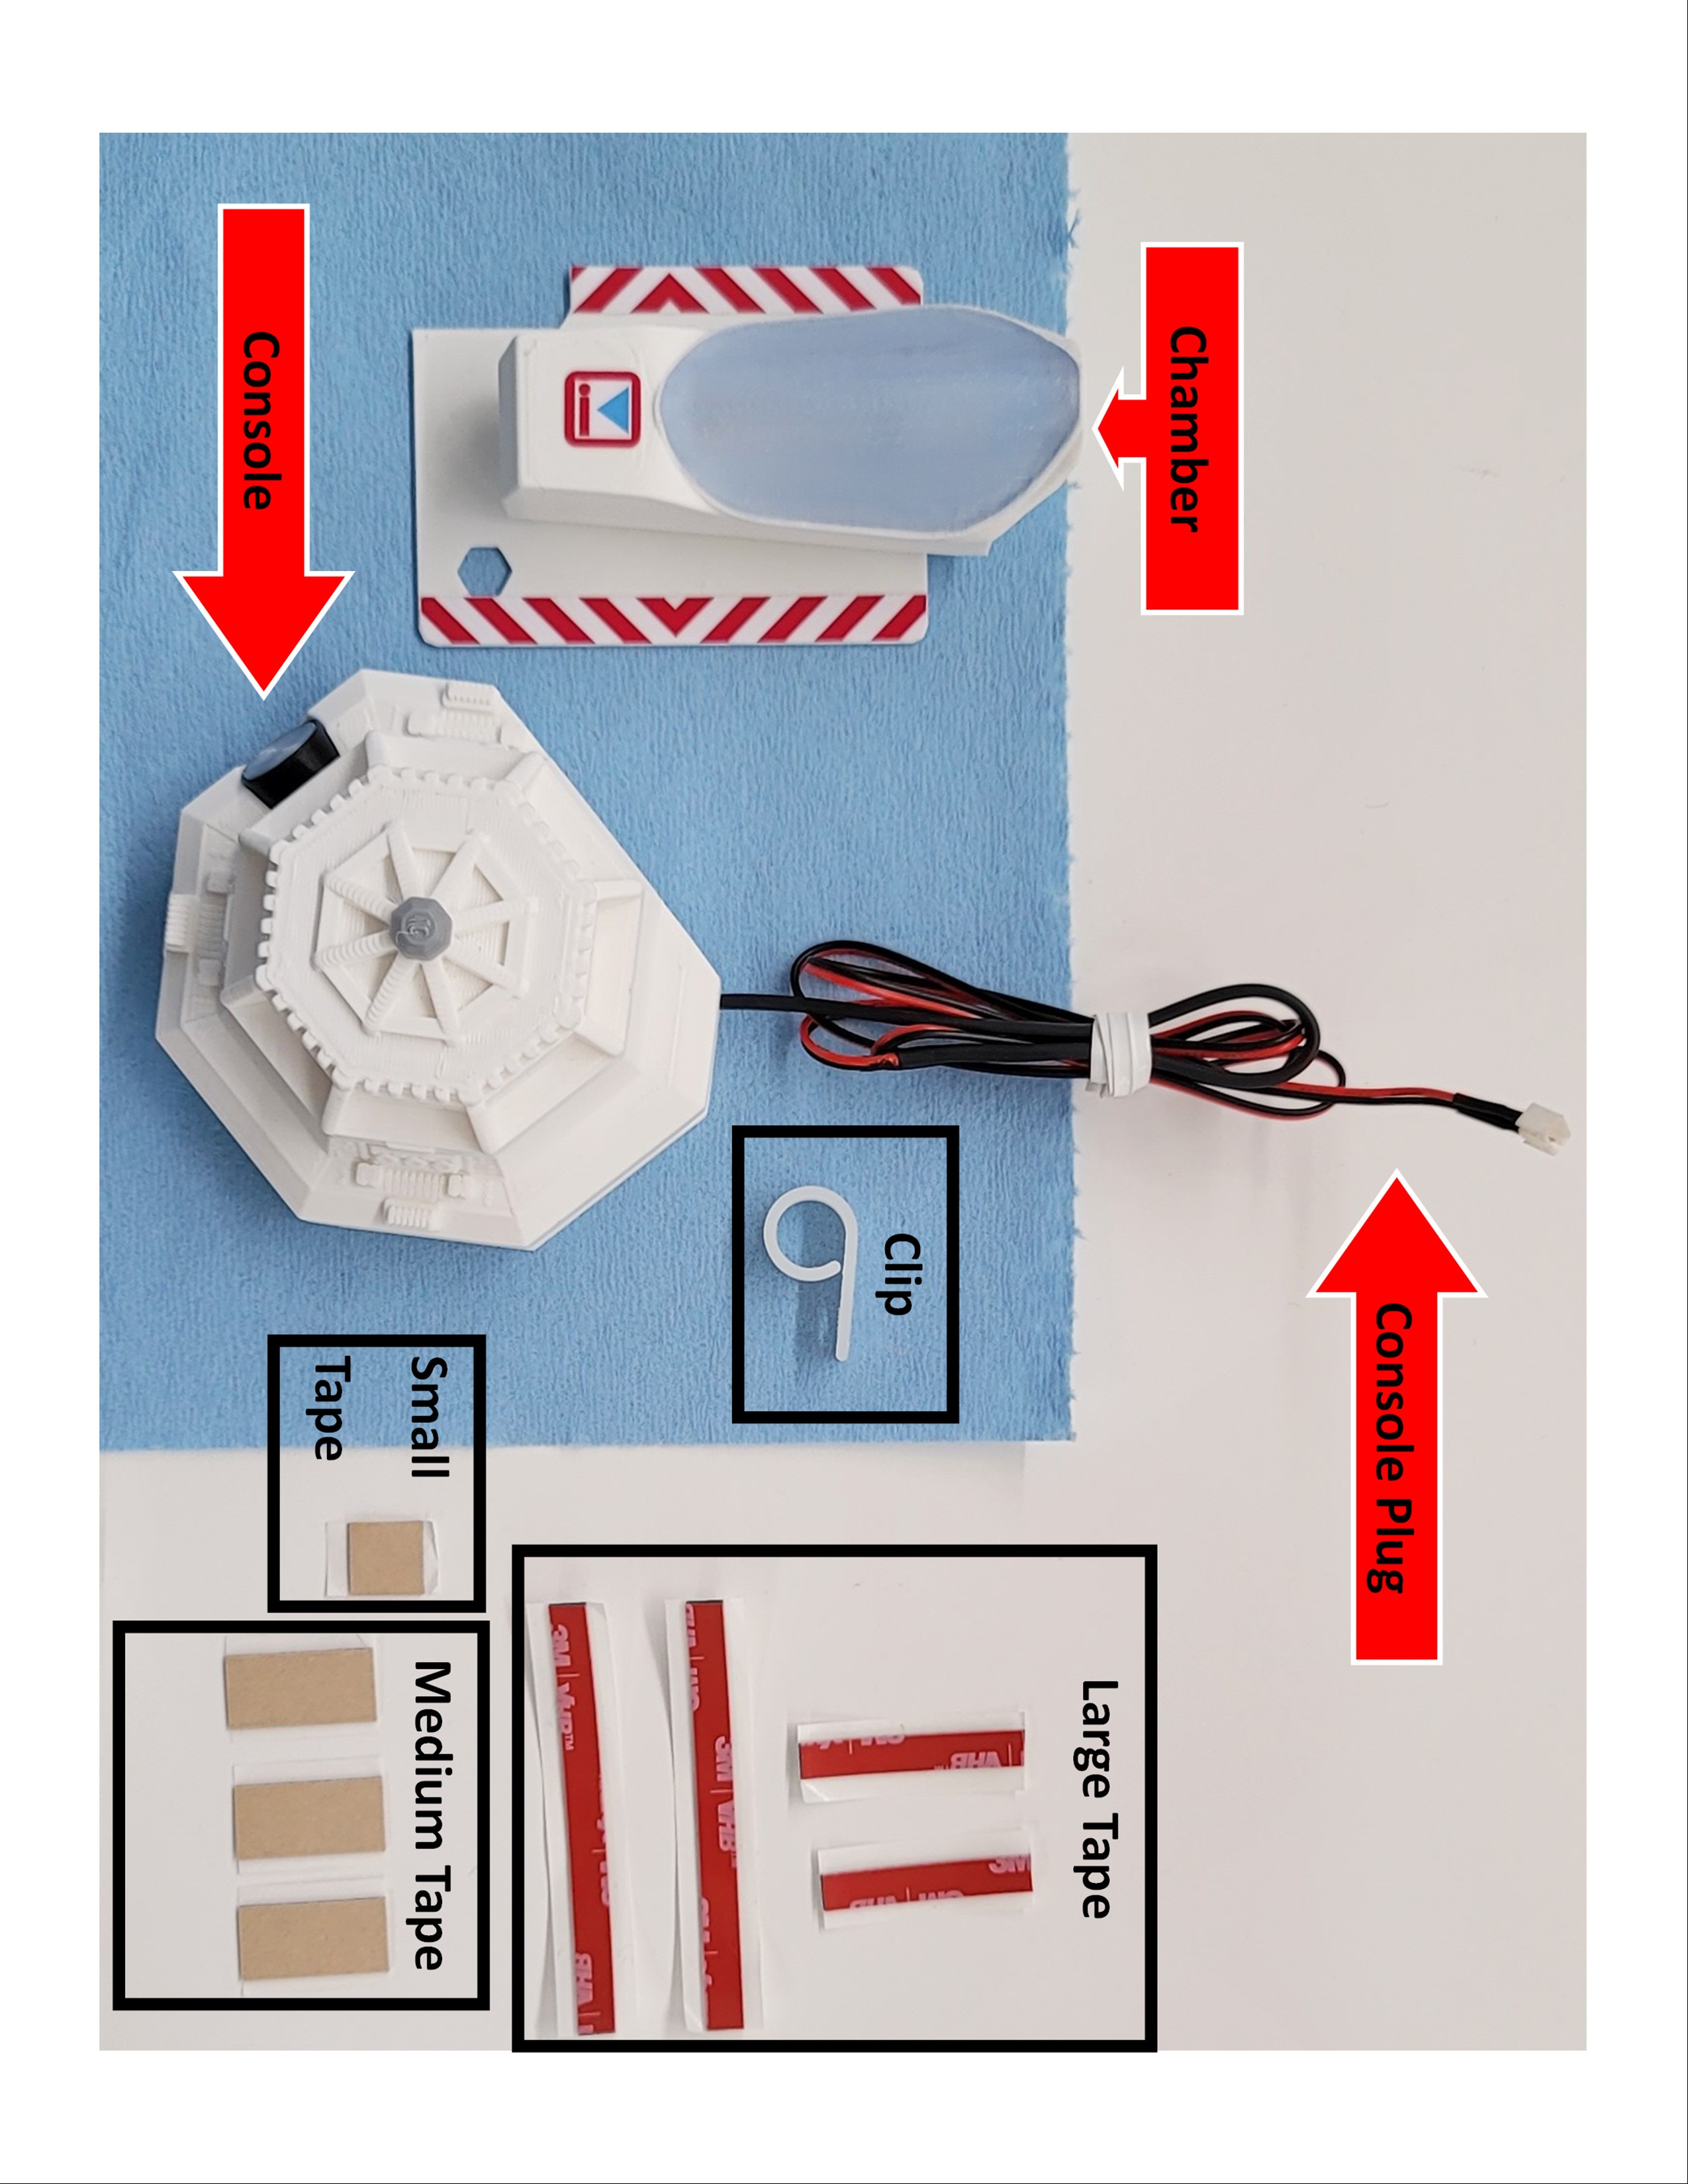
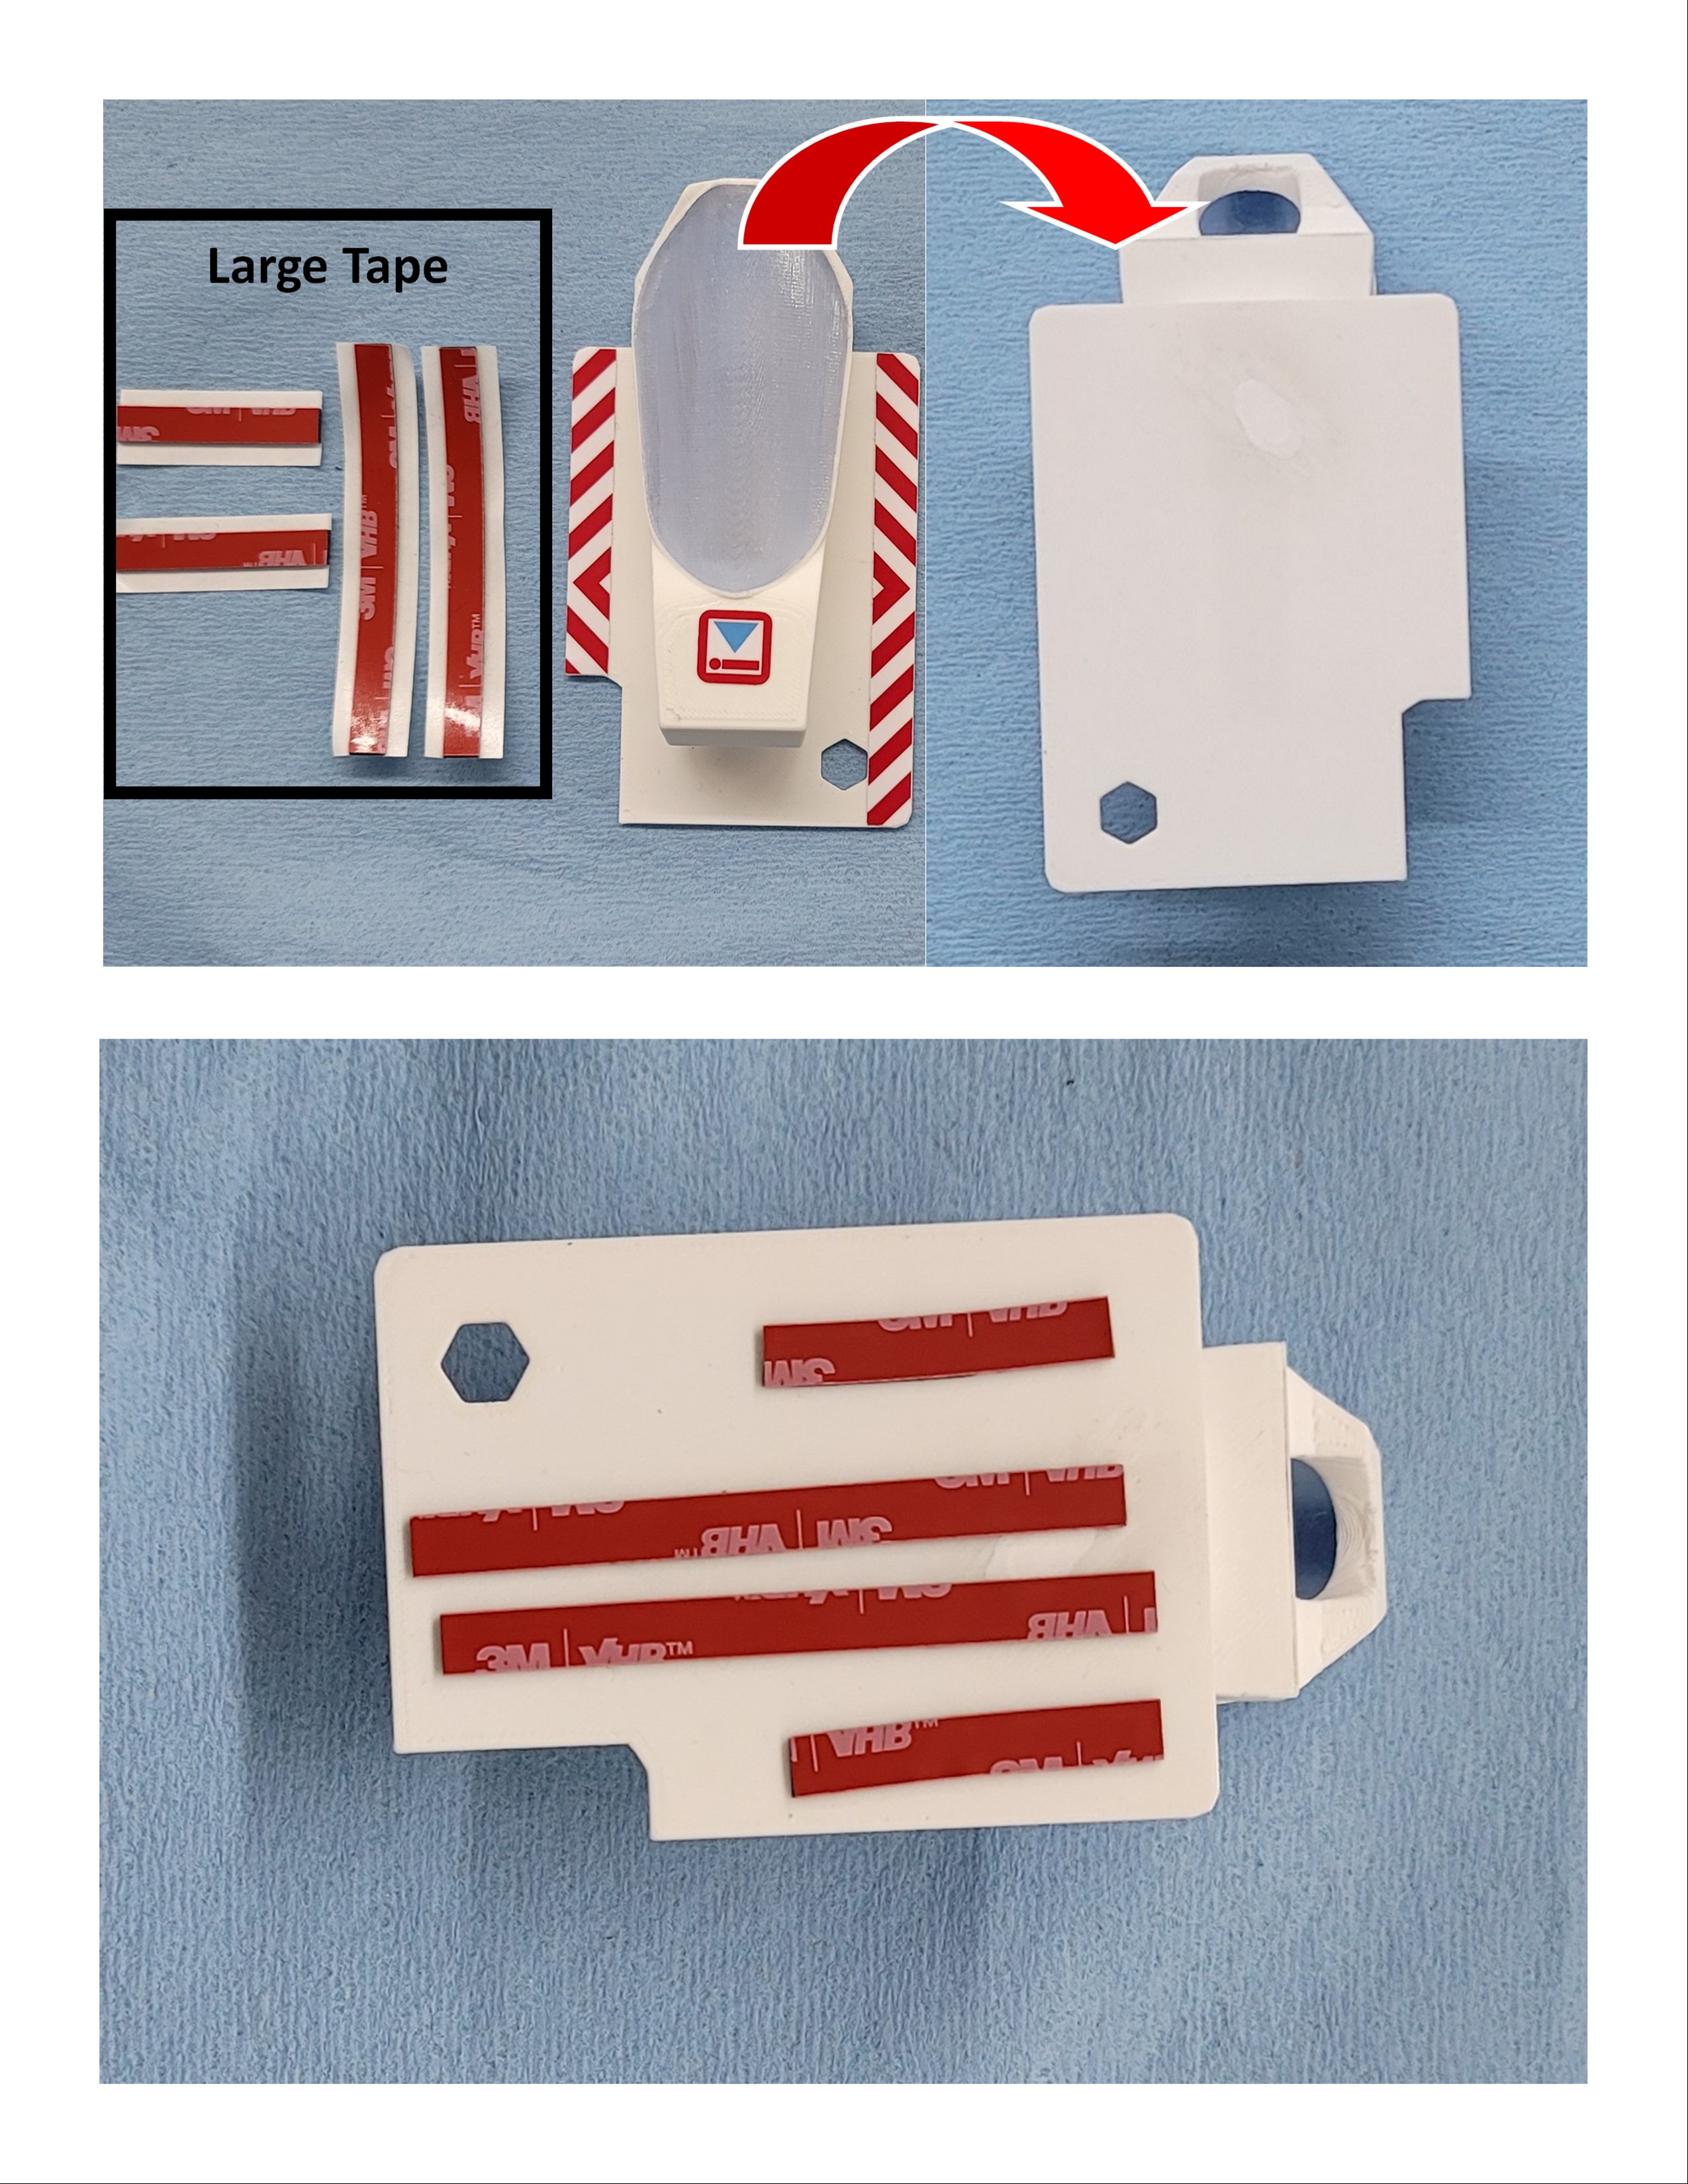
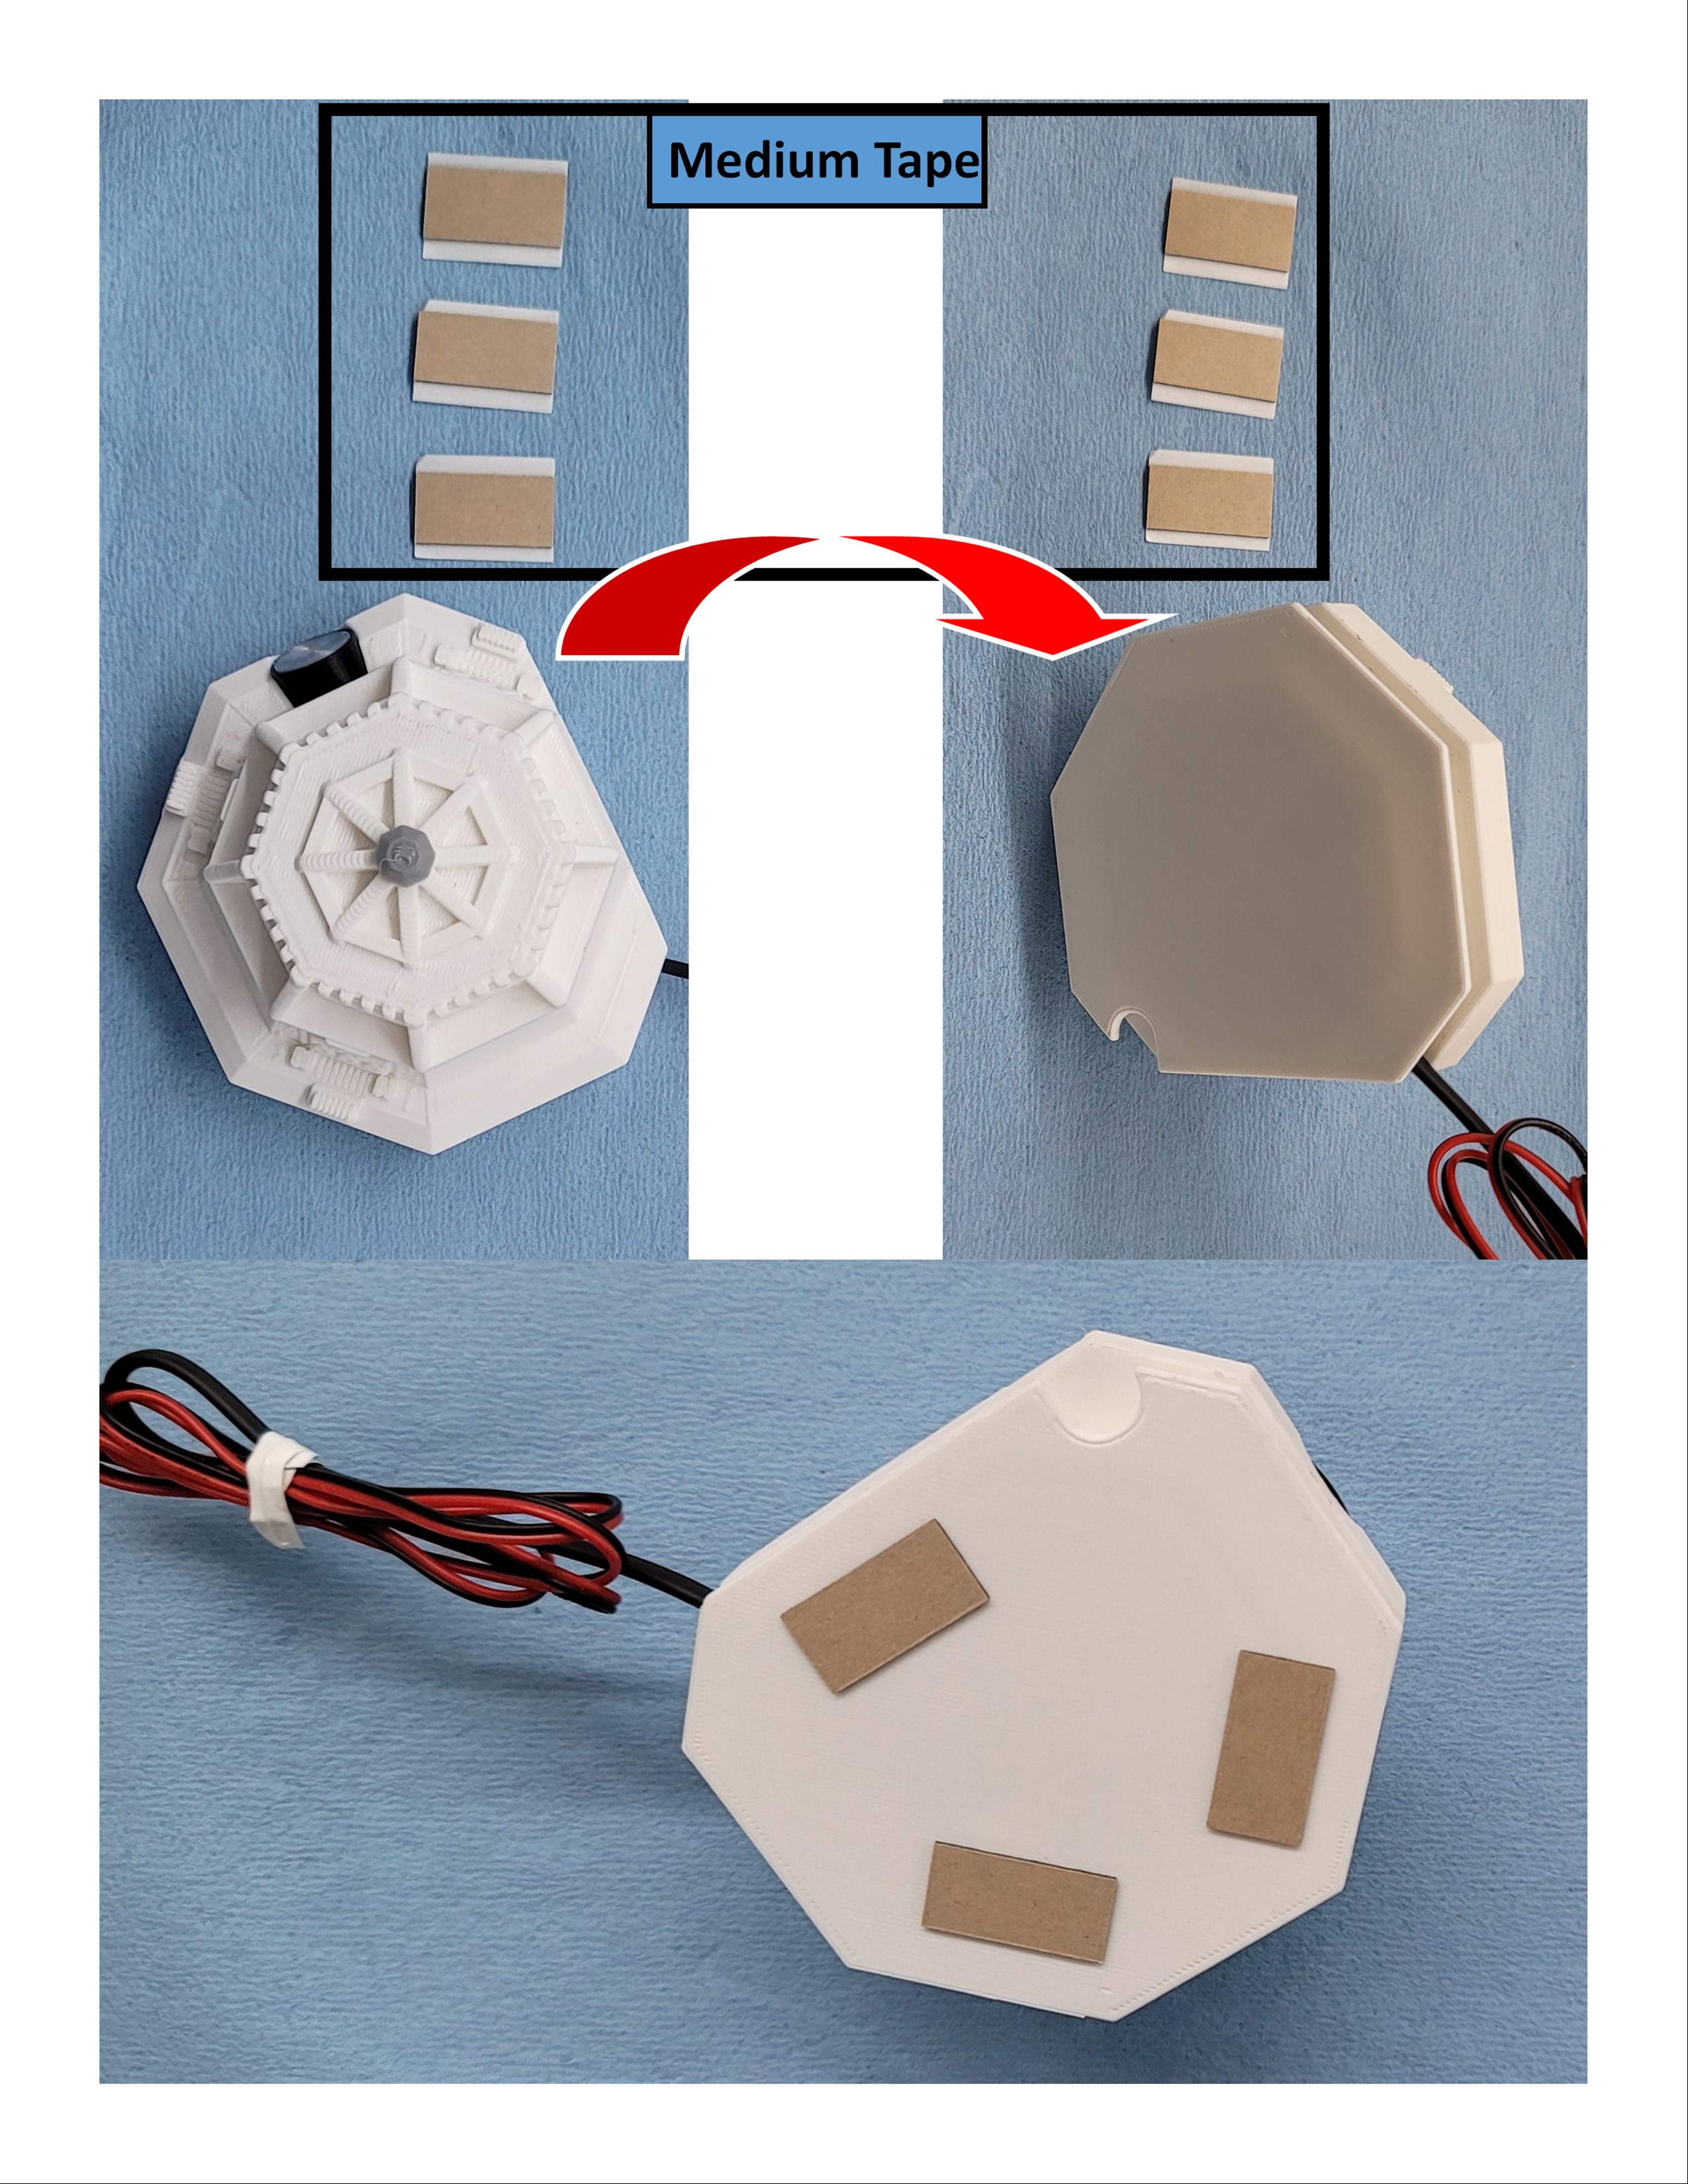
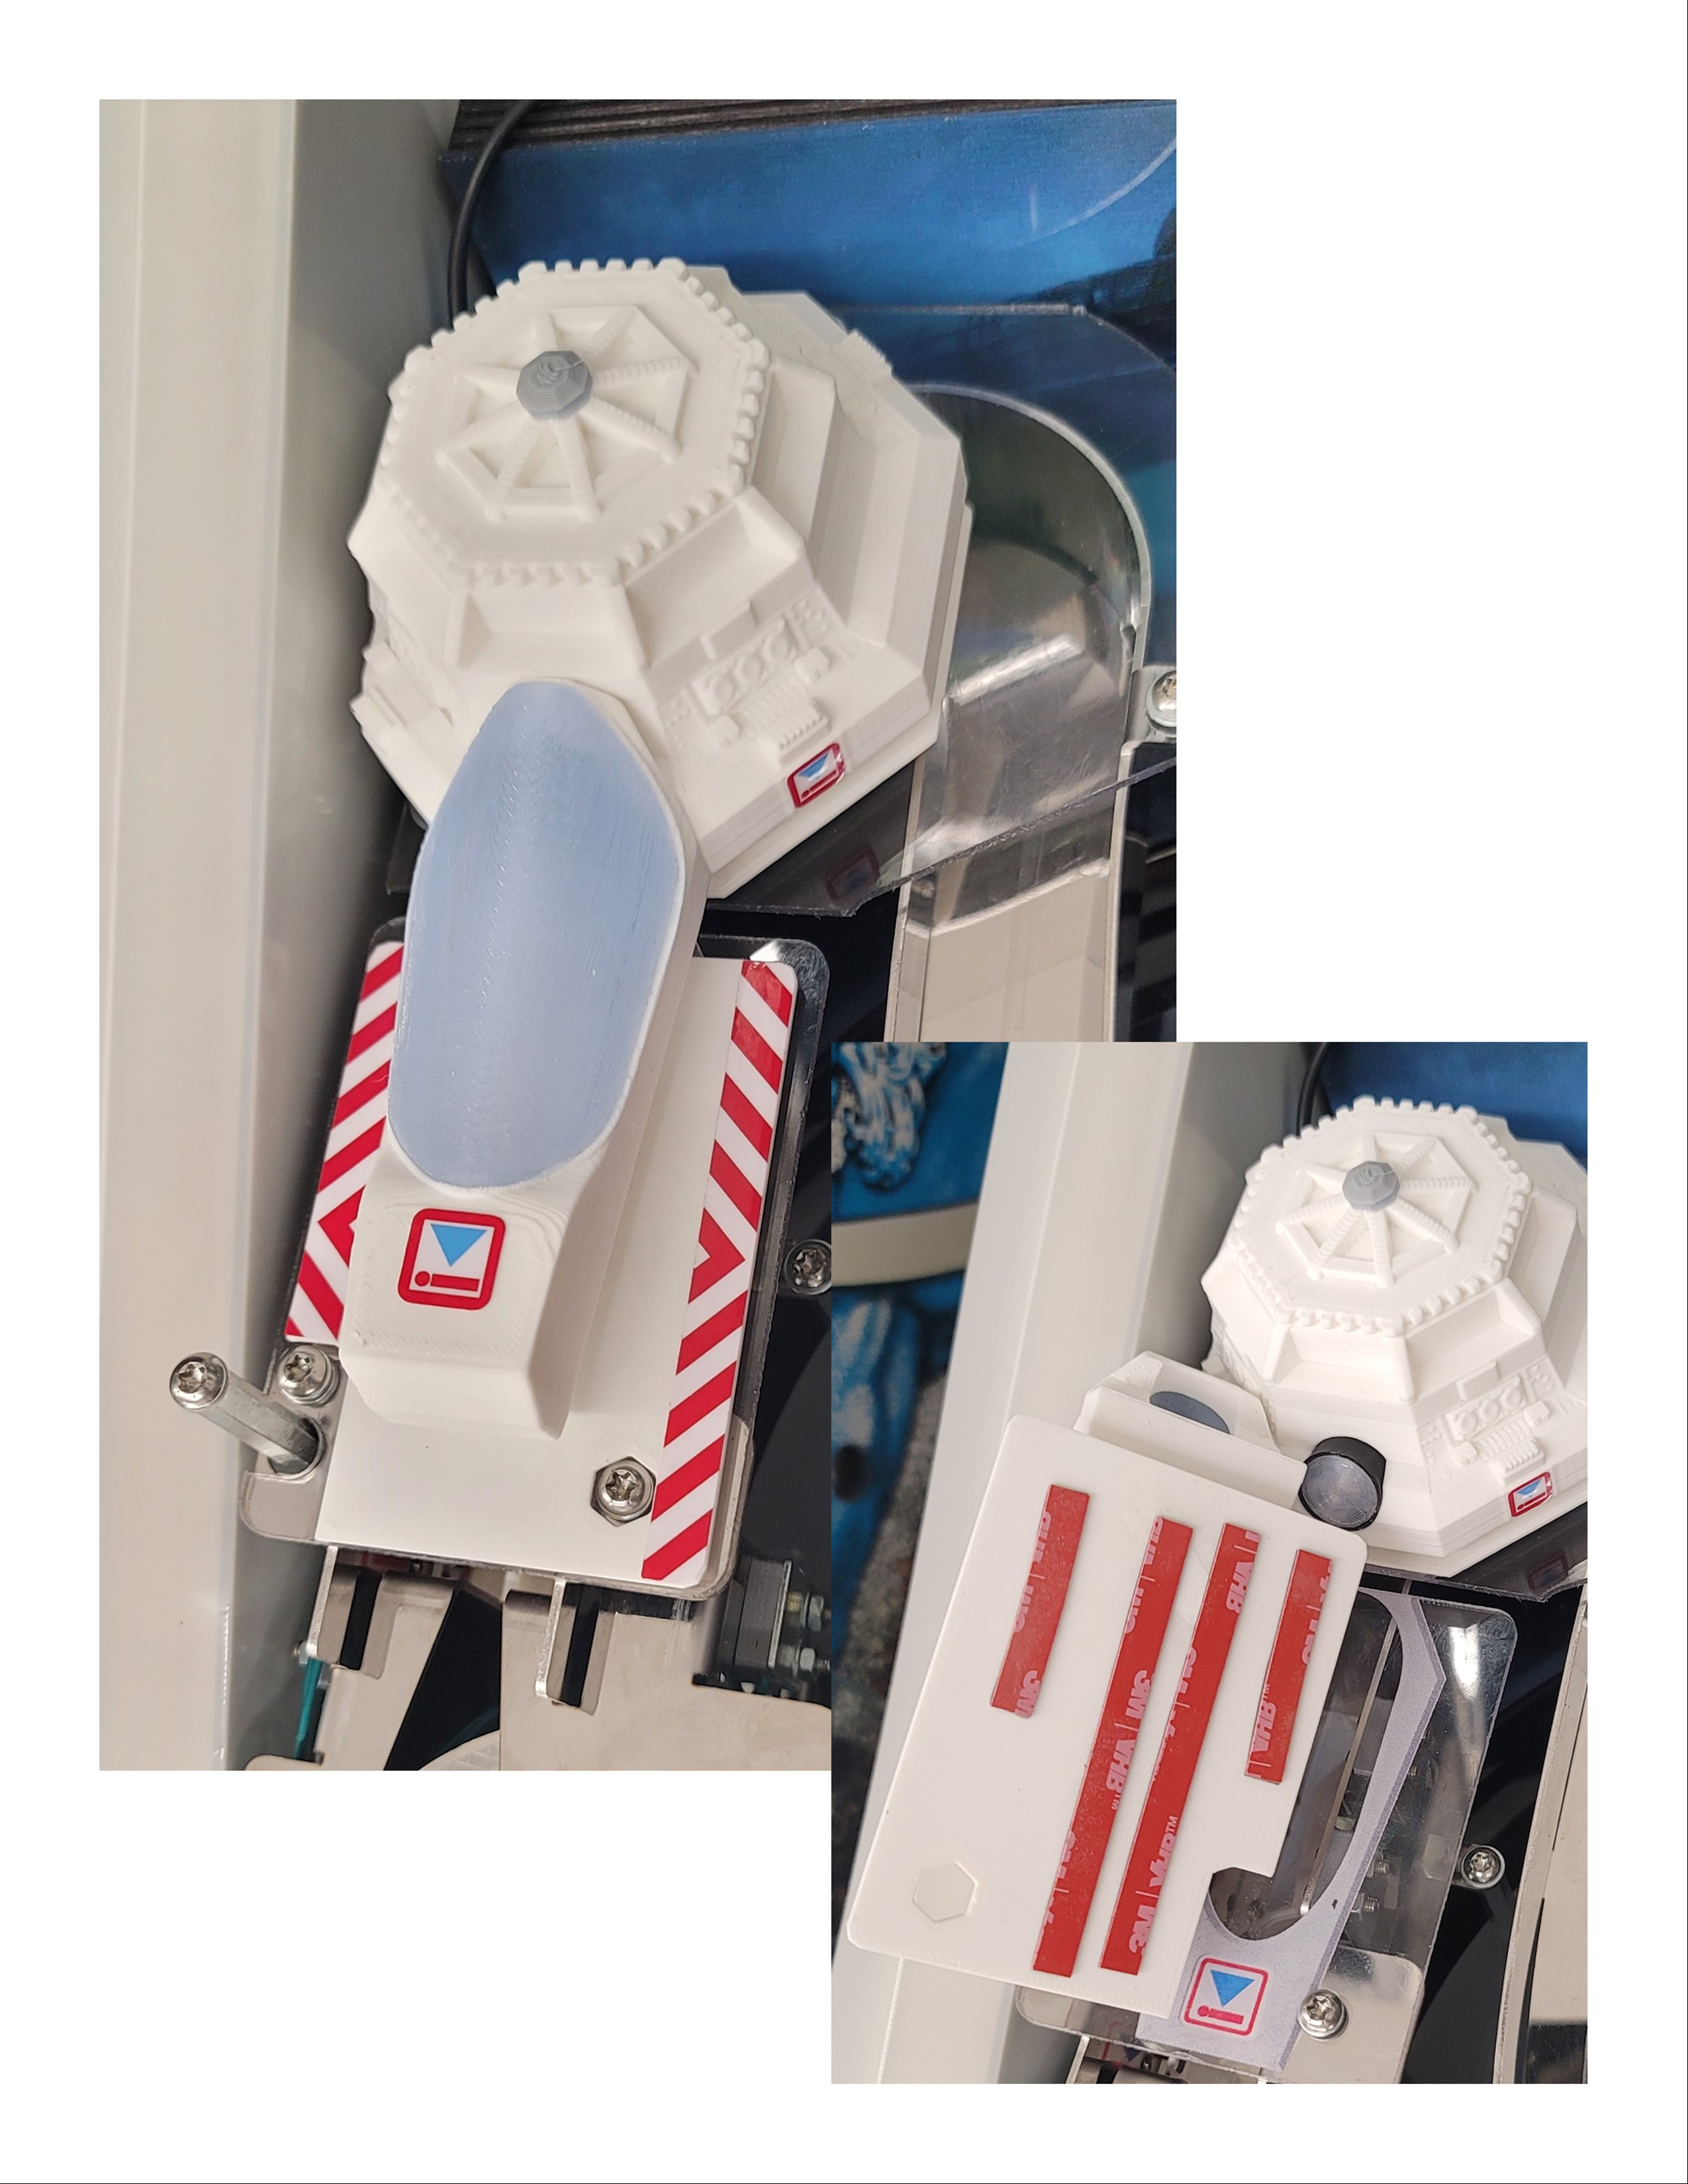
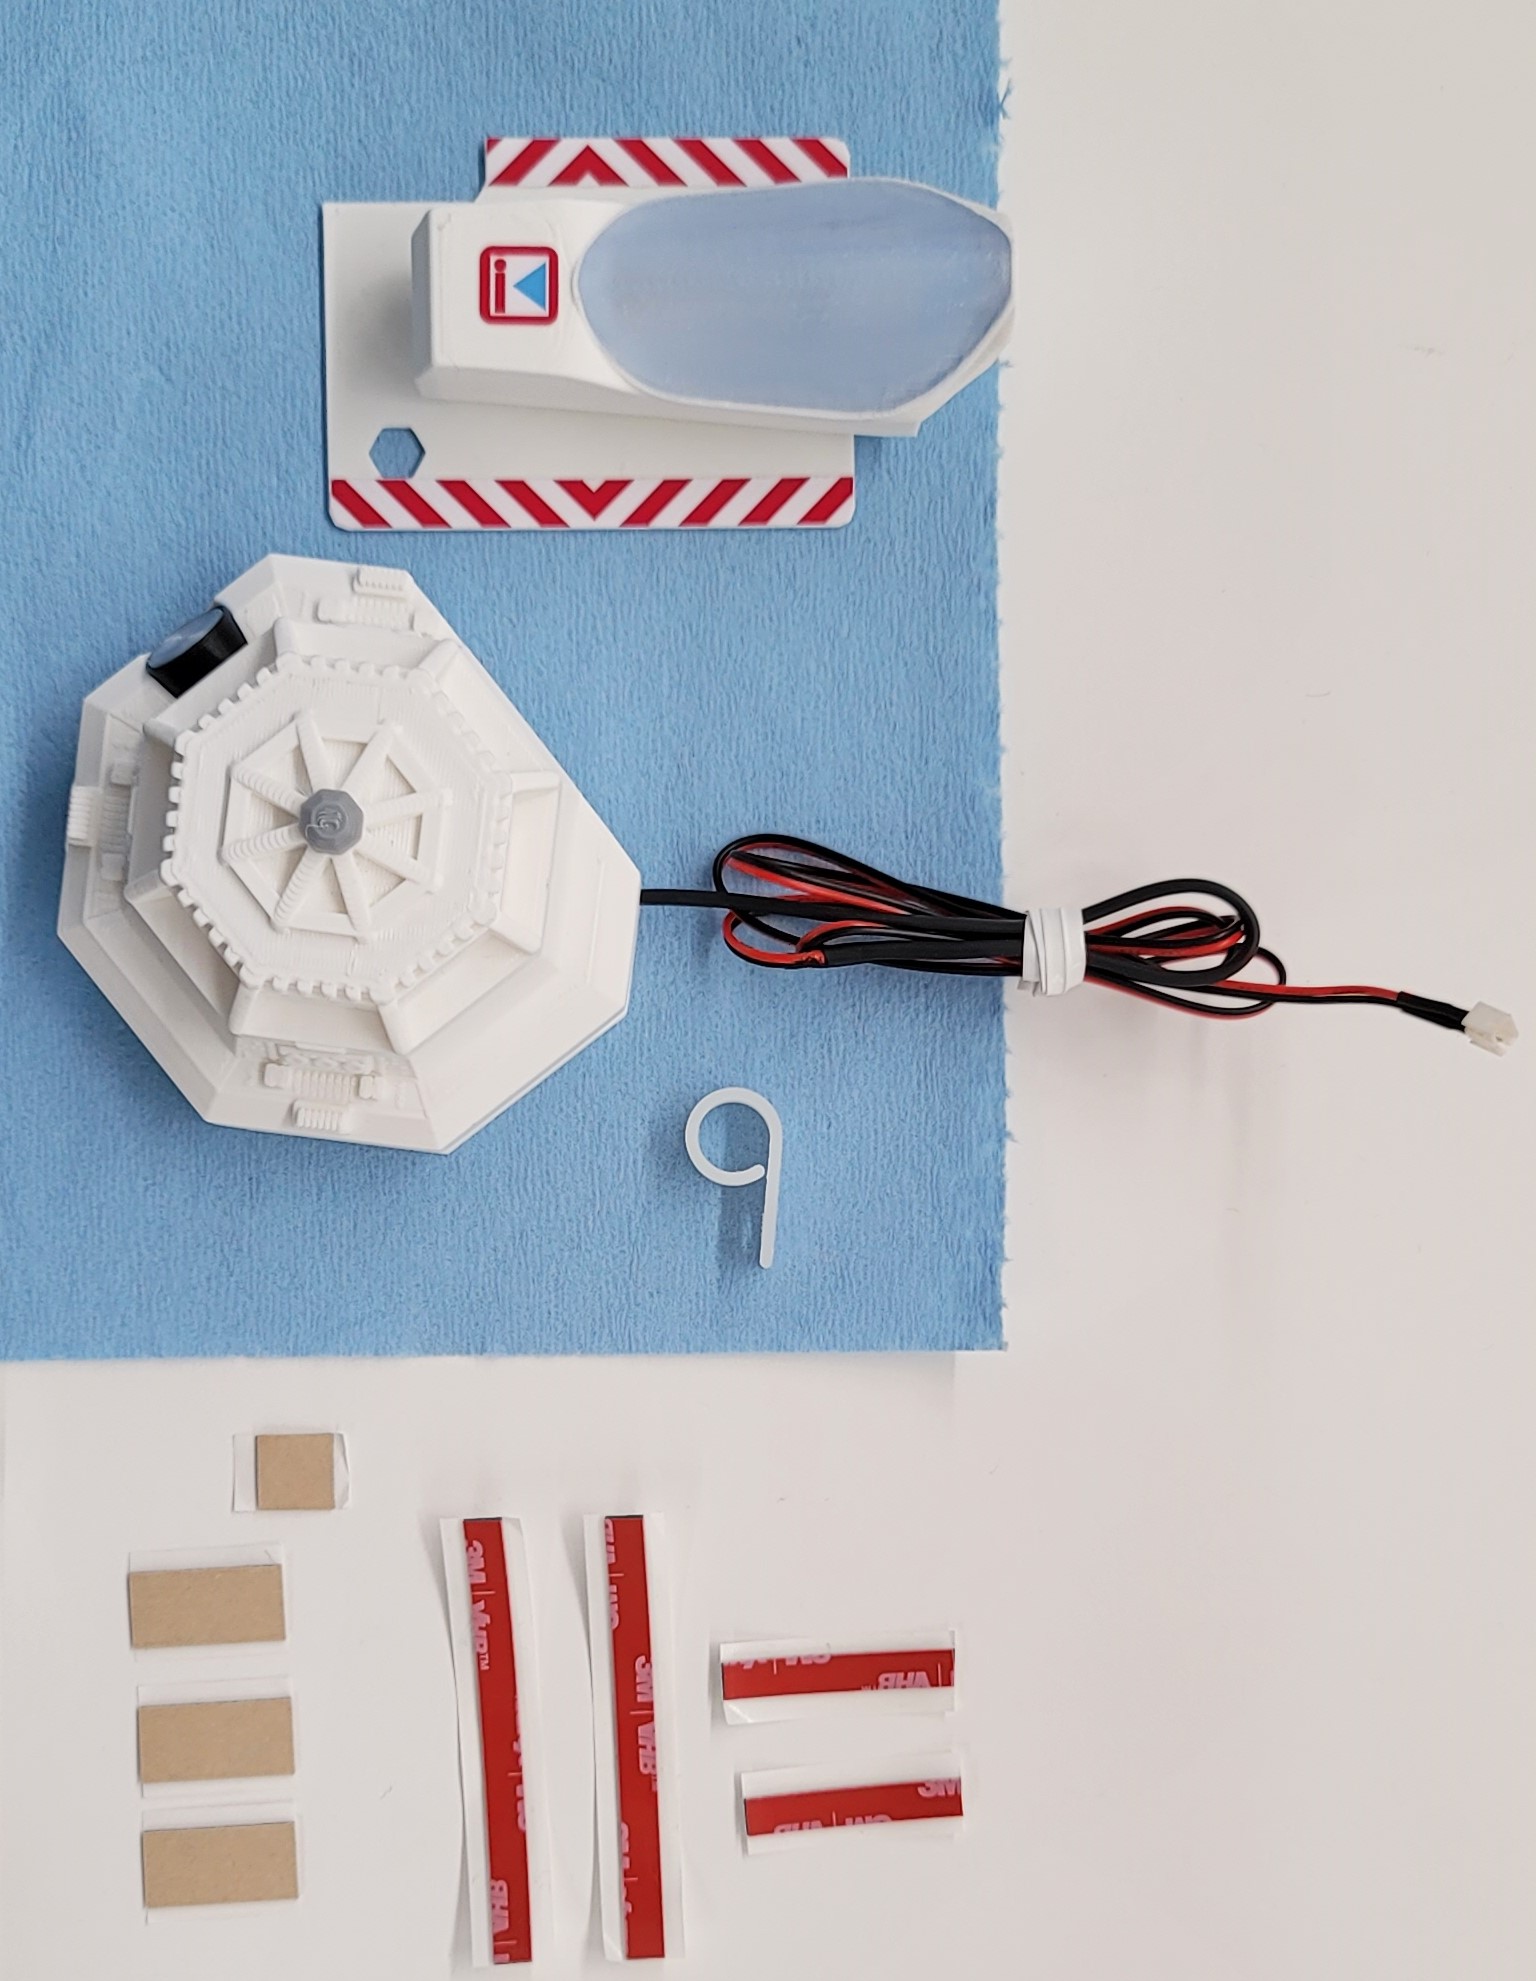
Take the Chamber and the large tape then flip the chamber over and apply the tape. Do the same with the console and medium tape.
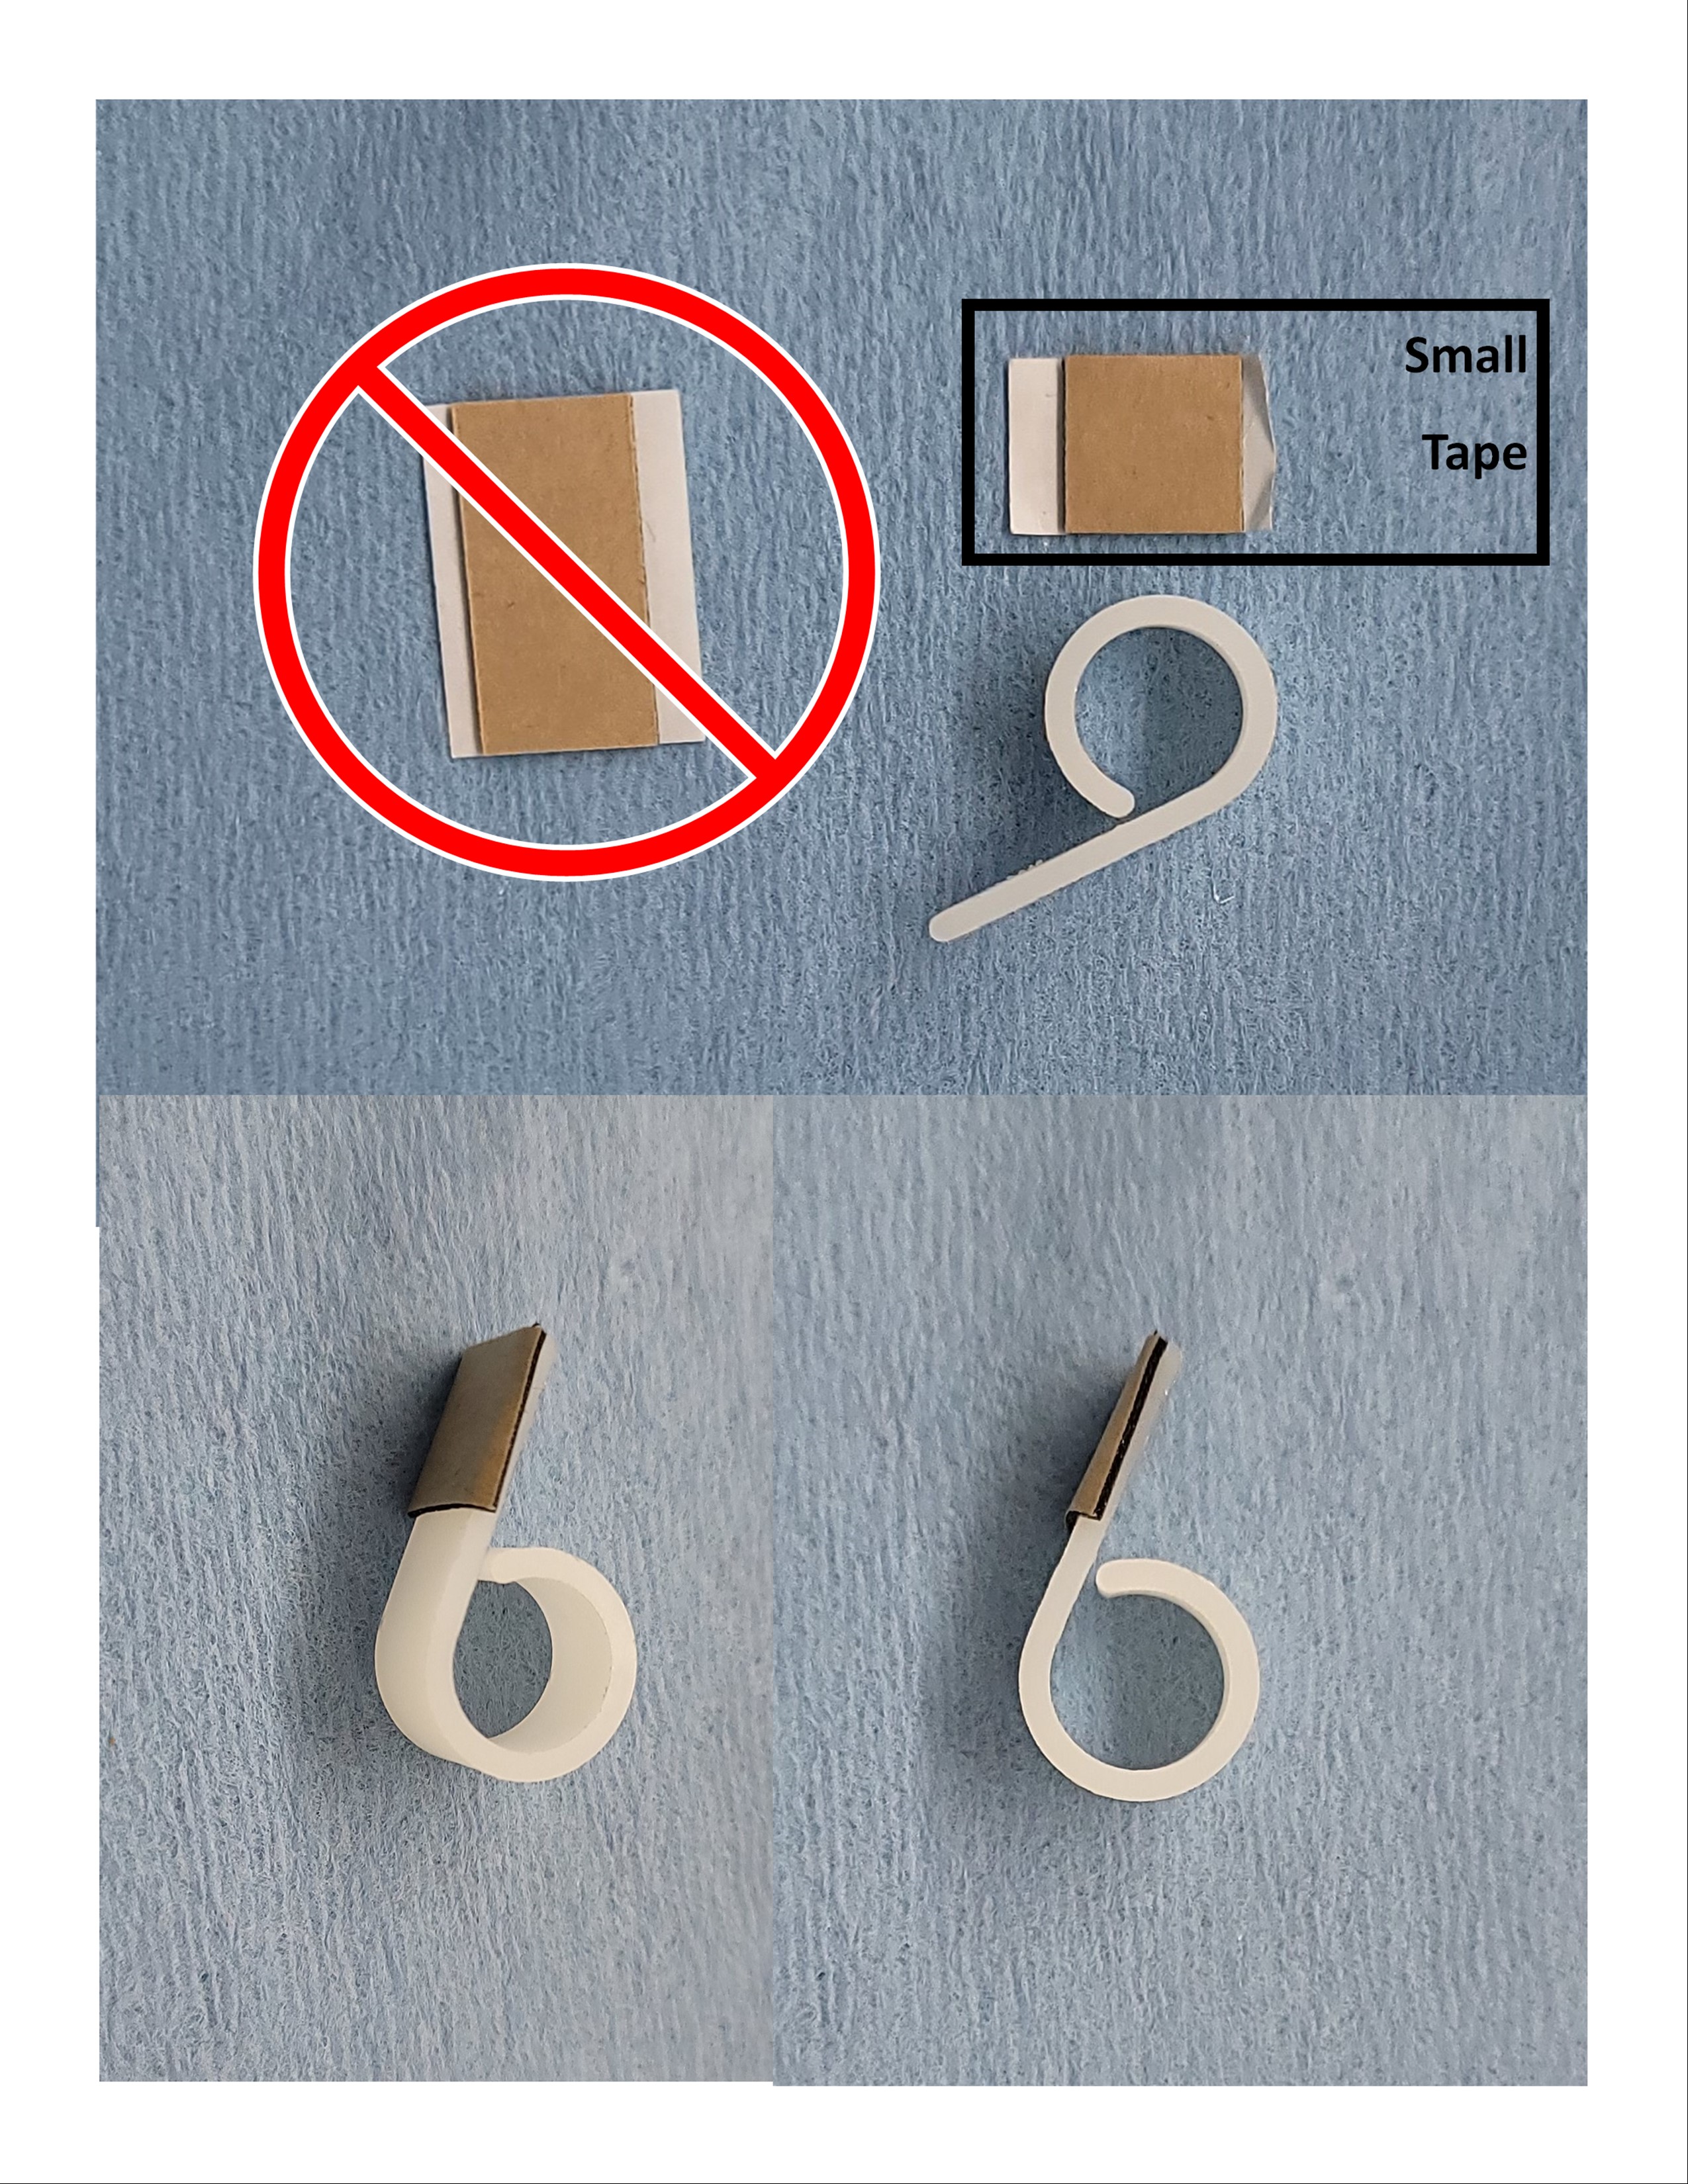
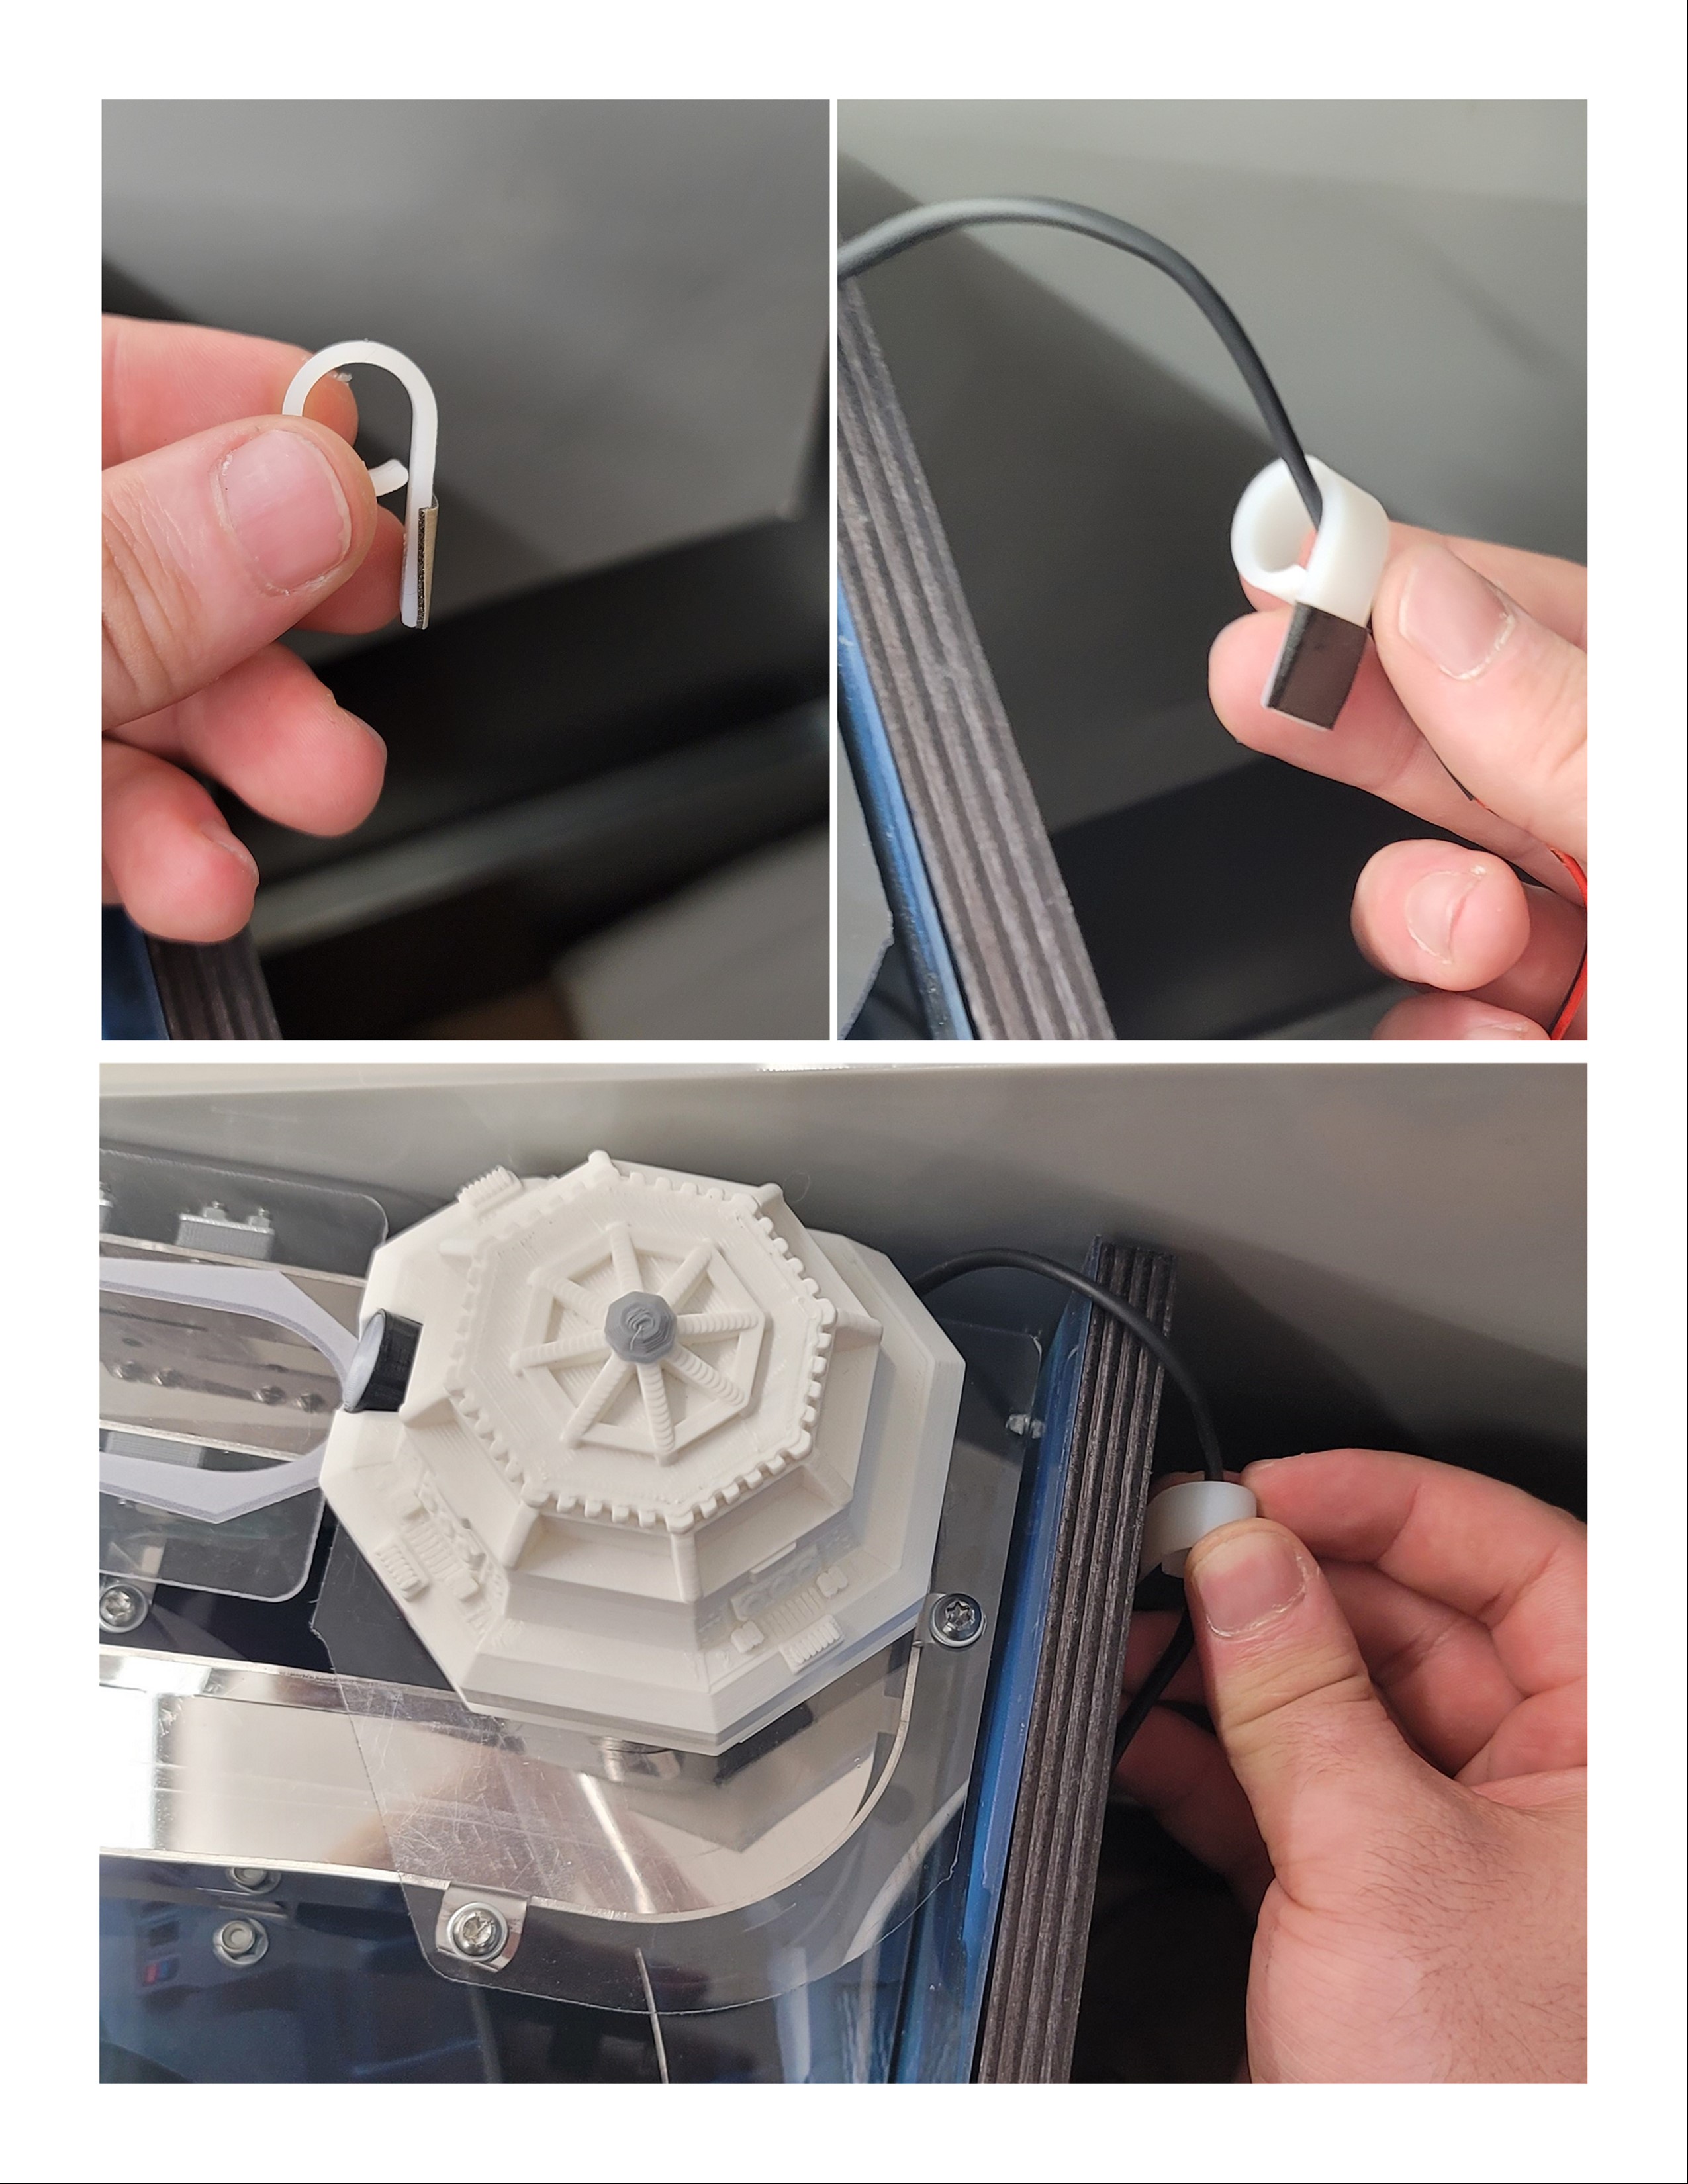
And one more time with the clip and small tape.
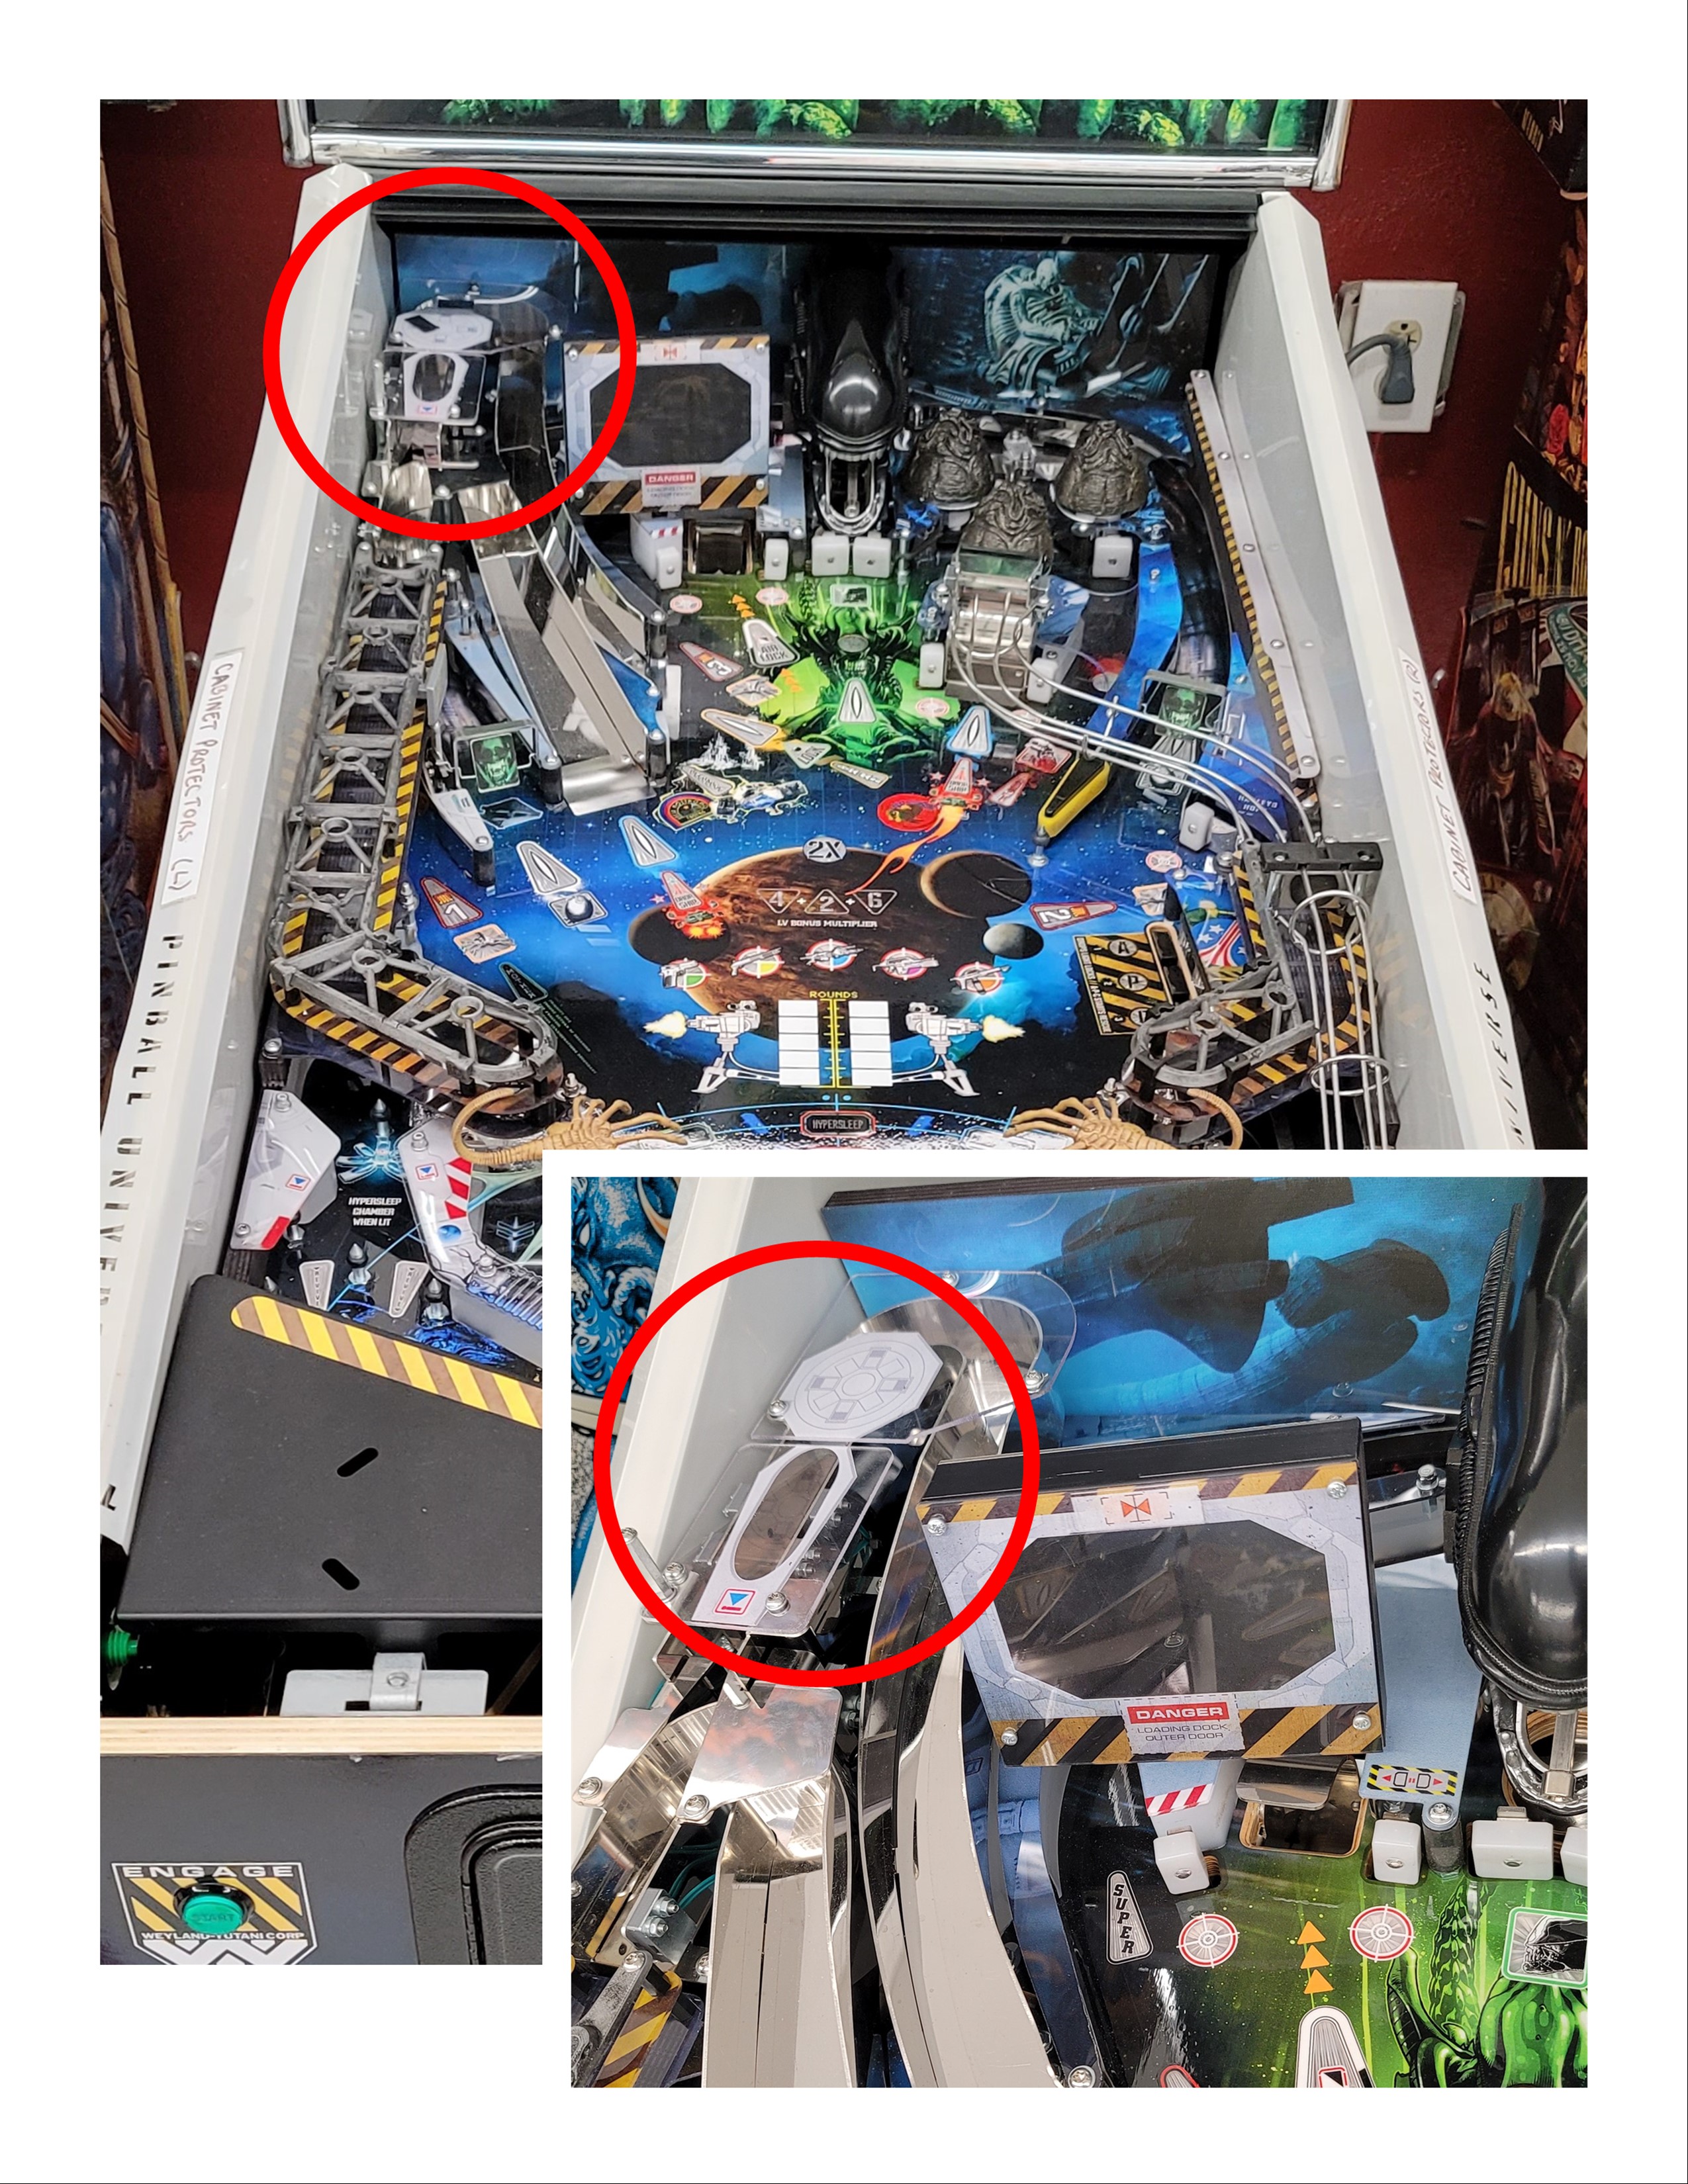
In the far back left corner of the playfield, you'll find the "existing" sleep chamber decal.
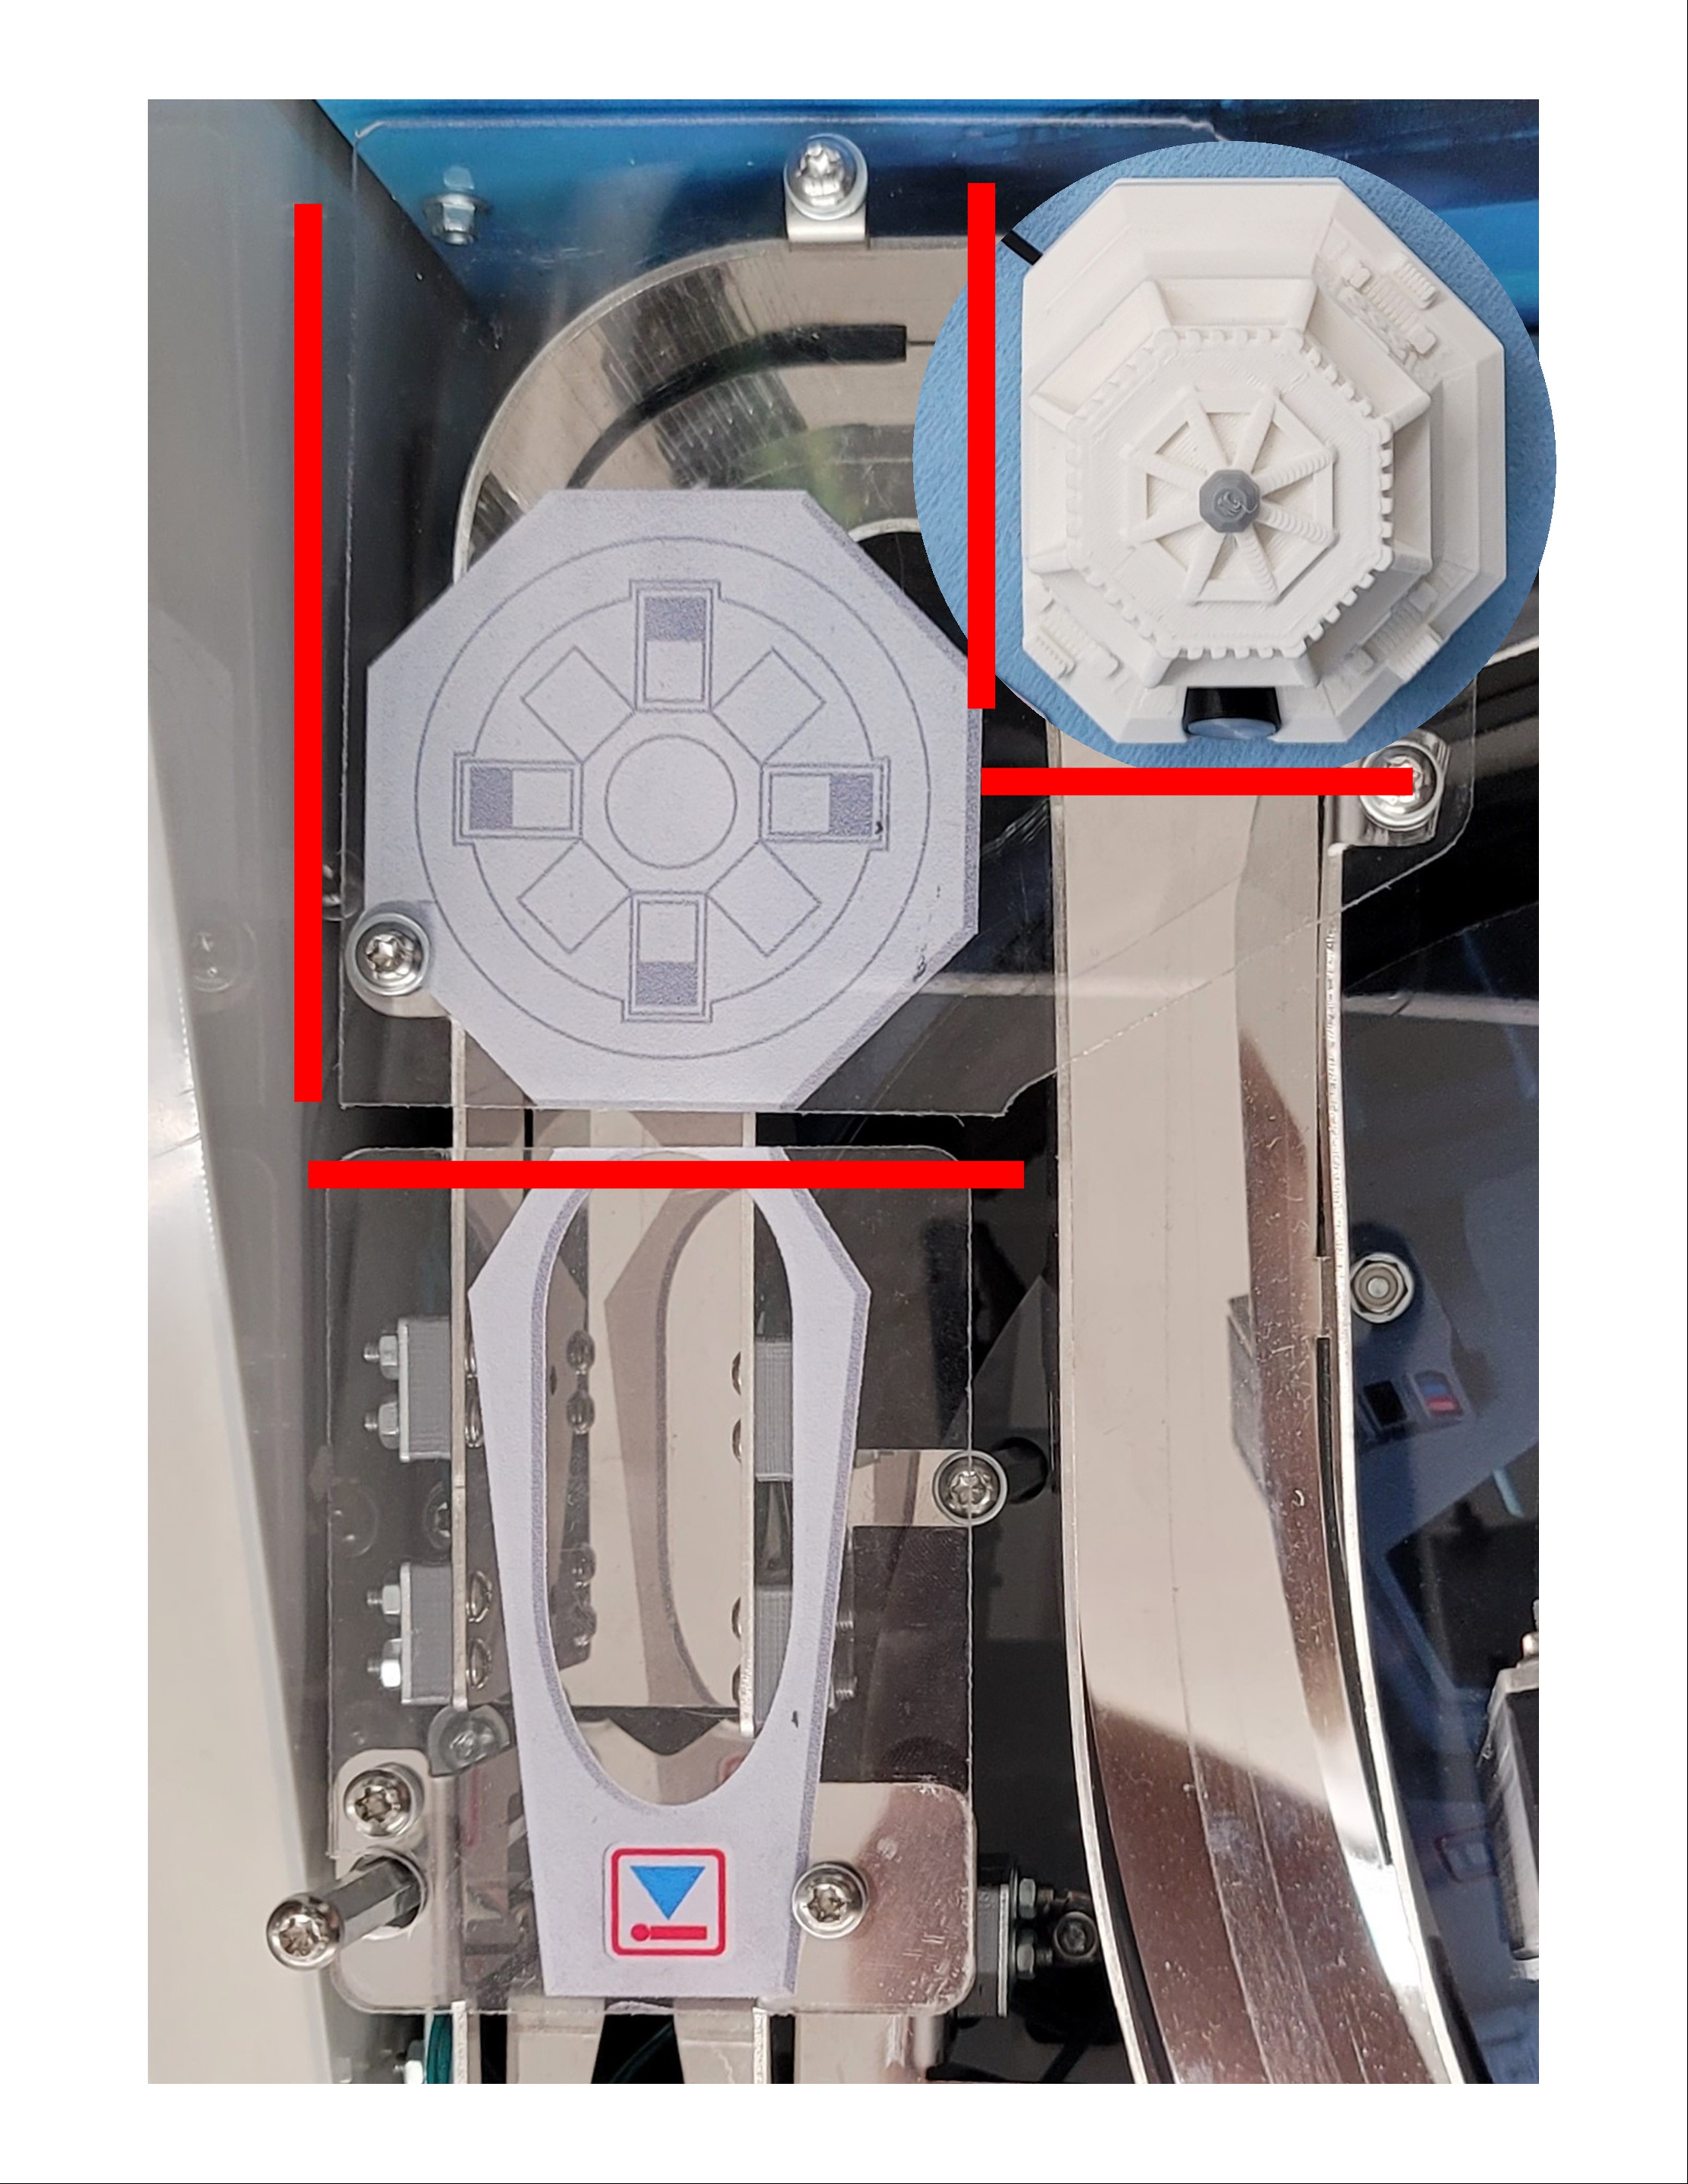
Placement Guide:
Start with the console and practice the placement with the tape covers still on, and align the console's front and left edge with the acrylic's front and left edge. Once you're ready remove the tape covers and follow the next step.
With the tape covers removed, align the console's front and left edge with the acrylic's front and left edge, then hold in place for 6 to 12 seconds. Refer to the Placement Guide Video
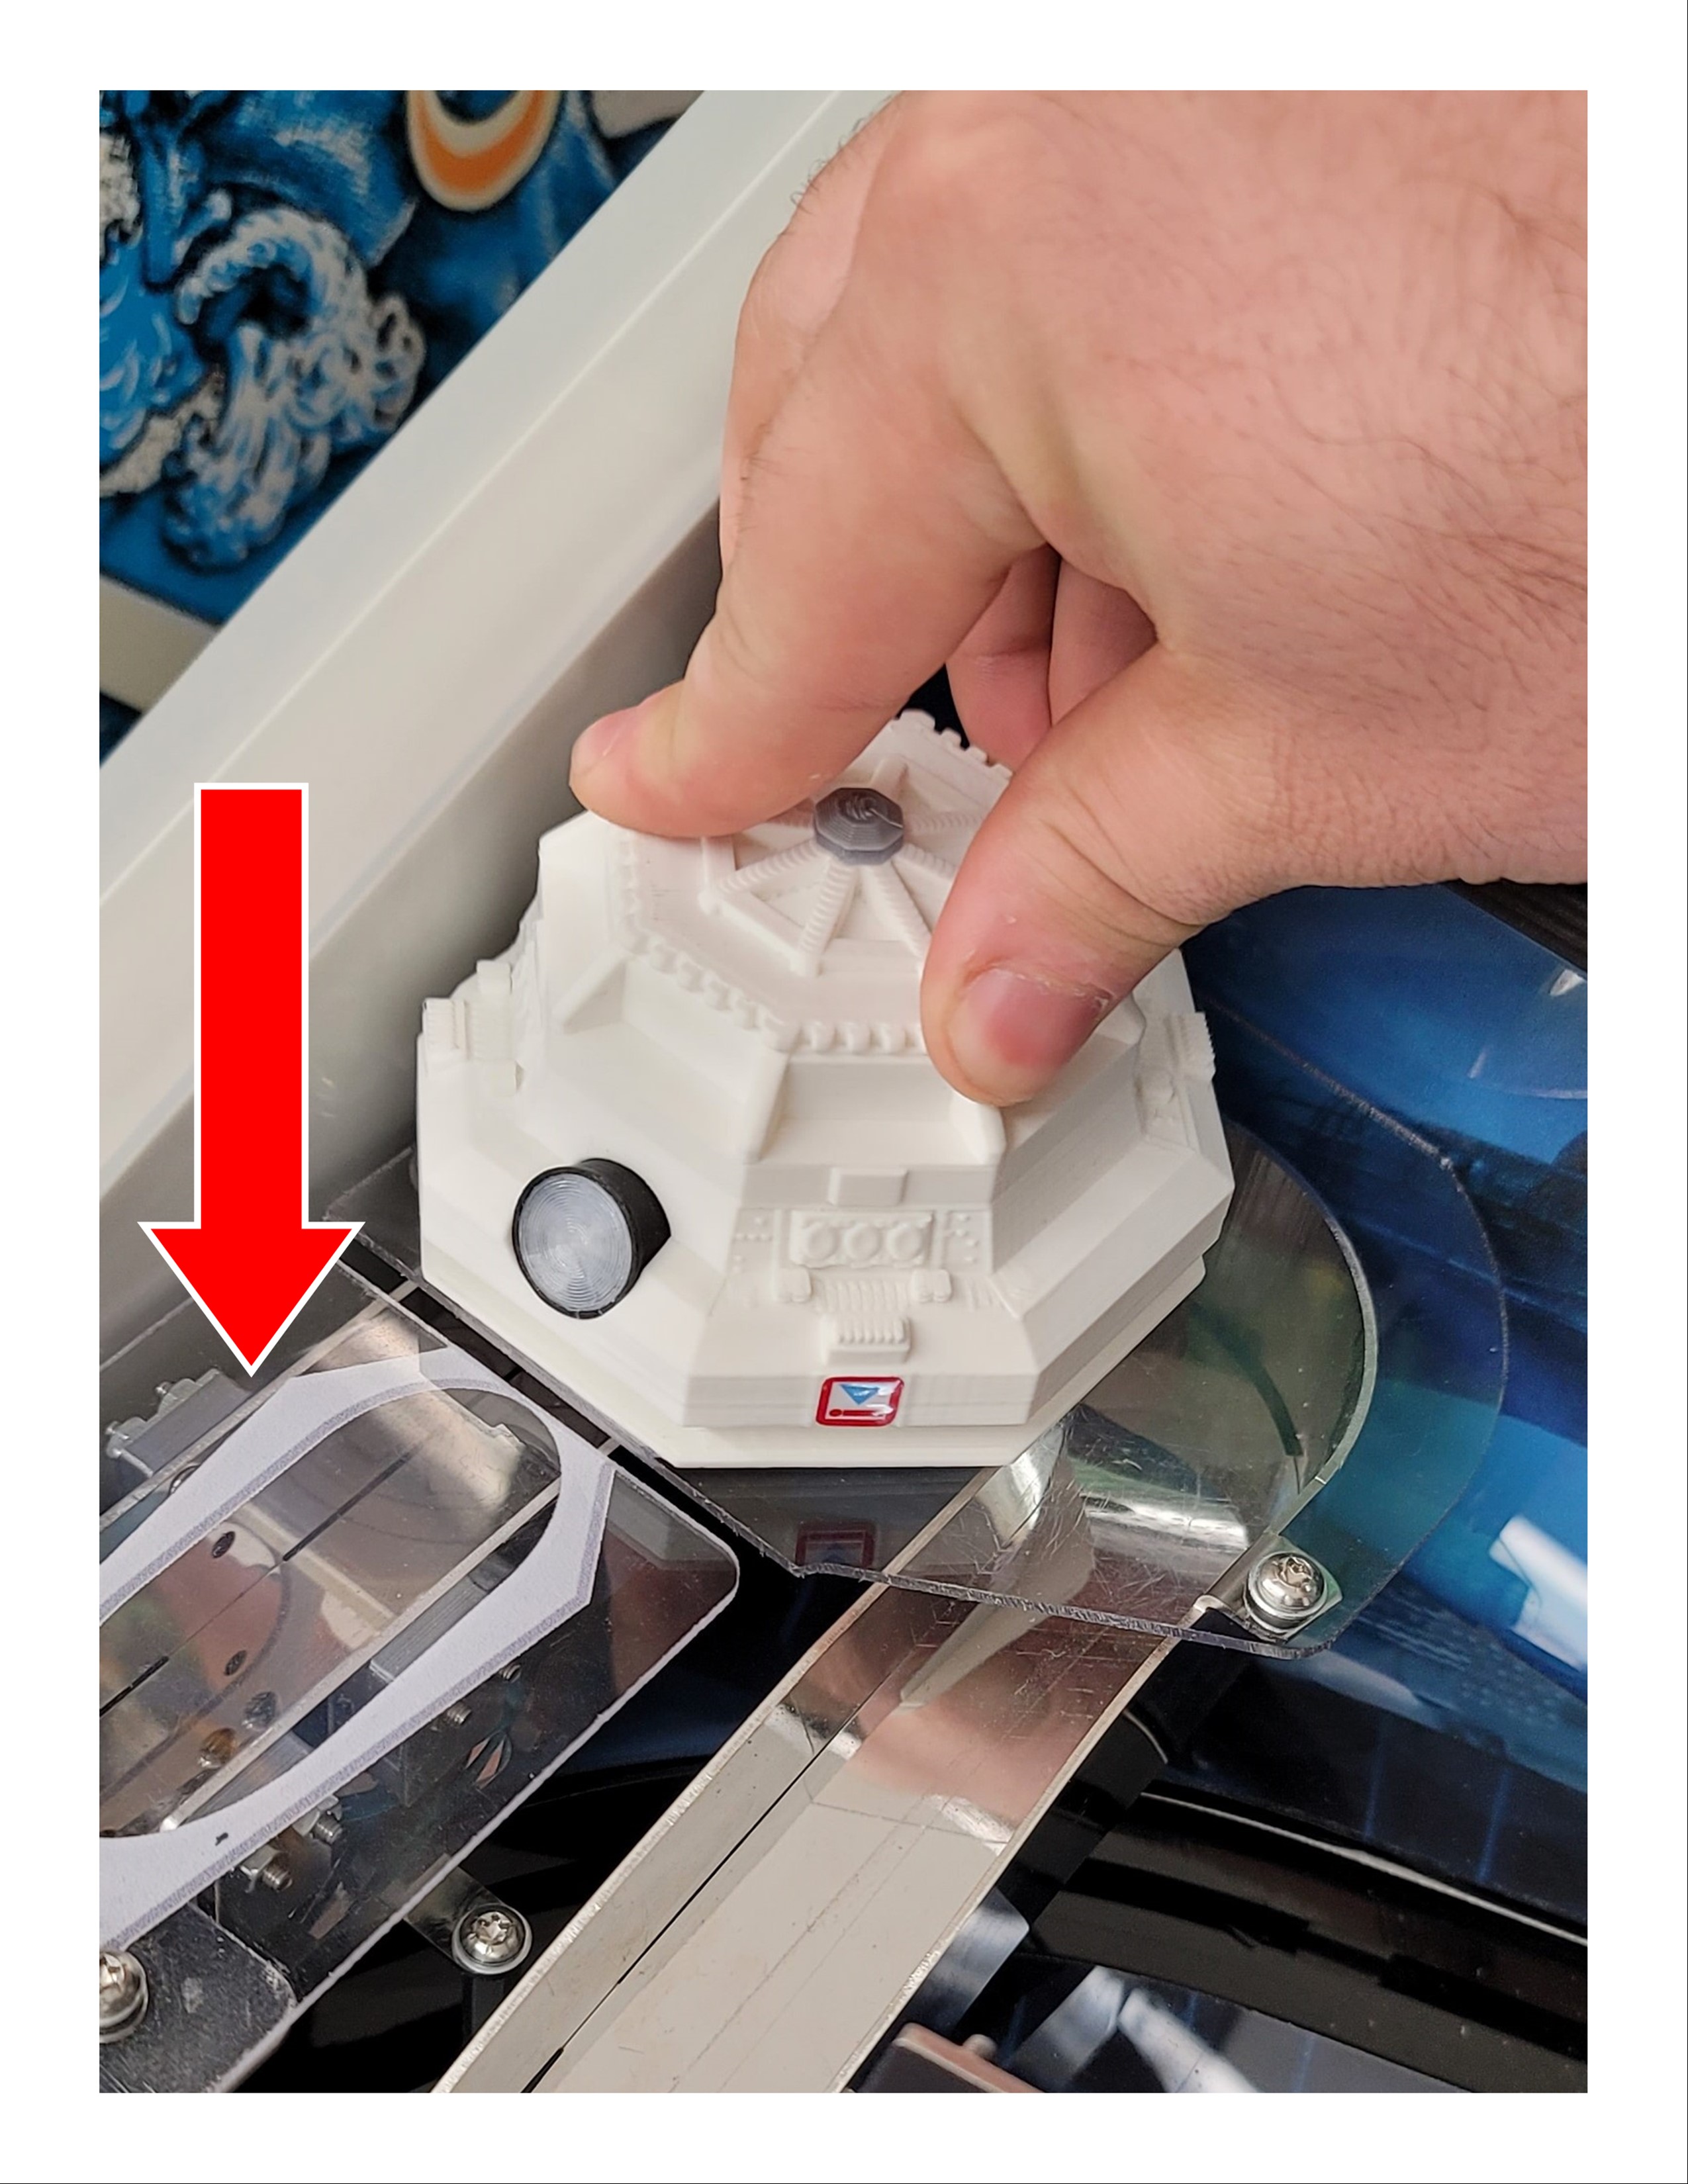
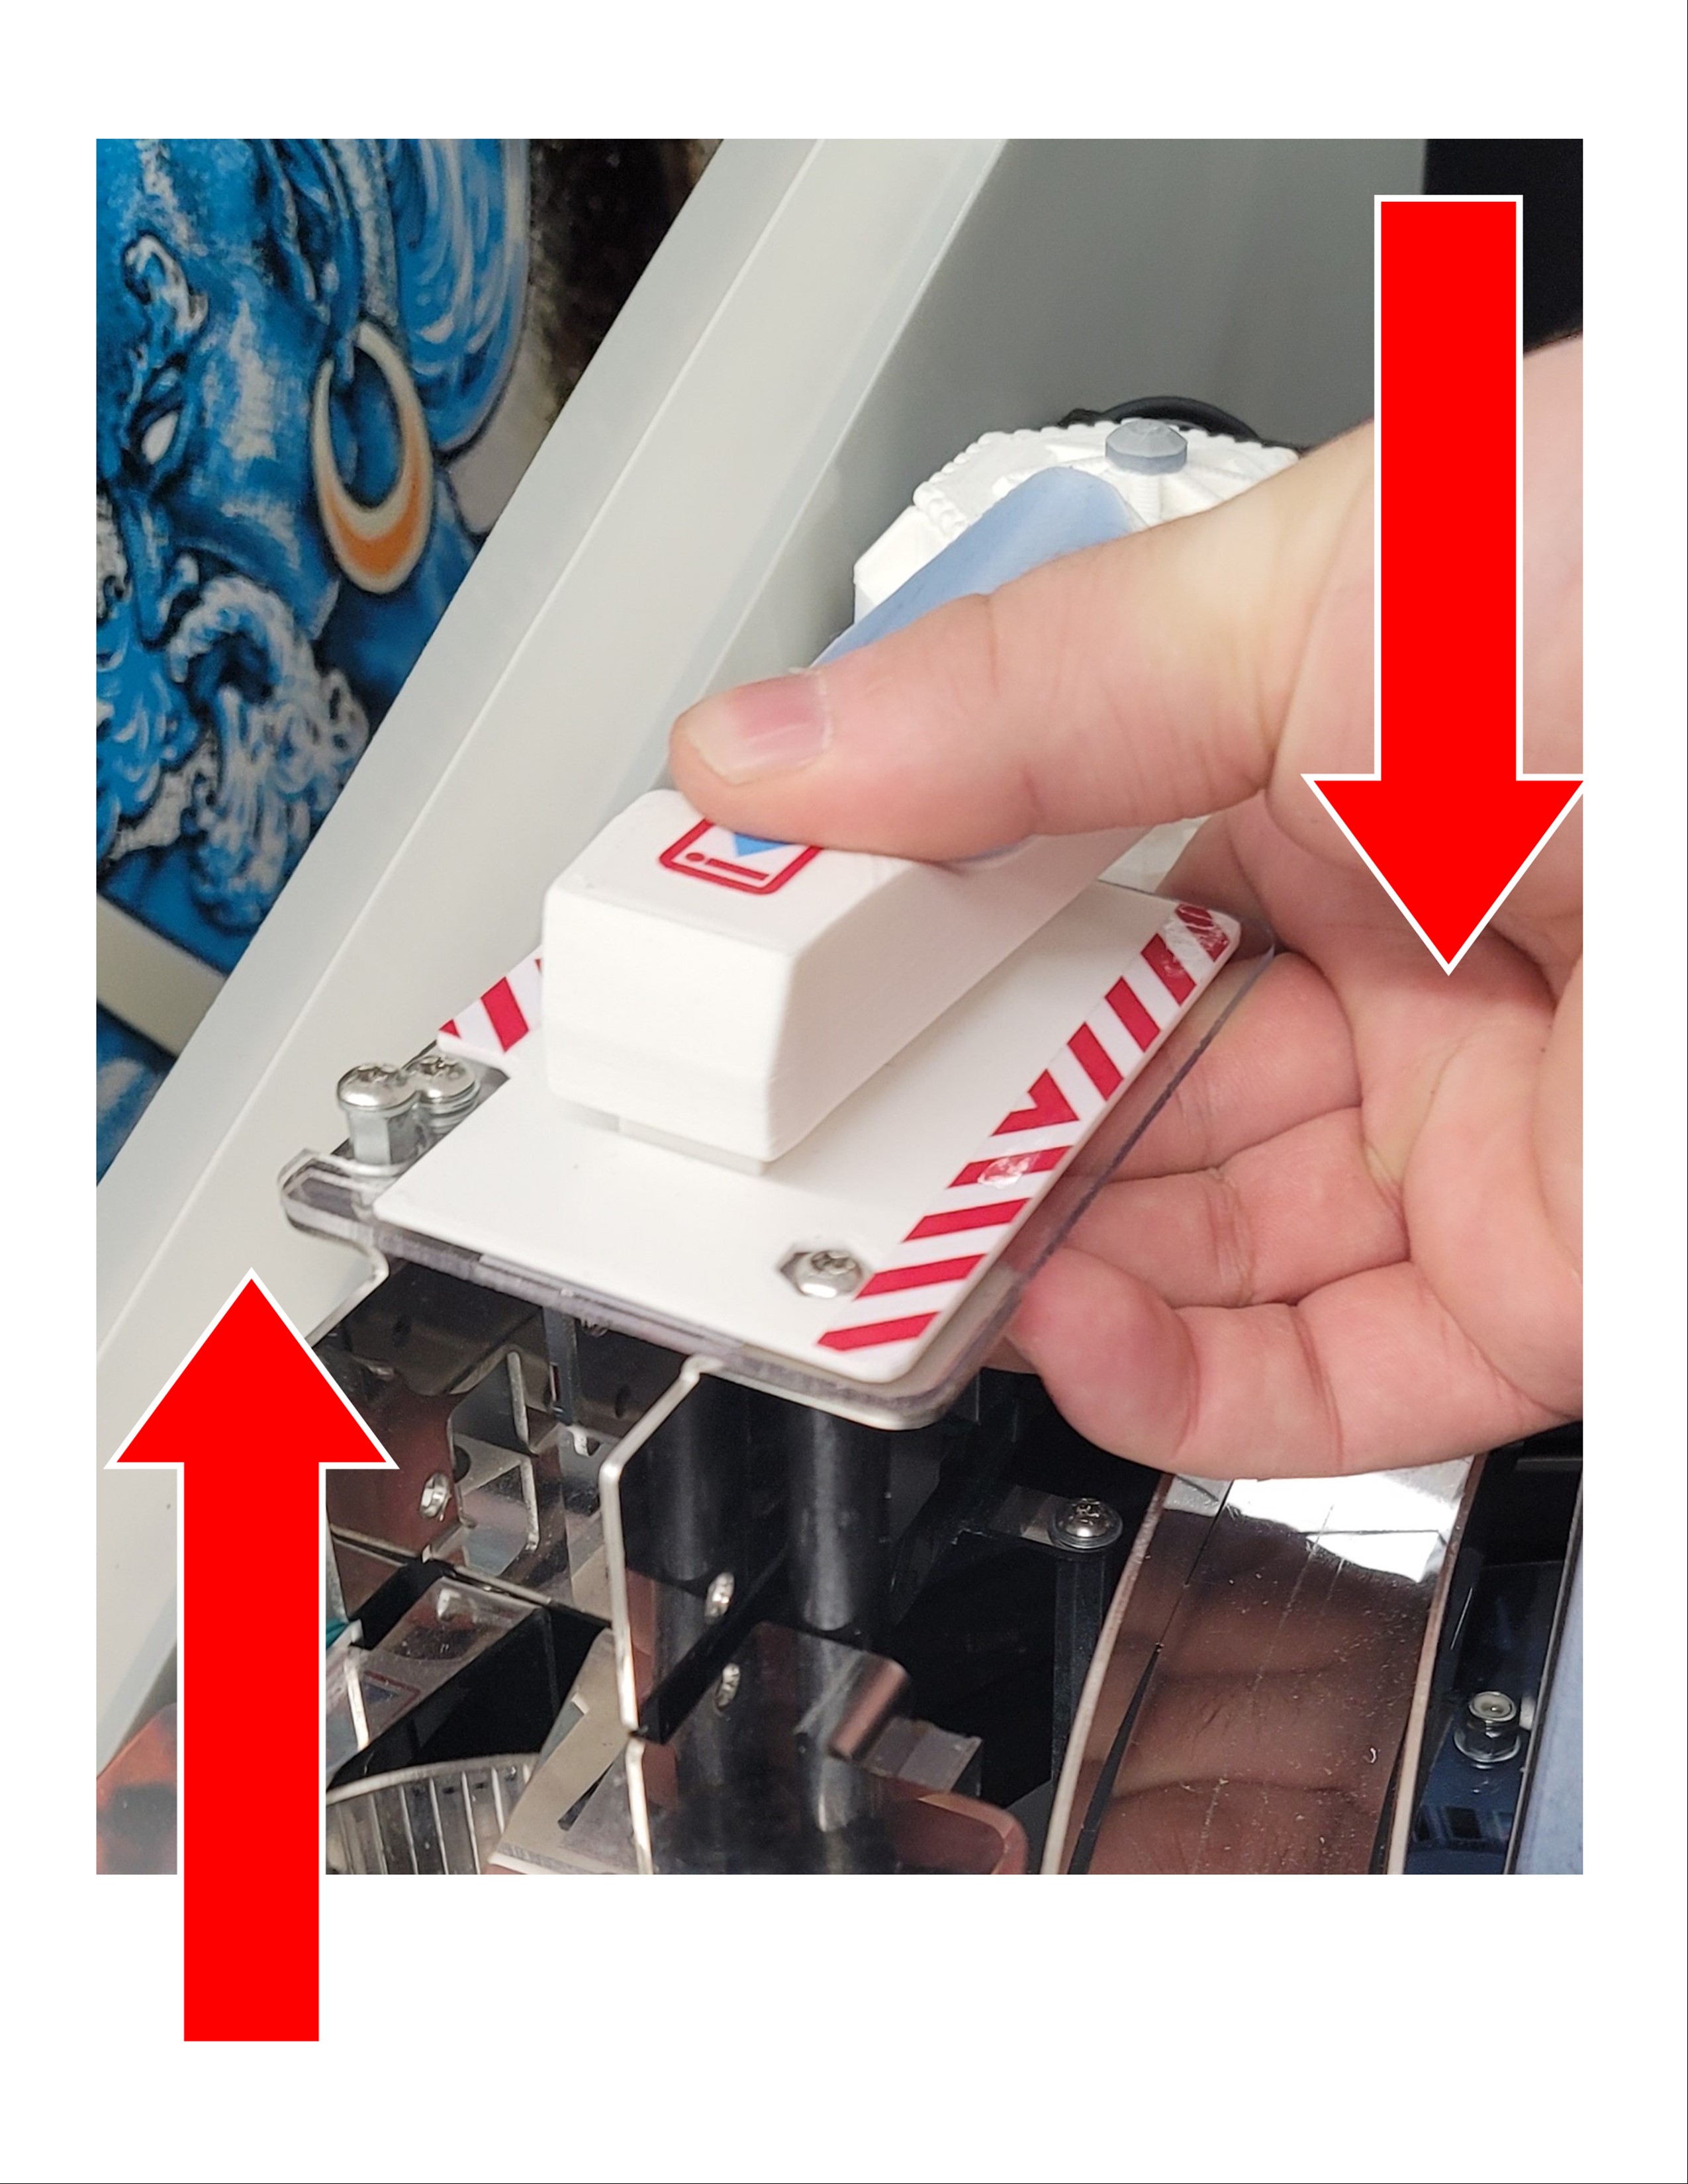
Repeat the last two steps with the chamber but when you place it on the acrylic, you can lift up that section to make it easier to attach it. Refer to the Placement Guide Video
Take the console plug and run it through the clip then remove the tape cover and attach it to the back of the backboard directly behind the console press and hold for 6 to 12 seconds.
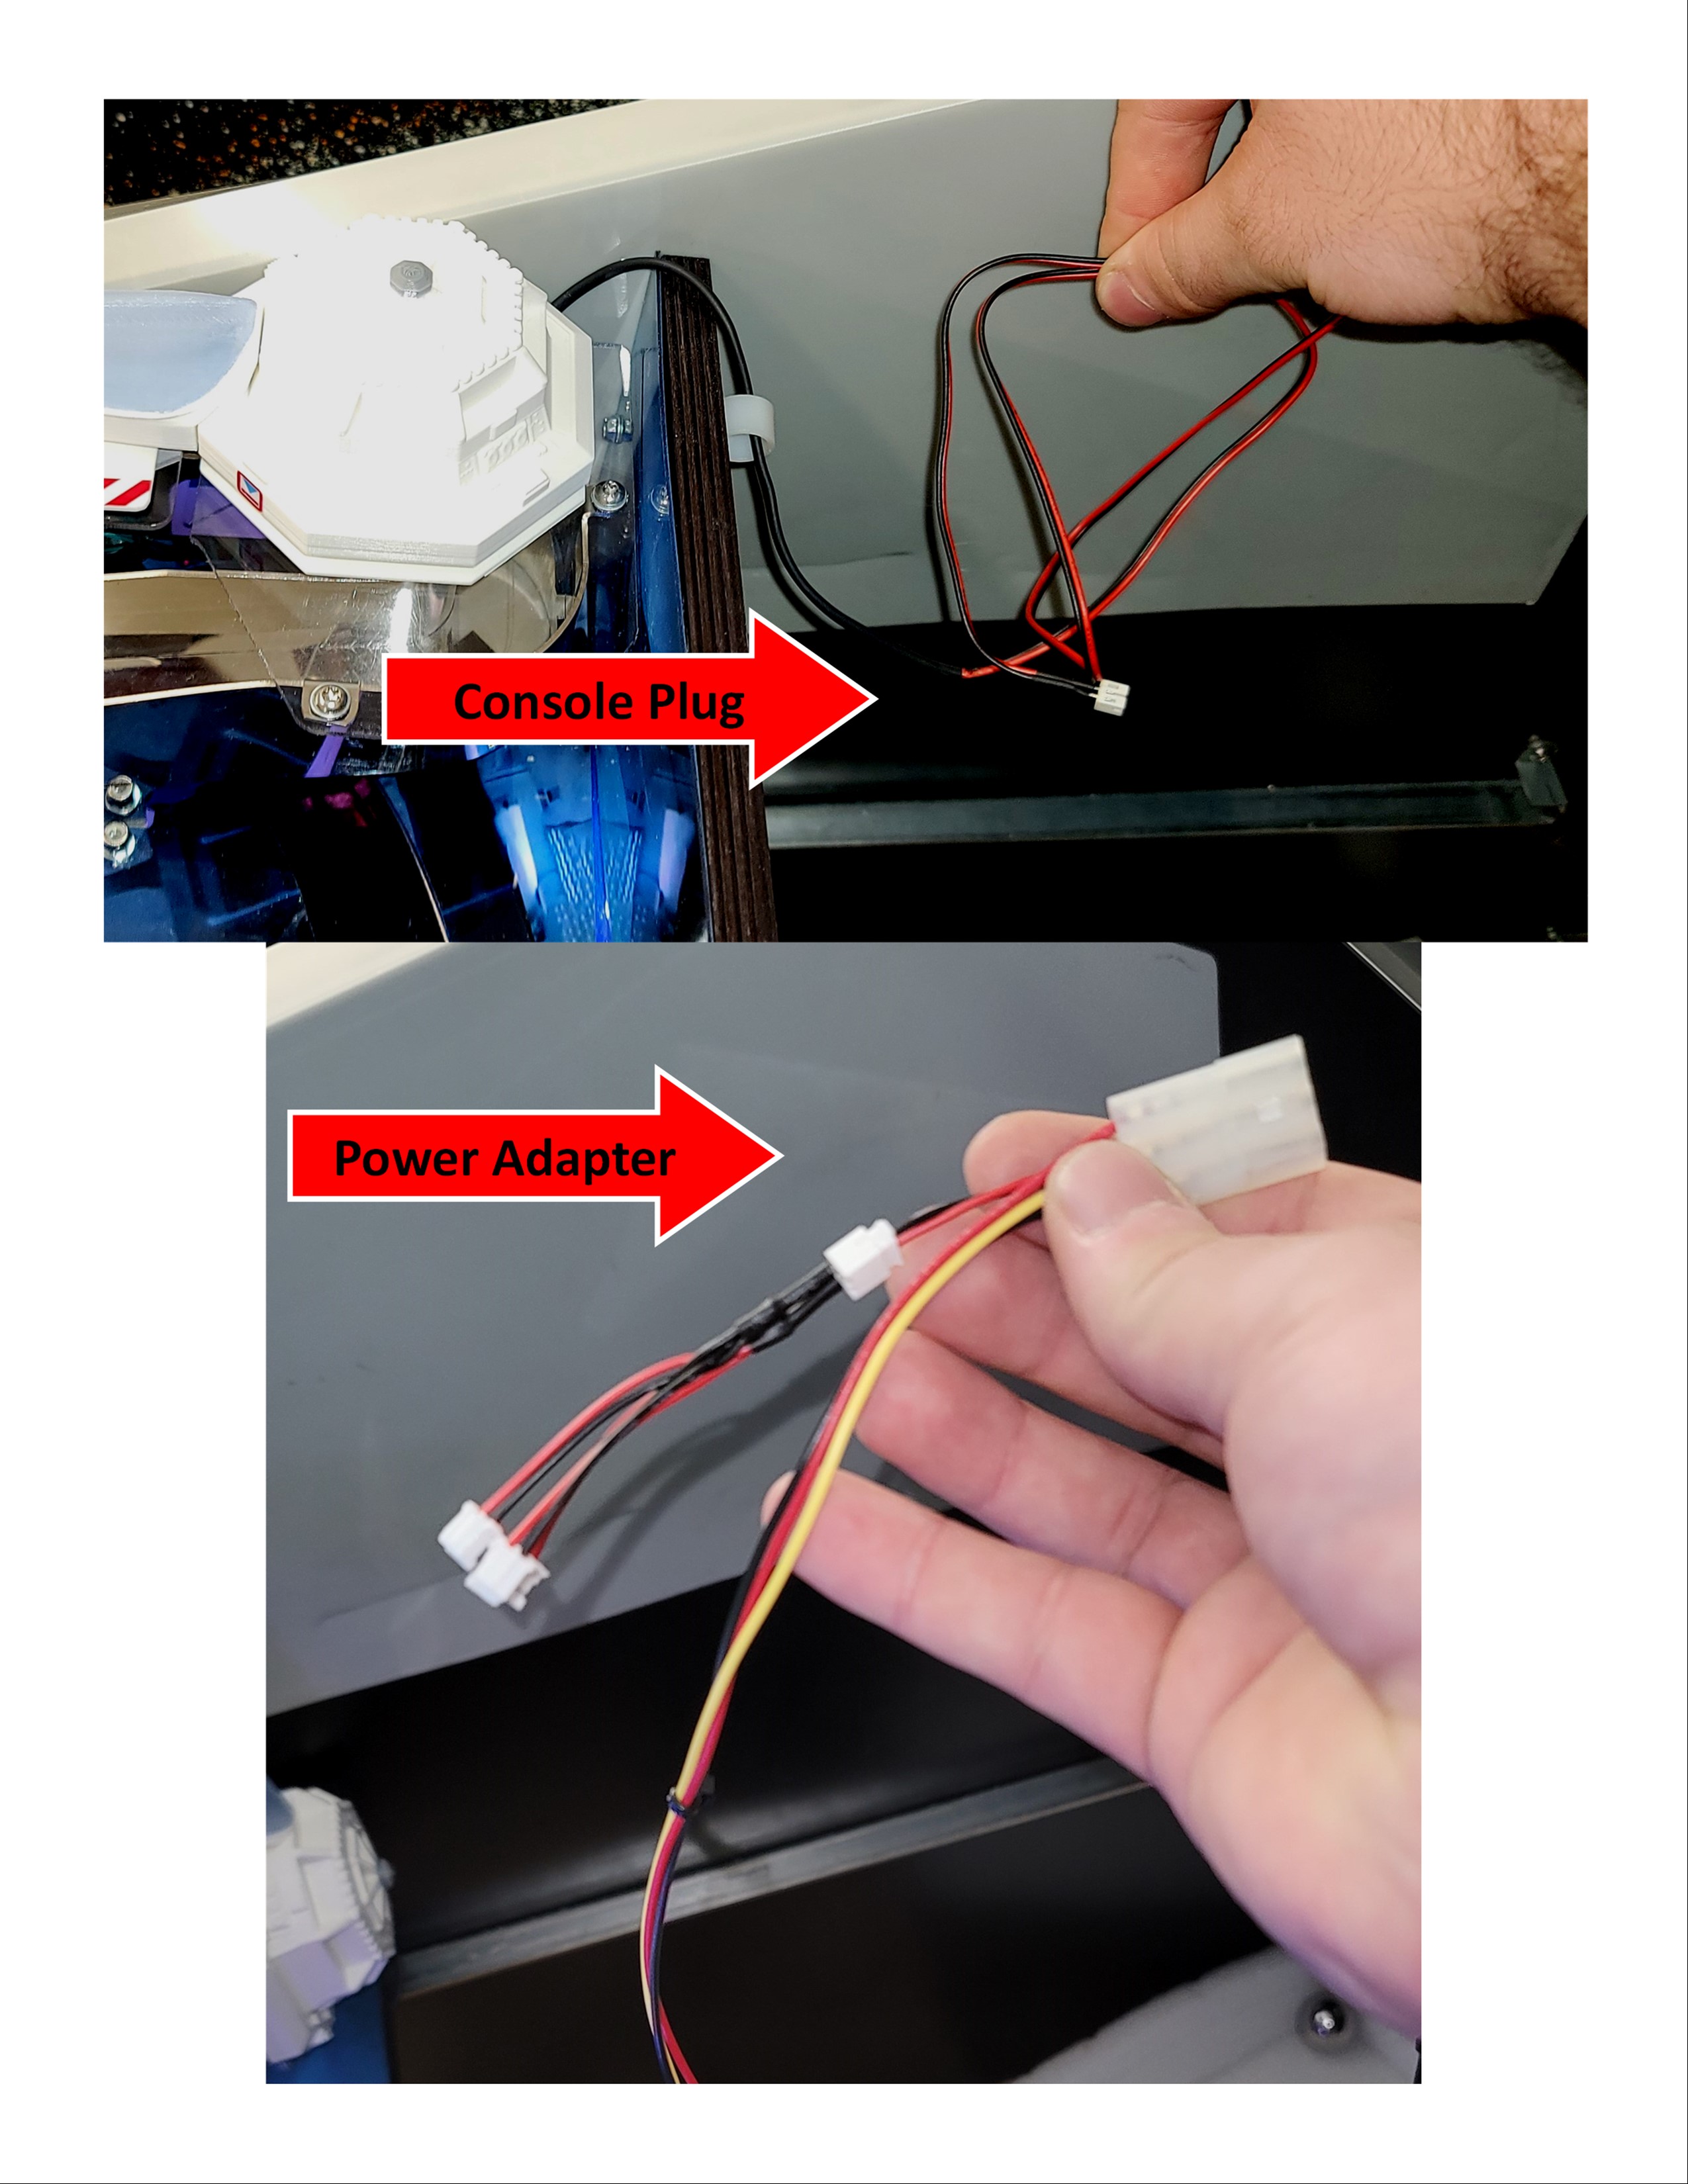
Find the end of the console plug and the end of the power adapter then simply plug the console into the power adapter and enjoy.

Comments
0 comments
Please sign in to leave a comment.