
DANGER ELECTRICAL SHOCK
Pinball machines have high voltages which can cause DANGER TO LIFE AND LIMB. TURN POWER OFF and UNPLUG PINBALL MACHINE prior to installation. Pinball machines are high voltage and can cause electrical shock.
SAFETY GLASSES are also recommended while working with or installing pinball parts.
Please follow these safety instructions as well as all installation instructions. Failure to follow these instructions may result in damage to the pinball machine, accessory or other parts. Please see our Disclaimer for associated risks and responsibilities (Section 13 in our Terms of Service) prior to installation.
Images included in these instructions are of an installed prototype and may vary from your product slightly.
If you have questions or concerns regarding the proper installation of this part, please contact us for assistance.
When removing screws from the playfield, reinstall by first turning them counter-clockwise to match the original groove in order to respect the integrity of the playfield wood.
Before attaching the LEDs to the cabinet, we recommend fully installing the power in order to test the illumination to ensure placement maximizes preferred lighting effect.
- Turn off game.
- Connect the molex end of the wiring harness to the appropriate power adapter for your game. Utilize the instructions below to install the power adapter:
- Spike 2 Power Adapter
- SAM/Stern Power Adapter (PLEASE CAREFULLY FOLLOW INSTRUCTIONS FOR BOARD CONNECTOR TO AVOID DAMAGE TO YOUR GAME)
- WPC/WPC95 Power Adapter
- JJP Power Adapter
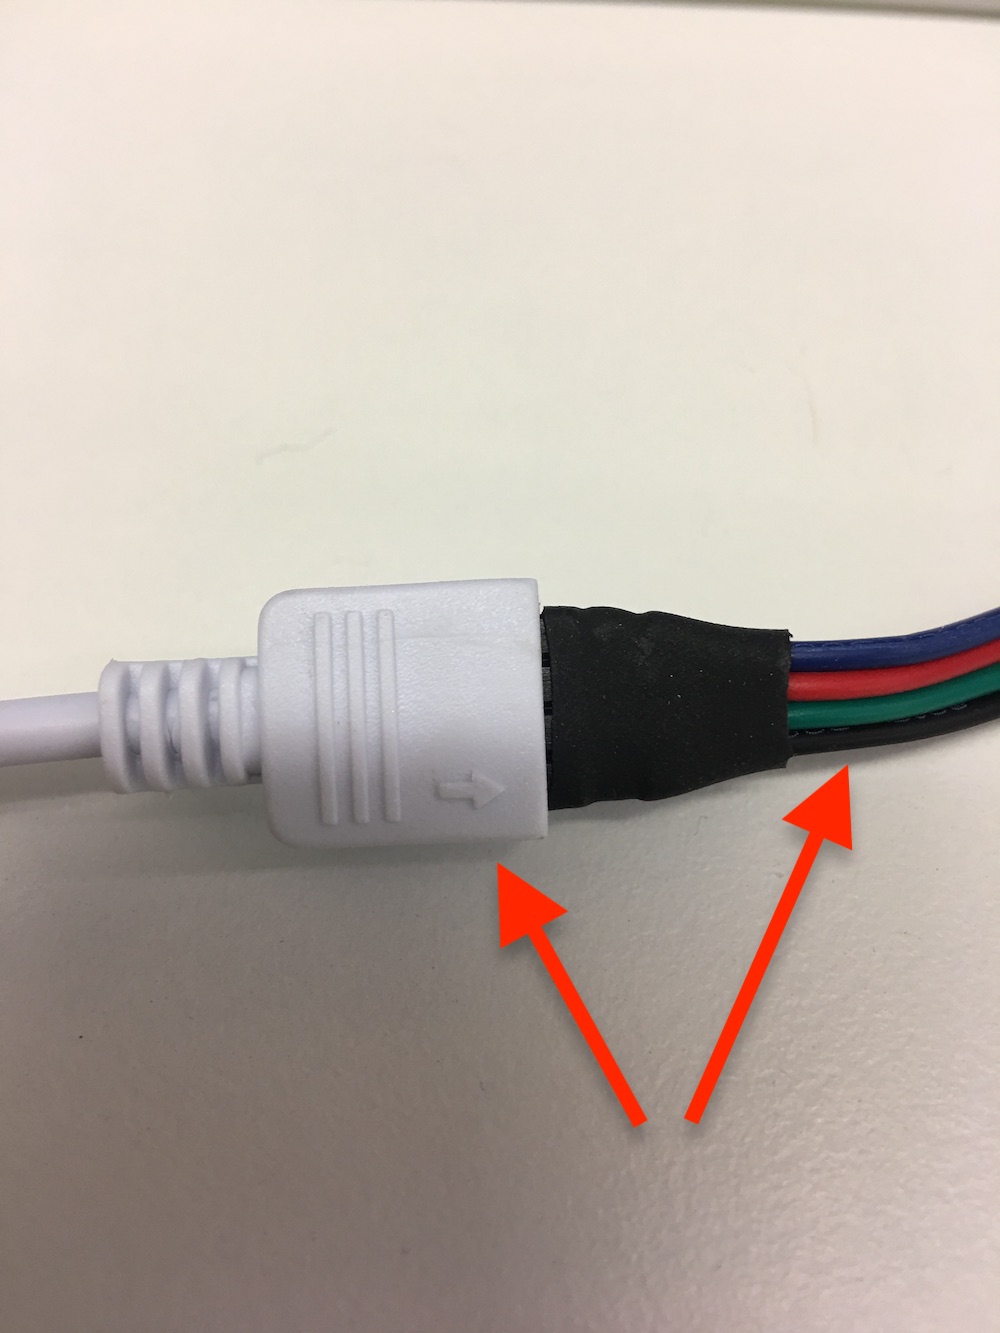
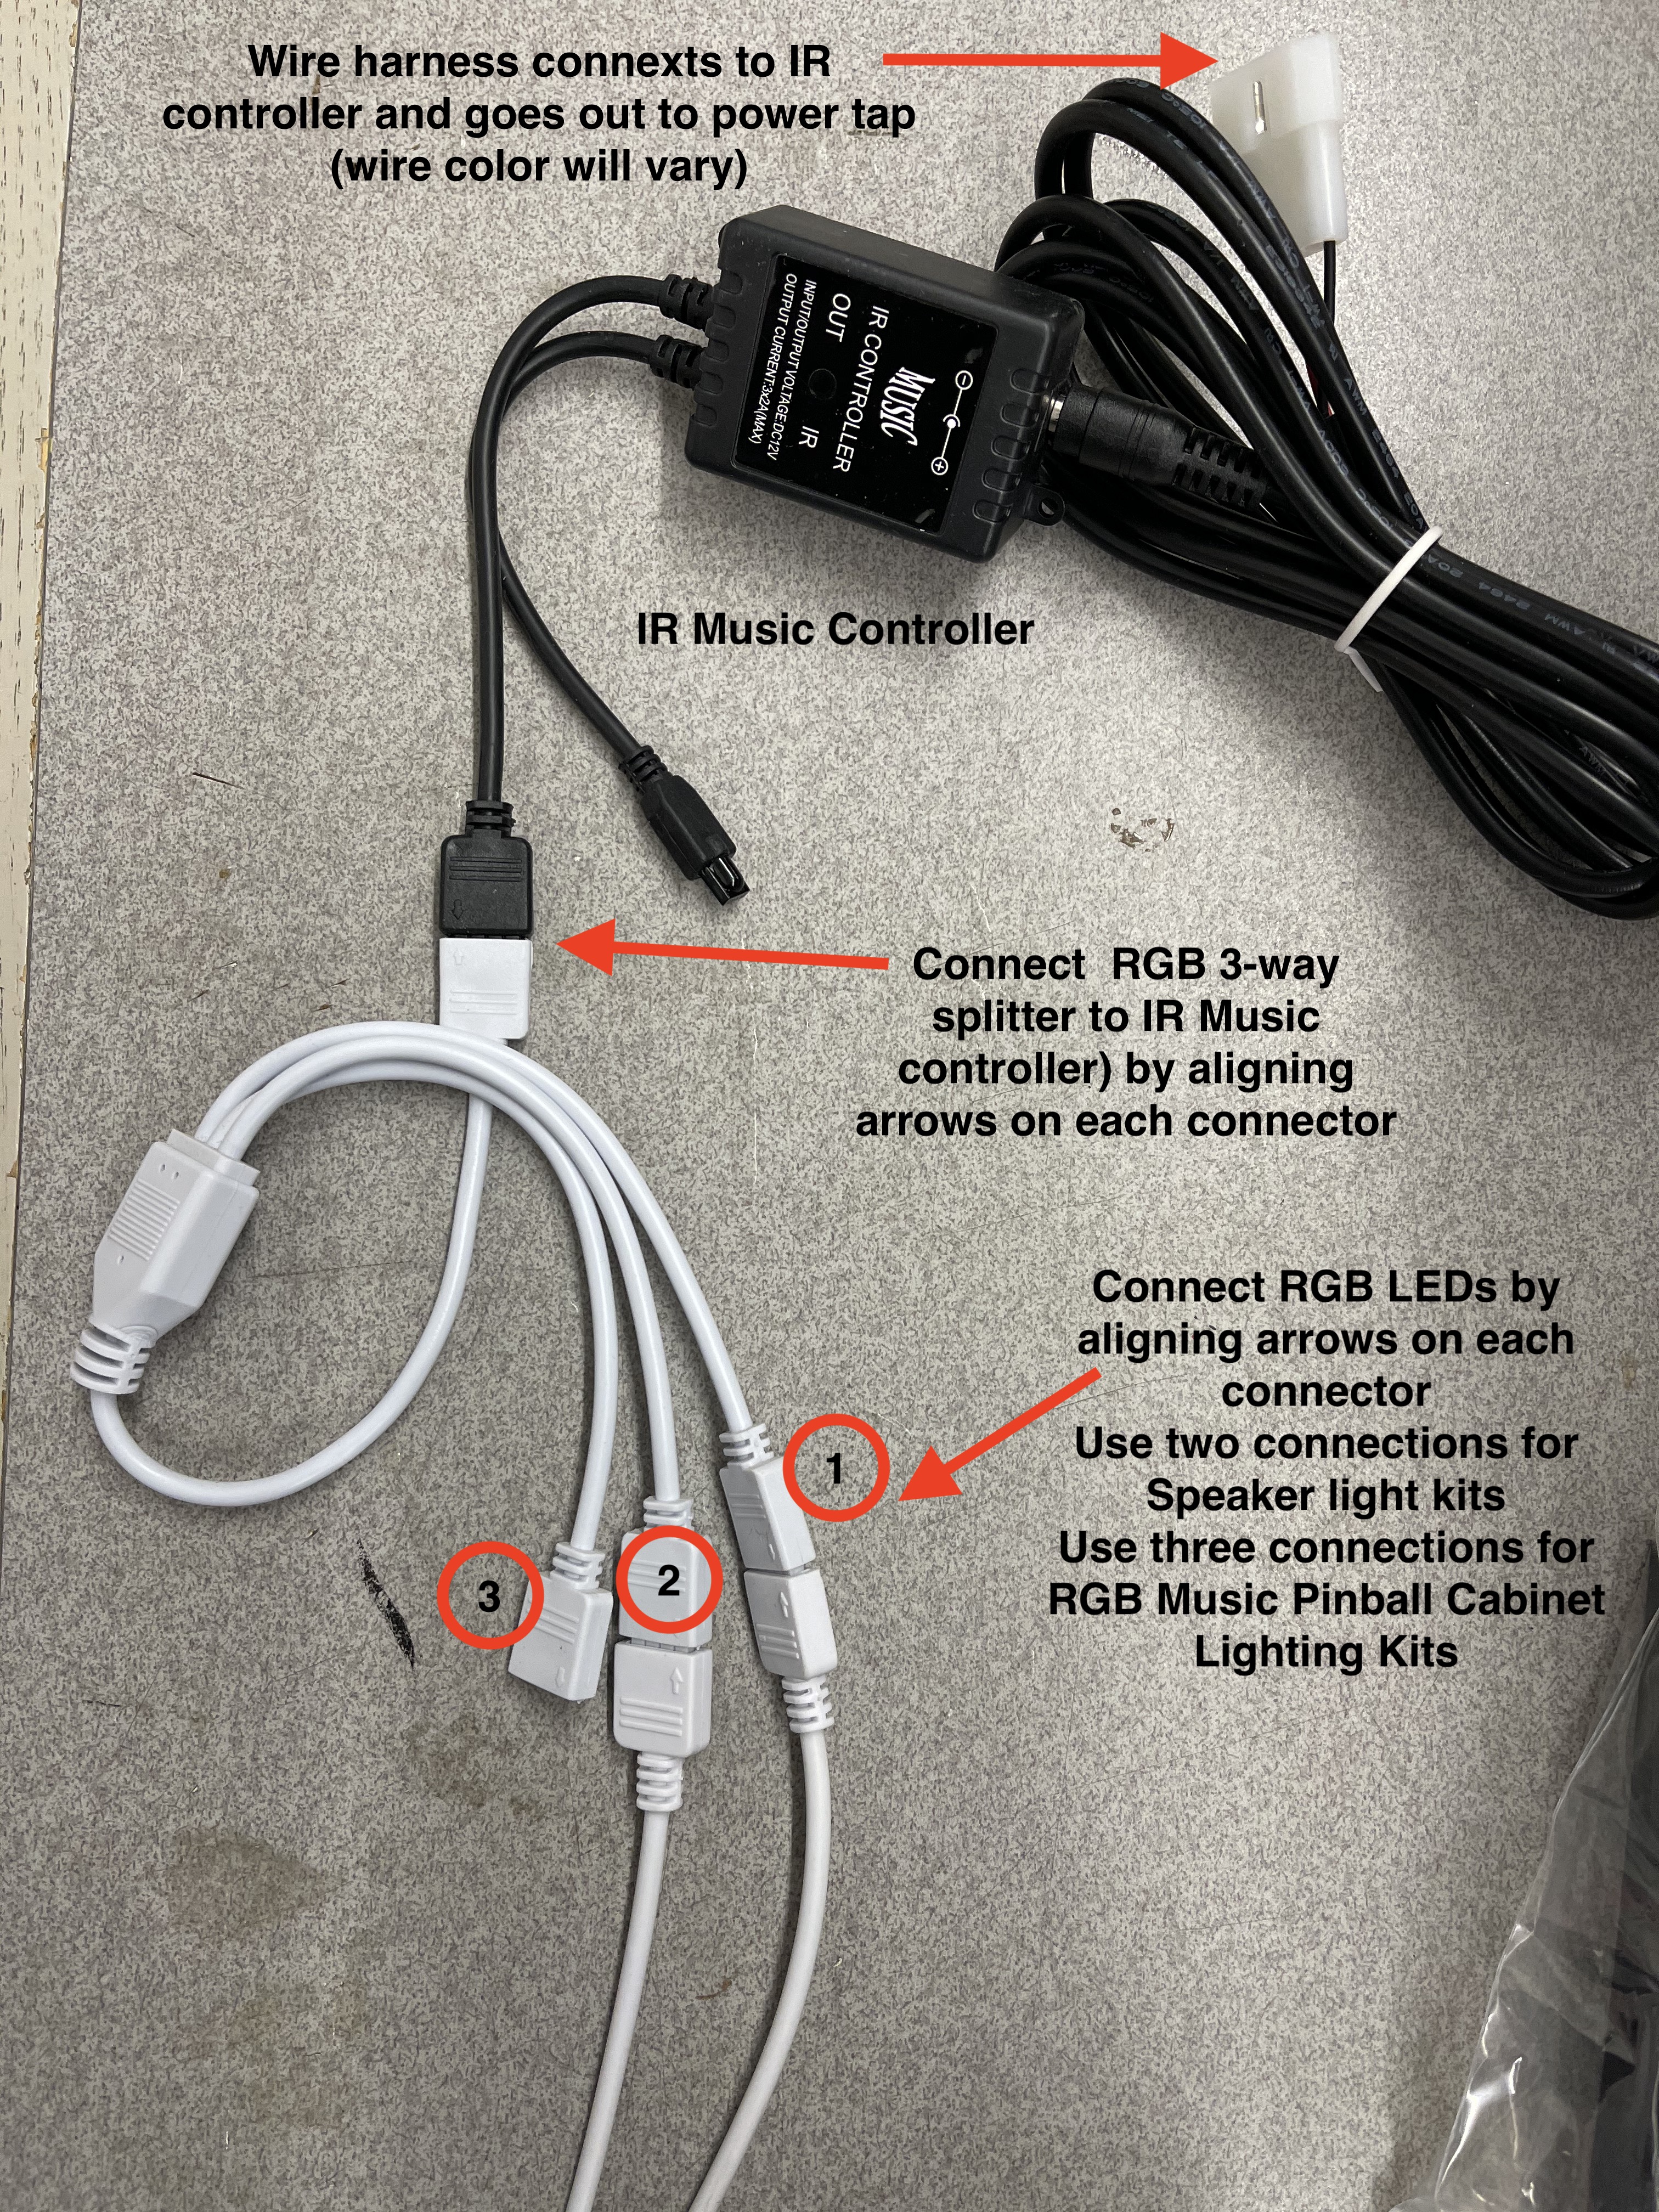
- PRIOR TO ATTACHING STRIPS TO CABINET: Attach the LED strips to each of the RGB 3-way splitter connectors and connect to the Music IR controller box (black). Attach so that the black wire is in line with the arrow on the connector.

- Connect the wiring harness to the other end of the IR Control Box. Please note, your wiring harness connector may vary slightly from the one shown in this photo.

- Power on the game and test the LED strip function. Utilize the instructions included in the box with the remote to try different modes.
- Unplug the LED strips from the RGB controller and attach the LED channel underneath the cabinet near the outside edge of the cabinet.
- Feed the wiring for each LED strip into the cabinet by finding an opening in the bottom or back of the cabinet. Each game will vary but most will have a grate that can be opened up to feed the wiring through into the cabinet.
- Install third LED channel on backbox (horizontally or vertically depending upon preference).
- Once LEDs are installed, pull any remaining slack from the wires into the and re-attach the RGB controller.
- The controller can then be fastened to the inside of the backbox ensuring it is in close proximity to the glass- this will allow the remote controller to be most effective.
- Installation is complete!

Comments
0 comments
Please sign in to leave a comment.