
DANGER ELECTRICAL SHOCK
Pinball machines have high voltages which can cause DANGER TO LIFE AND LIMB. TURN POWER OFF and UNPLUG PINBALL MACHINE prior to installation. Pinball machines are high voltage and can cause electrical shock.
SAFETY GLASSES are also recommended while working with or installing pinball parts.
Please follow these safety instructions as well as all installation instructions. Failure to follow these instructions may result in damage to the pinball machine, accessory or other parts. Please see our Disclaimer for associated risks and responsibilities (Section 13 in our Terms of Service) prior to installation.
Images included in these instructions are of an installed prototype and may vary from your product slightly.
If you have questions or concerns regarding the proper installation of this part, please contact us for assistance.
When removing screws from the playfield, reinstall by first turning them counter-clockwise to match the original groove in order to respect the integrity of the playfield wood.
Game Compatibility - see this link for our updated compatibility information provided by customers.
General Installation Tips: (from 85vett on Pinside)
These splints are super tight. They are designed that way to keep those targets as straight as possible. Because of this some can be a little bit tough to get pushed in but they will go. What I like to do is:
- remove target from playfield
- remove the front and rear bracket of the target
- straighten the stack
- remove the tape on the side of the stack (this will help get them to slide in better)
- push just the stack into the splint (you have to get it started at an angle to get the target itself into the stack). Try to push it in as straight as possible until the bottom of the stack is flush with the bottom of the splint
- push the L bracket back in (the one that mounts to the PF).
- Start the screws back in the stack and splint. This will help get the L bracket and the stack to line up. I screw the screw in all the way until it start to come out past the switch stack.
- Put the backing plate into the splint and screw it in.
- Tighten down the screws for the stack. No need to go super tight like you do without the splint since the splint does all the heavy duty keeping things straight.
- re-install the stack into the PF
It's a real quick process once you've done your first one. My first one probably took 10 mins as I was trying to get my bearings. Now I can get them done in about 2-3 mins. Just installed a couple on a friends machine again this weekend and he walked off to download new code from Sterns website. He came back and I had finished both targets and had the game back ready to play.
Here are a couple sample pictures of the small splint installed on Metallica.
Star Trek Installation
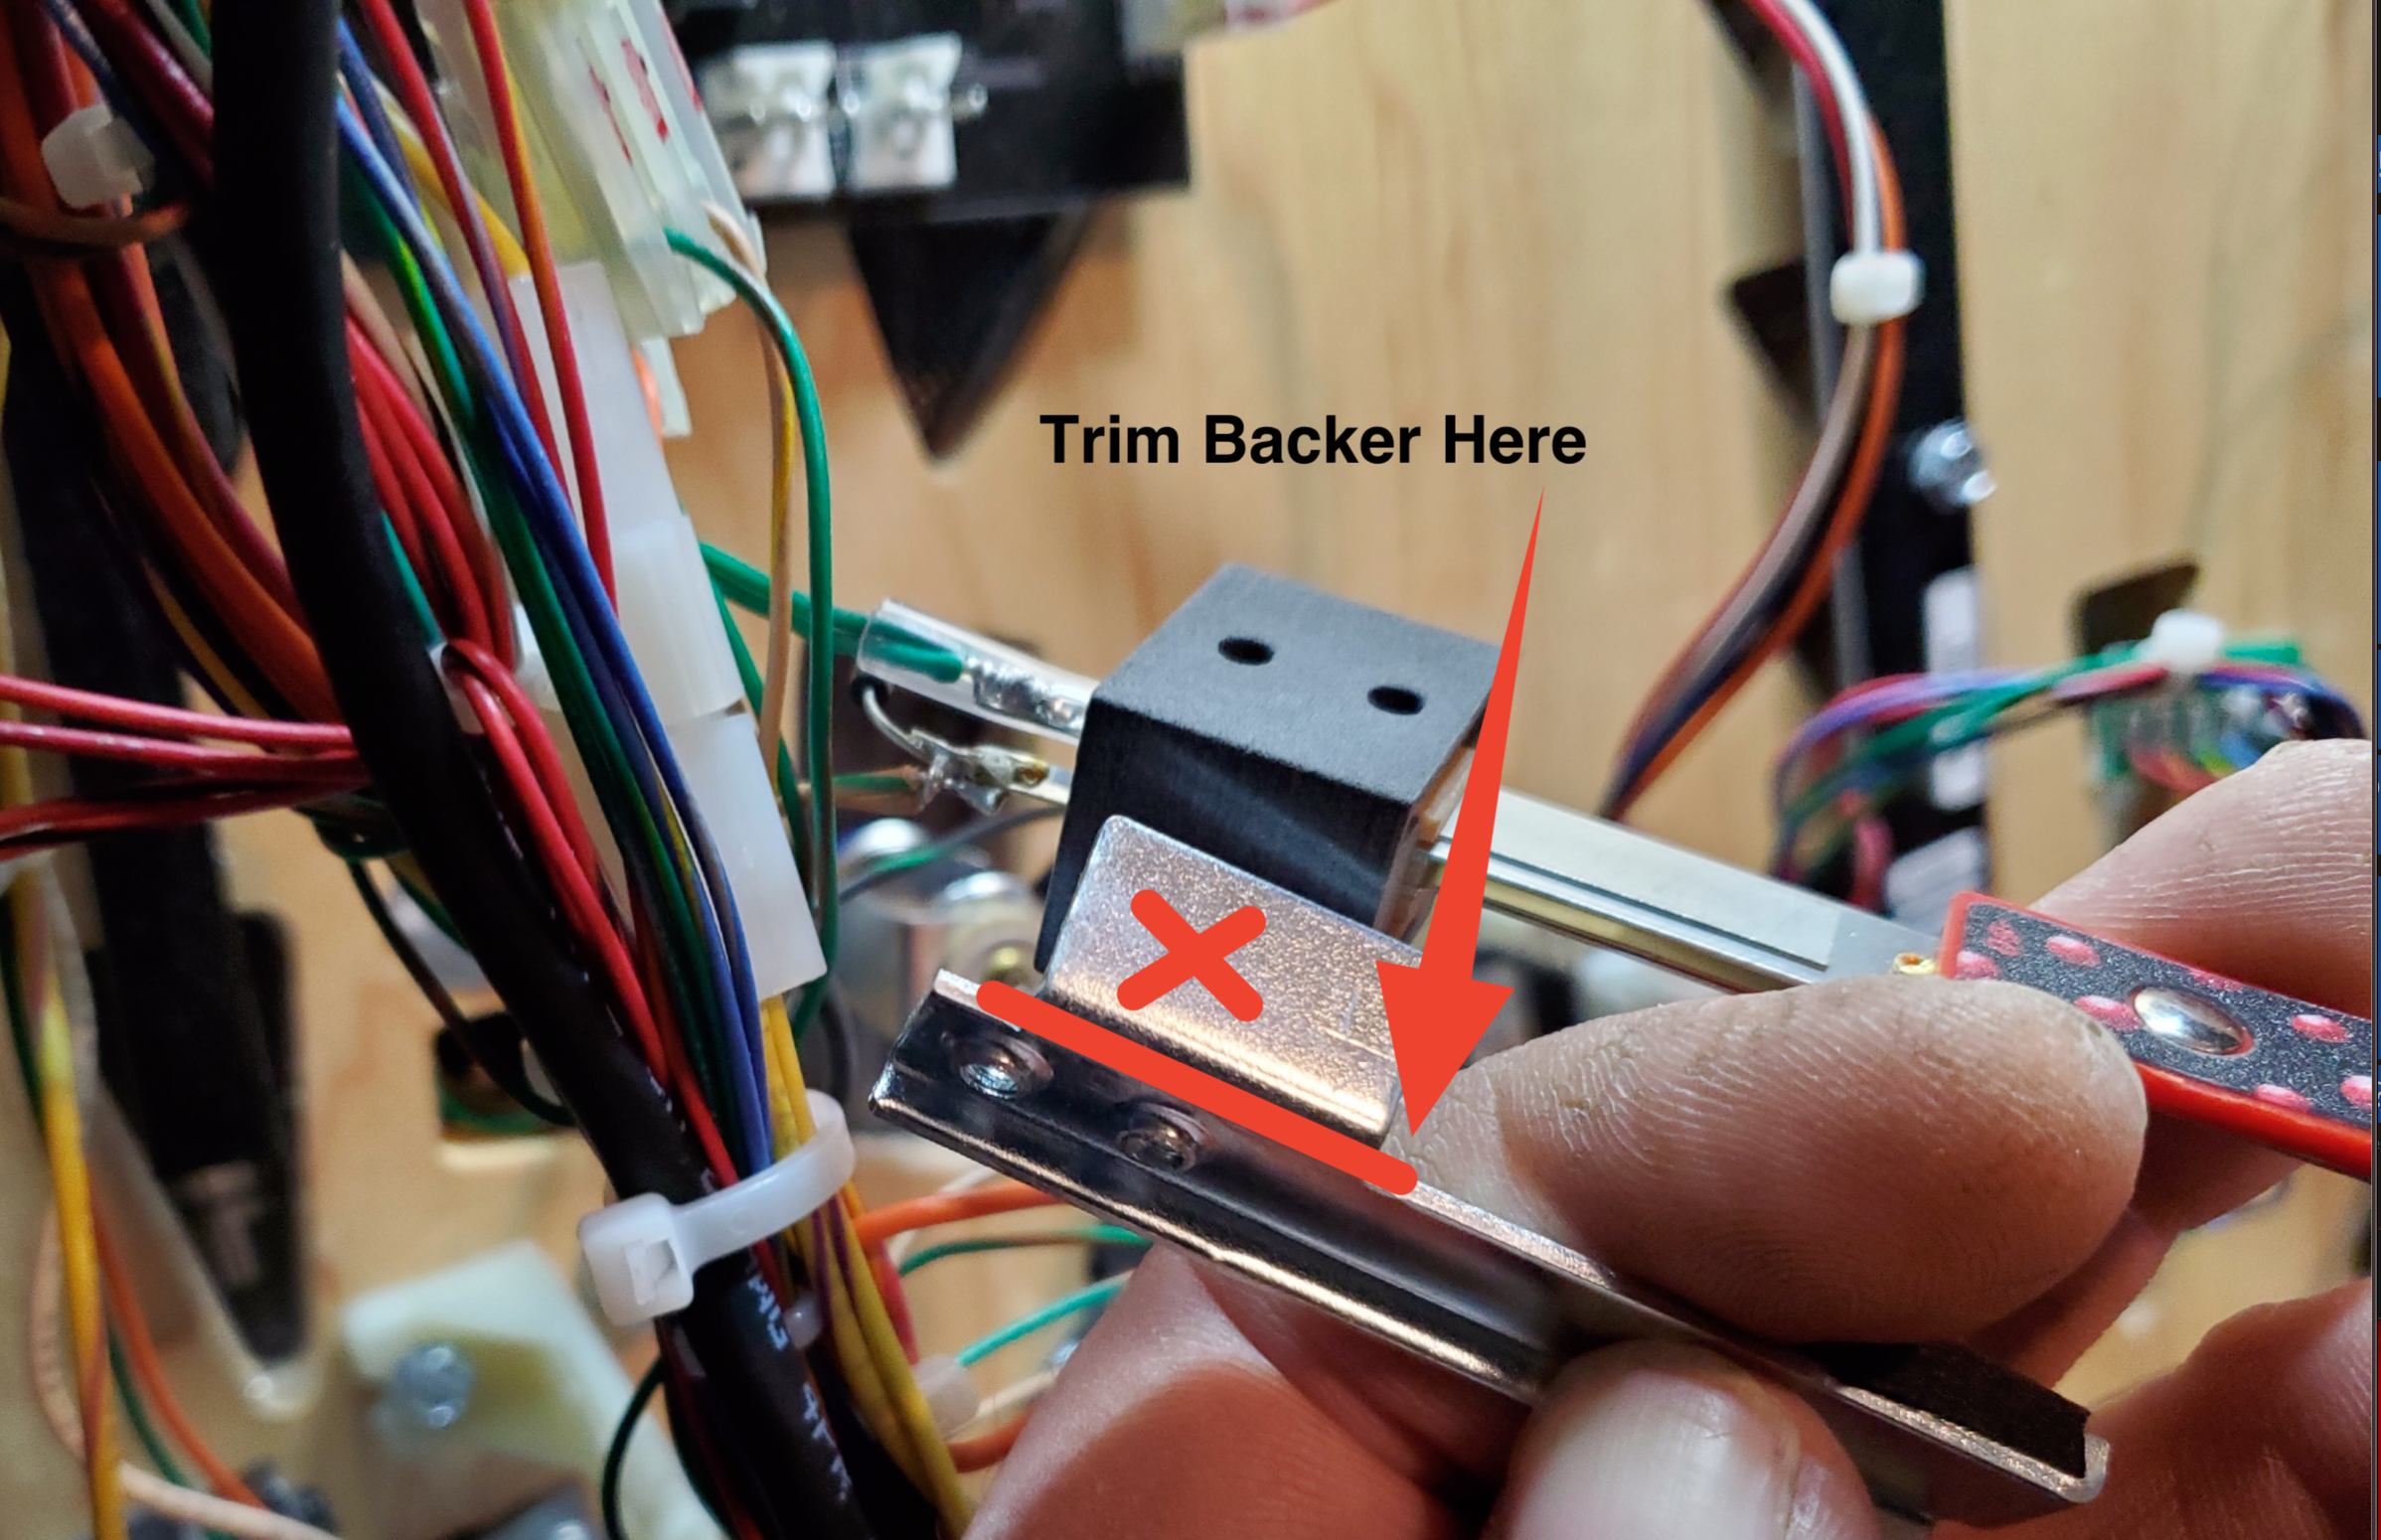
The base bracket from stern on the left most target is their attempt at bracing to keep target from leaning. The photo below shows where it must be trimmed.

Copyright Mezel Mods- 2016. All rights reserved. Because stealing is wrong and mean.

Comments
0 comments
Please sign in to leave a comment.